Good Morning, and thanks for clicking my desperate attempt for help!
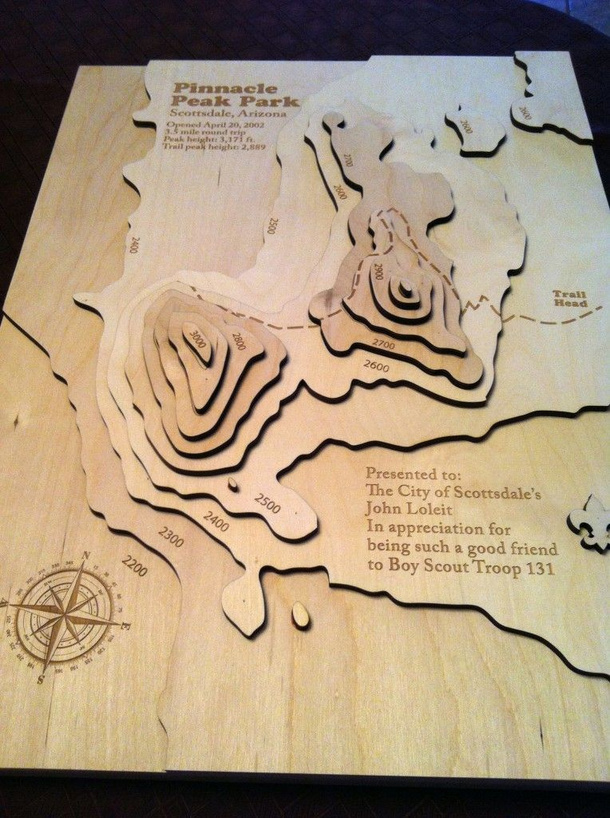
I’ve been having a lot of fun with my glowforge since getting it, but the entire justification for purchasing it was to make accurate & scaled 3D topographic maps using high-resolution imagery, and that’s the one thing I have had terrible luck with so far.
I’m aware of the techniques people have used to create 3D maps with vector layers and I’ve had some success doing that as well, but the real goal is to reliably get imagery to engrave with a moderate level of clarity and create 3D topo maps using contour lines as the cut lines for separate layers. I have also read through every post I can find about preparing raster layers for engraving and they have helped a lot with miscellaneous aerial pictures and obliques, but I haven’t ever gotten it to work well with the map imagery. I’ve primarily been using 1/8in baltic birch plywood from Amazon and it just occurred to me the other day that maybe my difficulties are stemming from the wood I’m using.
I don’t have photoshop available to use, I’m not proficient in GIMP, I’m becoming a little more proficient in Inkscape, but most of the work that I do is done in GIS and CAD programs, specifically Global Mapper for my map making. If at all possible, I would prefer to find a solution that lets me manipulate the imagery itself as little as possible before sending it to the laser and I really need the workflow to support geo-PDFs like the examples I’ve added below, so that I can manage accurate scaling and georeferencing throughout the process.
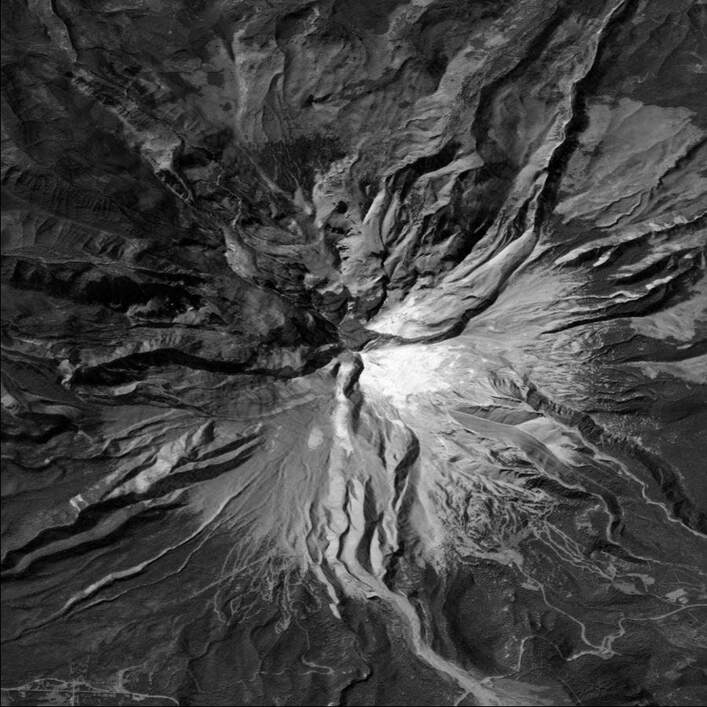
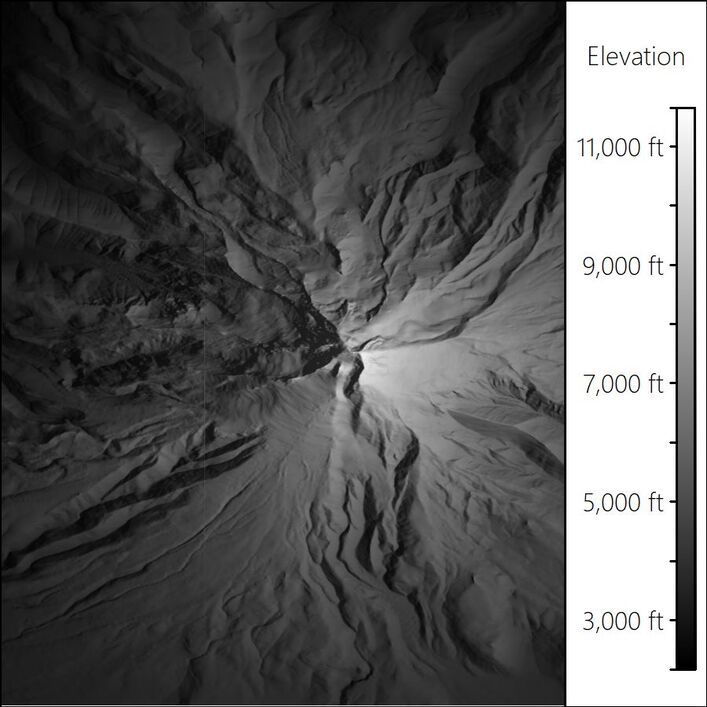
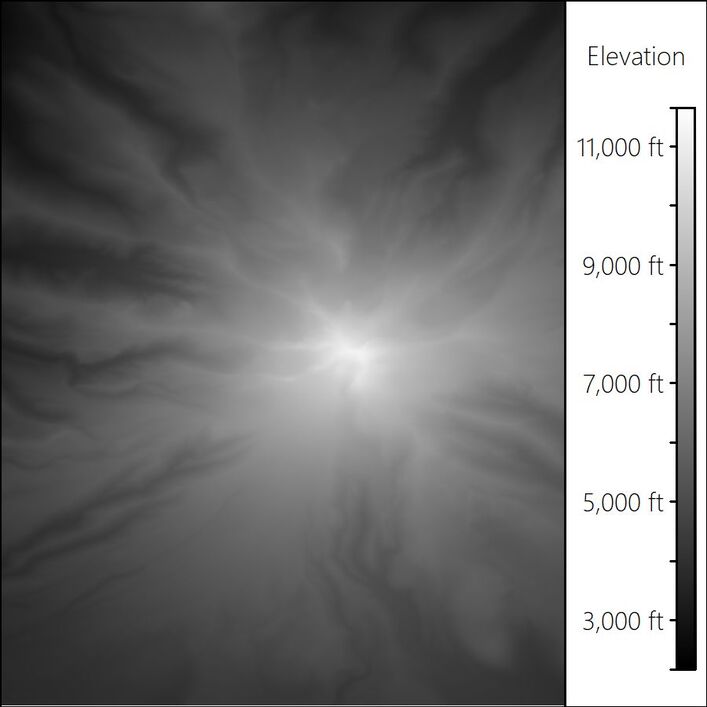
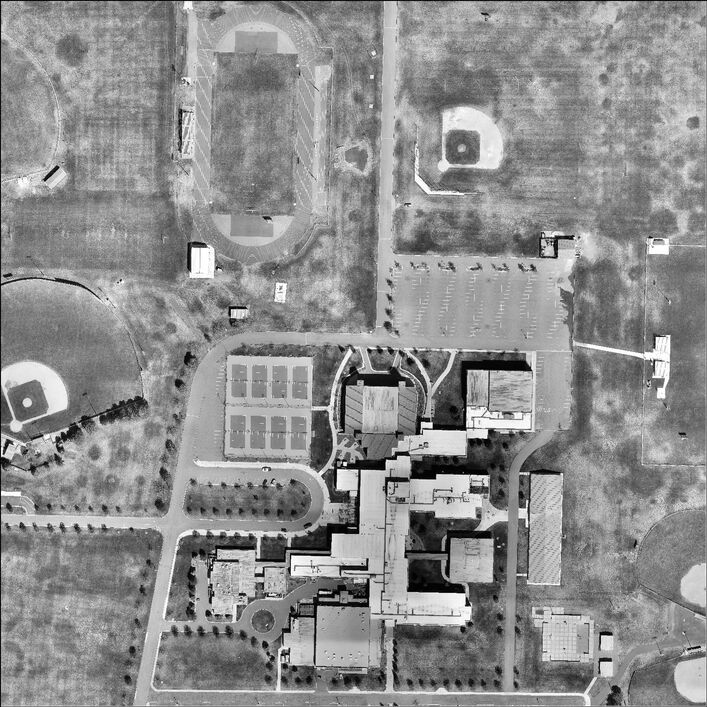
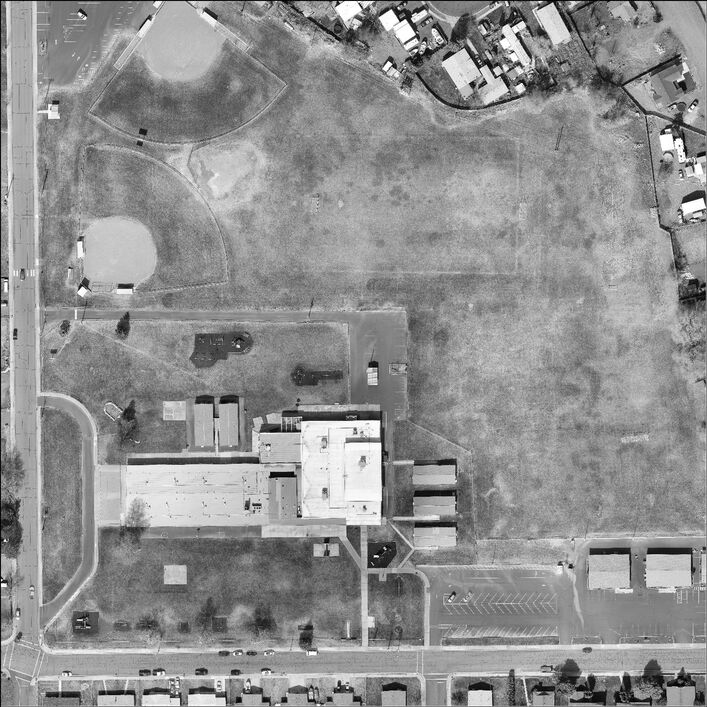
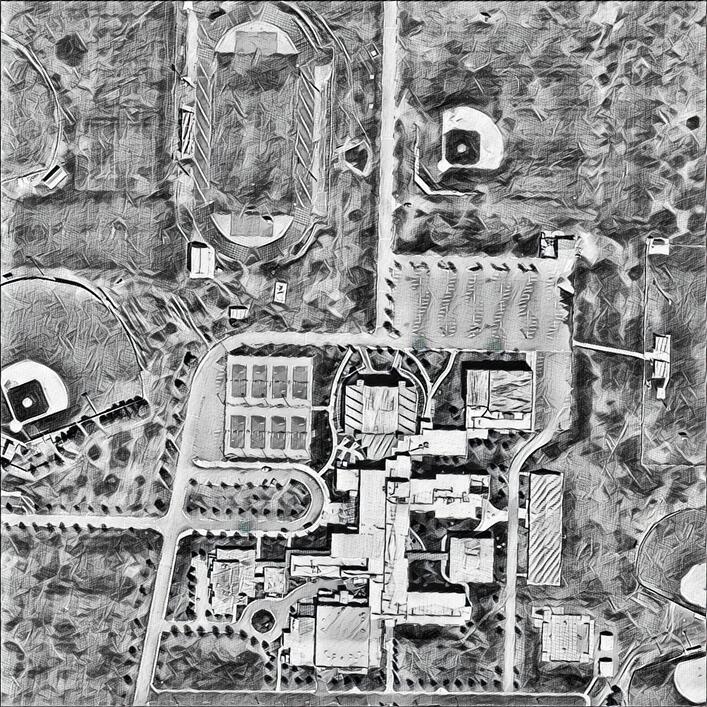
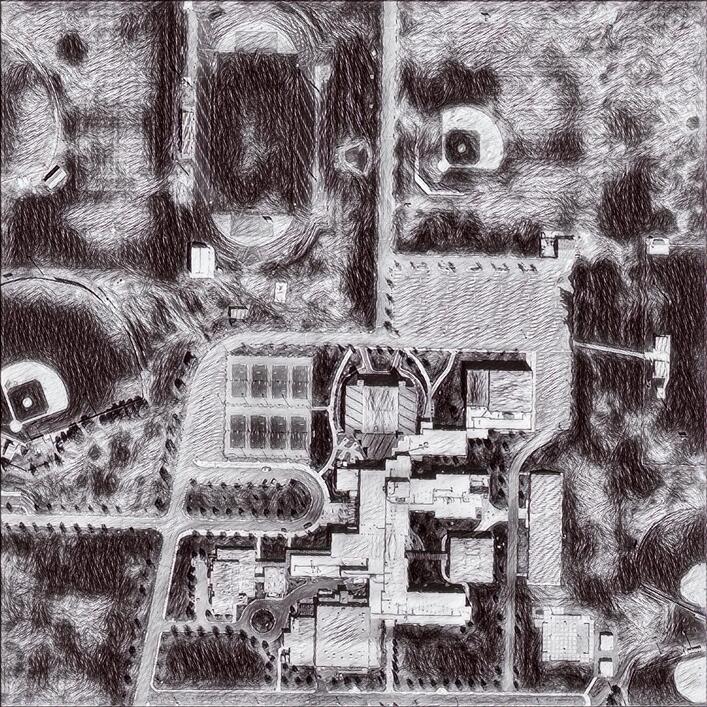
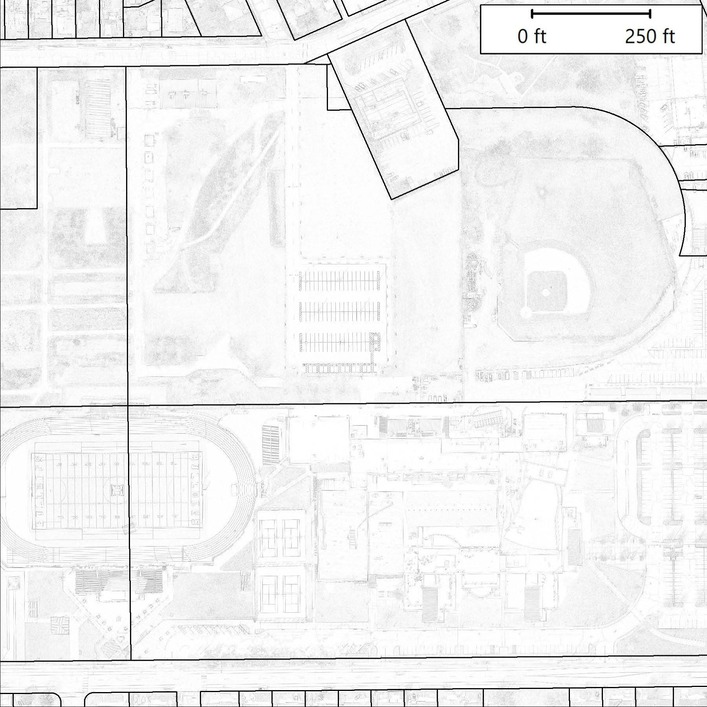
If anyone is willing to offer some help and maybe a couple test prints, it would be greatly appreciated. Here is a download link to some quick test files that I made. Two of them are 10in X 10in, and a 3rd is 3inX3in for smaller tests. This is satellite imagery converted to greyscale with terrain hillshading applied. No other contrast or gamma adjustments applied, which is what I’m hoping I can find a solution for. MtHood-RequestingHelp - Google Drive
edit: Added a small 3inX3in gradient shader test file as well
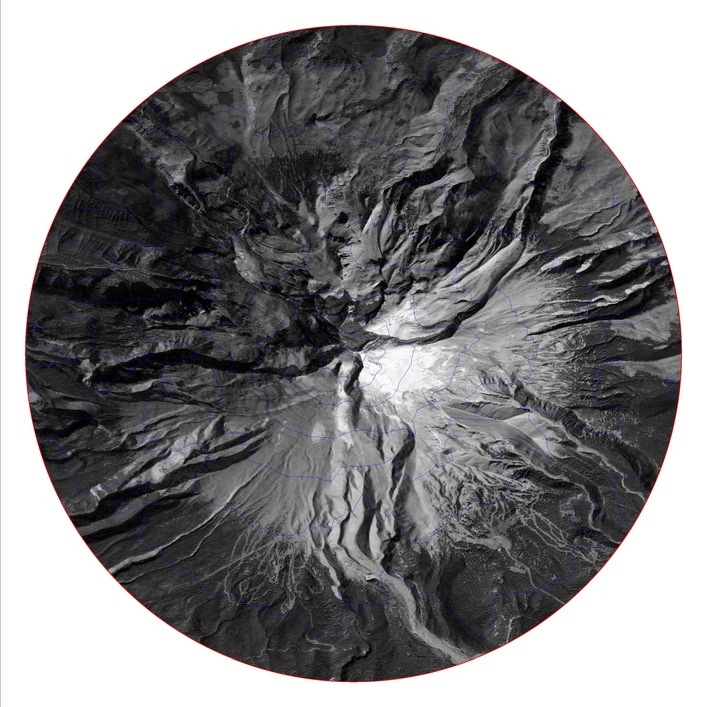
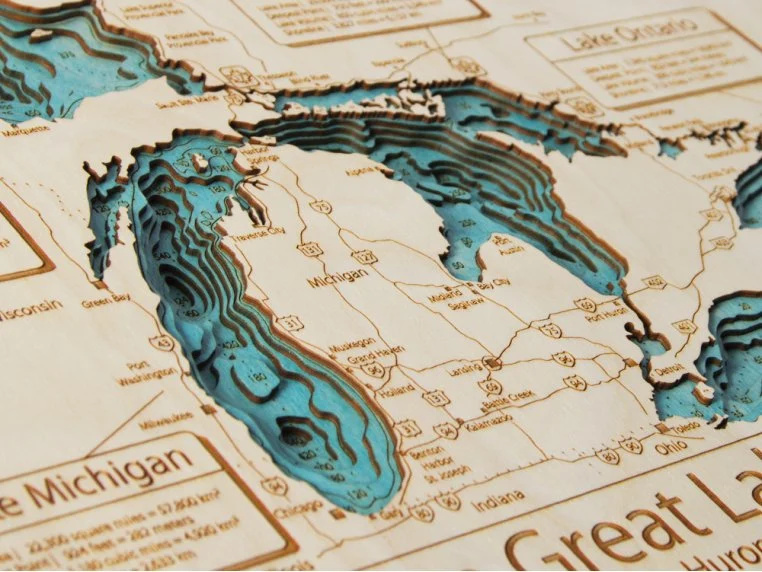
And just for Clarity, this is the type of work that I normally do and along the lines of what I would like my laser engravers to be modeled after once I can get the rasters to engrave well.
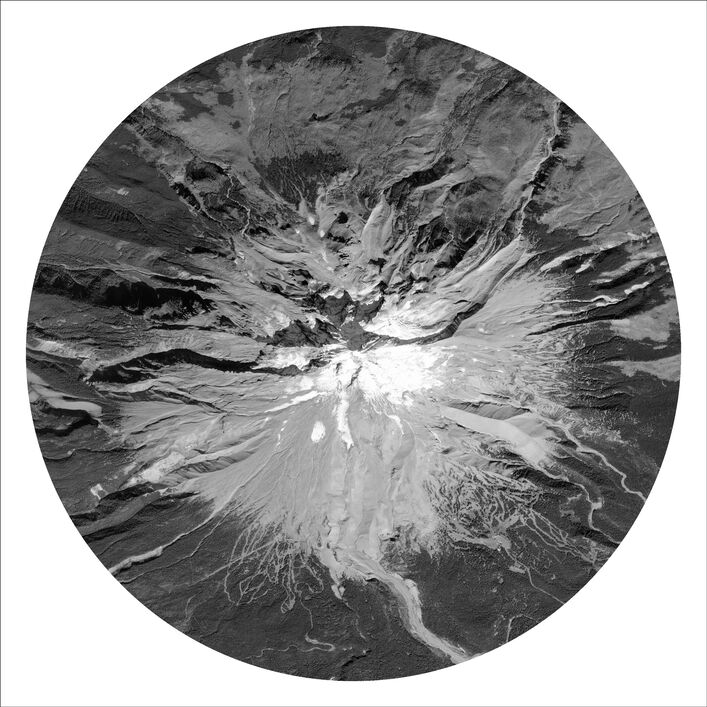
(I assume that I would want to use a black/white gradient shader for elevation instead of a color ramp like what’s shown here)
You are using the hardest mapping. I have done a lot of such work and had the best success with a special variety of grayscale the sets the level of gray by the highest and lowest points on the map as white and black and divides the points in between by 255 and assigns a gray level to each.
I did this a lot making landscapes I sell here from the basic data I get here that is very funky and limited in many ways but translating from direct GIS I have found to be very difficult.
Making multiple levels is also fraught in most cases if there is a number of locations at the same elevation. However, though very time consuming for large examples a lot can be done with variable engraving.
Your Mount Hood gradient is exactly what I am talking about, no shadows just elevations.
Dropped into inkscape each shade of gray can be a shape to cut out but hard to properly align
3 Likes
Are you mainly talking about the terrain aspect with your input here? I think I have a good workflow planned out for that and am planning to use a lot of the workflows that I already use for building DTM surfaces for our engineers and surveyors, so filtering to closed polygons and removing small islands below a certain threshold shouldn’t be too much of a problem. Creating the cut lines themselves for different elevation layers is something that I’m already doing through the normal course of work that I do on projects I’m involved in, and I think that the only additional work I have to do to prep for laser cutting there will be to create a slot at the centroid of the highest elevation cut-out and apply it to all other layers so I can use some sort of vertical dowel to align all of the different layers. I was able to do this on one attempt right when I got the glowforge and it seems to work well on simple sites…but it’s all for nothing if I can’t get the imagery to clearly engrave in the first place.
I always have trouble wording the request, but basically I want to be able to see the buildings and roads because of the imagery, NOT because of vector features that have been digitized off of the imagery.
This example is the general idea i’m going for, except I want to engrave imagery into each layer instead of vector layers (like the roads) shown here.
3 Likes
You’re going to need two distinct images even if you depth engrave it all on a single layer. On one you can use inkscape to draw a line around each color of gray or several as that is somewhat easy. Trying that with the Tampa Area would be a lot harder than Mt Hood but I was able to get the vector result even if putting it together would be more difficult. A black dot would leave a hole for pins and then you could come back and do a dot engrave of the land photos but they would not be color. if you only cut out 1/8 sheets of BB that would work as a style.
I have been thinking of rice paper printed in color that I could get to fit by making it damp and pressed with a soft brush but only in imagination so far.
I’m really not trying to do any kind of depth engrave…just different levels of an image engrave. I think I probably muddied the waters by including a gradient elevation map in my examples.
If we can completely forget about the 3D & topographical aspect for a second and just think about the “picture” itself…how can I get this image to engrave clearly on a single sheet of wood?
Btw one of the reasons I have the mountain building in Kitely pretty much to myself is that way back when there was a program that “painted” the triangles based on a lot of fractal math. Vertical stuff was painted as cliffs the elevations varied so the snow would be high and the swamps or deserts low with a lot of widgets to control the variables, even the math to trace water courses. By going way high the parallax went away and I could just paint by triangle.
The program was written for Win95 and so very funky but nobody else can go buy a copy.
2 Likes
If you just want to engrave a photo that is like any other photo, you do the aerial shot and then engrave in dots just like any other photo,
1 Like
That sounds like it’s getting close to old school photogrammetry. I like that stuff…I was just watching a docu about photogrammetry in WWII over the weekend.
What I do is Structure from Motion photogrammetry, mainly to produce orthophotos. Orthophotos are created on top of the digital surface model to correct for perspective and parallax effects. The whole point is so that engineers and surveyors can use these maps in CAD to digitize features, and the orthophotos have an accurate scale throughout. 10’ on the ground will measure 10’, 10’ on a roof will measure 10’, etc.
Here’s a short video I made a few years ago to briefly show off the different stages of processing - https://vimeo.com/241623728
2 Likes
That looks like a fancier grade of what I did in Kitely. Getting the trees that nice is really hard and I have done a lot of trees! That could be done entirely in Blender or similar but would not be anything you could put your fingers on.
1 Like
Trees are tough, but I normally have a processing template that removes as much of them as possible on purpose. I’m typically trying to create a DTM with these flights, so any trees that make it through processing have to be removed in post processing.
I’ve 3D printed some of our photogrammetry models as well. Unless they’re derived from LiDAR, vegetation normally needs to be extruded down to the terrain layer if you want it to carry through to the 3d model.
3 Likes
Yup, I was getting trees painted on but because the trees had shadowing included they worked well though because the scale was weird they ended up as bushes ,
The Great Canadian grid no longer exists but…
1 Like
The short answer for the first image is “not easily”…
The lack of uniform contrast in wood engraves means it is very difficult to produce a clear image, period. For recognizable subjects, however, such as portraits or regular shapes like your second & third images, the eye associates with those common objects and the lack of contrast is less of a concern. Even on those, you’d have to know what you are looking at to recognize anything other than the building shapes.
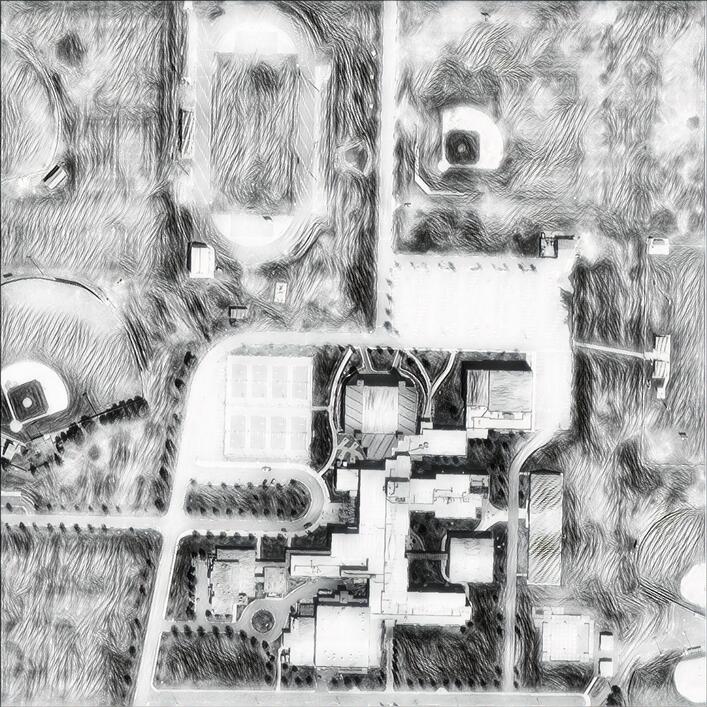
A good way to “cheat” is to squint so the image is blurred. If it’s recognizable, there’s a chance it will engrave OK. That’s why high contrast, almost “comic”-like images, look best when engraved on wood.
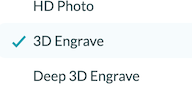
And forget about “3D Engrave” for any kind of photographic image. Depth of engrave does not translate to “darker”.
3 Likes
That is why I would use the variable engrave for elevations done to be as light as possible and then use the dot method to do the details, It can be done but needs to be done twice, for two totally different images,
1 Like
Thanks @eflyguy - The squint trick isn’t something I’ve heard before, but I can see how that would be a good guesstimate about the potential engraving.
Even if the chance of success for something like this is low, do you have recommendations on the pre-configured modes and settings to use? Dots vs patterns vs vary power? Slow & low power or fast & full power, etc? Filters to apply to images, like edge detection or something, that would translate well to an engrave? (Filters would have to work on PDFs or JP2000 images, though)
The best luck i’ve had with portraits is some “artful” filters like these, but they look pretty obscure on maps.
Dots at higher contrast would work best but there would be a scale that there was not near enough detail to work out,
This is Tampa Bay in vectors using the gray scale and only eight levels.

You can see how pins could get complicated,
Btw Inkscape sees White as lowest in overlaying vectors so I had to invert the gray
1 Like
Imagine that image printed in the local newspaper and you will be close.
you can also print this with different settings for each gradient…
GRADIANTS.zip (3.4 KB)
1 Like
The Glowforge tutorials on editing with Gimp or Photoshop cover what you should be looking for, generally high contrast as I said earlier. Also, forget 3D engrave / vary power for photographic engraving.
The only way to know is to try a small section of your images, on your materials, with various settings. I have a small stack of test samples like that. Just don’t expect the “HD” defaults to be better than “Draft” - but you’ll quickly find out if you try them yourself.
2 Likes
Are you implying that 3D engrave / vary power are synonymous? I didn’t know vary power was supposed to be for 3d engraves specifically…that’s just the setting that has been giving me the best results with some of the photos I’ve been making.
Thanks for the tips, I’ll give it all another shot this weekend and see if I can get better results. I’m working on a high contrast image right now, but I found an old post on the woodcutters forum that also recommended using an edge detection method and inverting it. Going to try this one as well…
Yes, the PG settings are called “3D engrave” but they use the “Vary Power” Grayscale option.
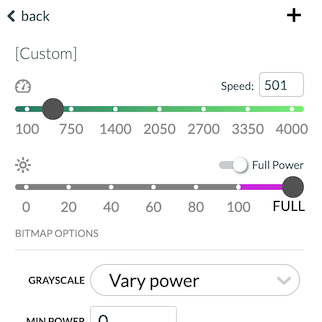
It is typically only suitable for “depth map” type images, not shadows from traditional photographs. The “Dots” options that produce dithered “newsprint” style shading are appropriate for photographic images.
1 Like
It is quite possible to get a reference to Lidar elevations and somewhat lesser movement with the 3D Vary Power have it very clean and come back with dot dithering for details like roads and and other things revealed by aerial photos,
Running trials with gradient.svg zipped above can tell you more than an explanation