I have a friend who restores and maintains antique steam powered tractors. One of the challenges is that spare parts are not available. You have to build them from scratch. This can be very expensive or even impossible as some of the techniques used on these machines are no longer used today.
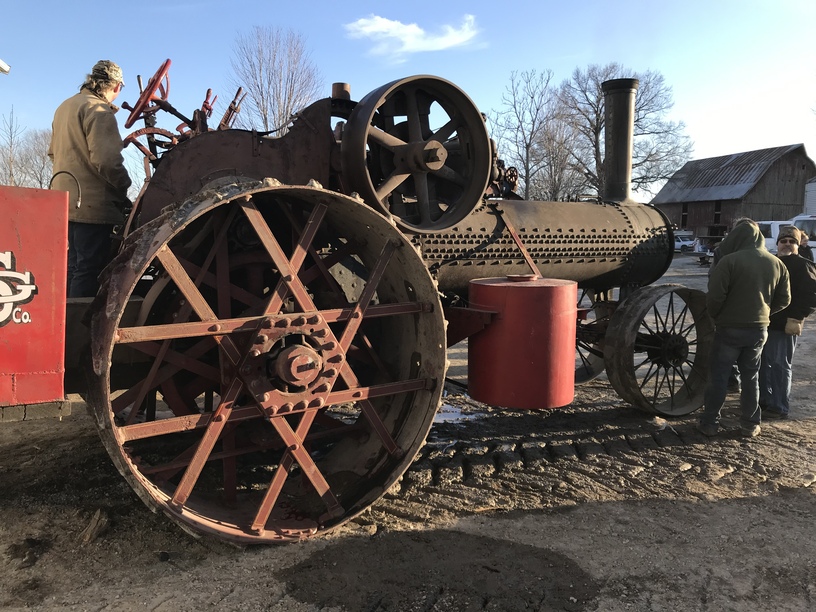
Here is an example of a steam powered tractor. Not the one we are working on, but you get the idea.
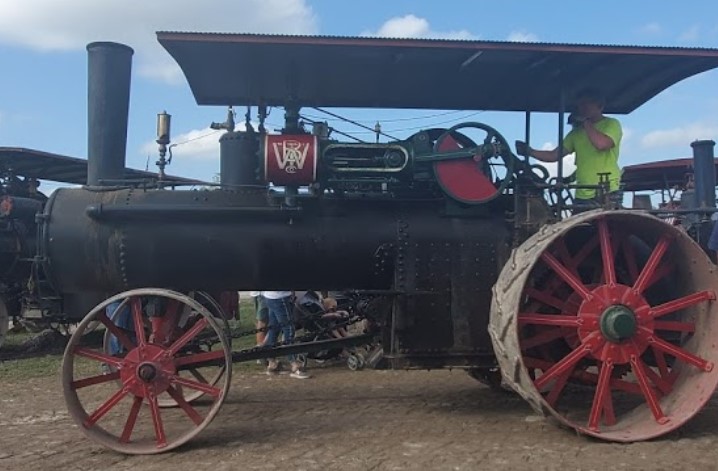
We are making the outside sections of rear wheels. If you look closely, you can see that there are actually 2 rear wheels per side. His tractor has one set and he wanted to add the extra wheels for better traction. The part that we need to make is the center hub.
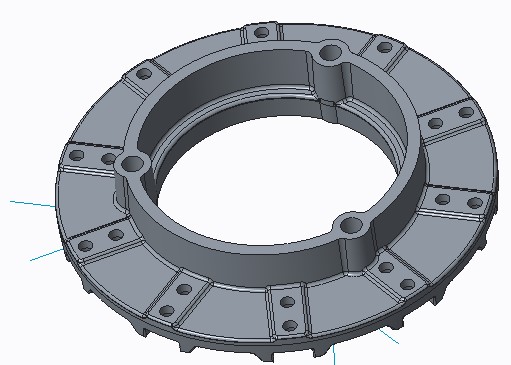
This is normally done by sand casting. We needed to create the sand cast pattern and got quote for $8,000 for just the pattern. Then we still have to make the molds and cast the parts. That was too steep for us so we decided to use the Glowforge to make the pattern.
There were a few challenges.
- The assembly is 25" in diameter and about 5" thick. This is larger than the Glowforge cutting area, so we puzzle jointed several parts together to make up an accurate assembly
- The pattern has to have 2 to 3 degree taper per side in order to allow the pattern to be removed from the sand mold successfully. We made some tests and realized that 1/8" Draftboard allows for a 2 degree taper if each layer is .004" per side larger than the next one. This required minimal sanding for cleanup.
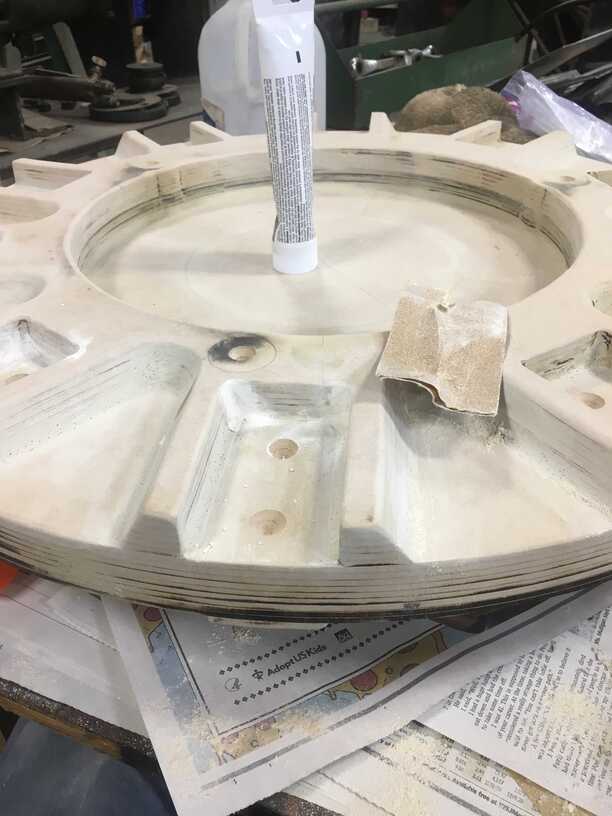
- Sandcasting requires fillets and radii, no sharp edges. So after the parts were assembled, we had to use wood putty and a sander to add radii back in.
Here are pictures of the build process.
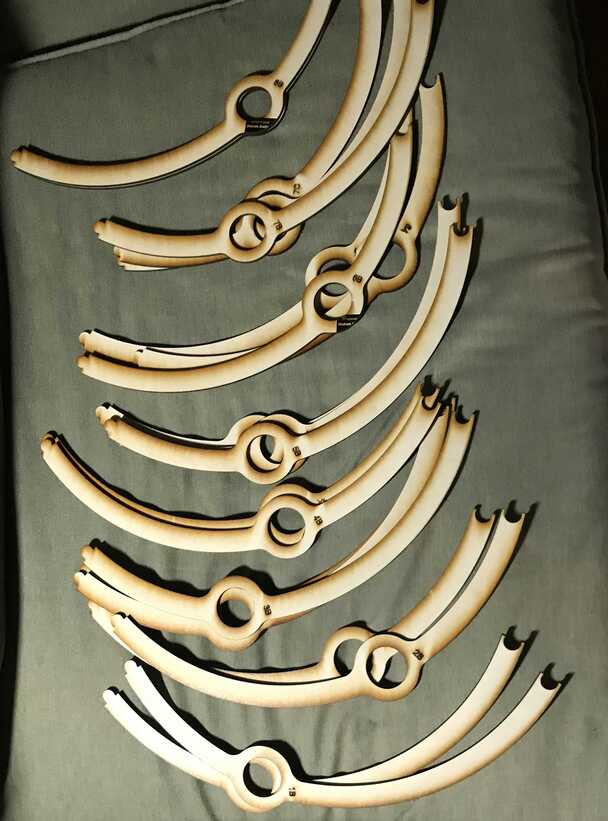
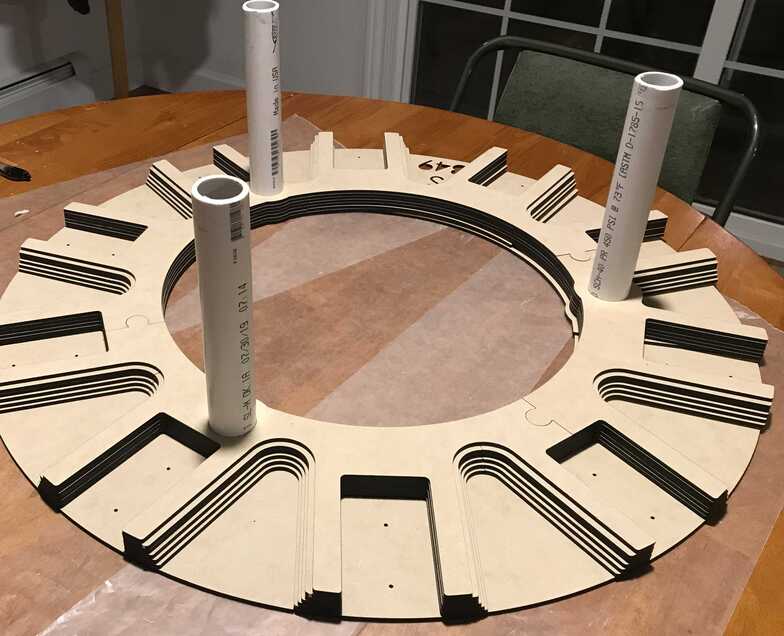
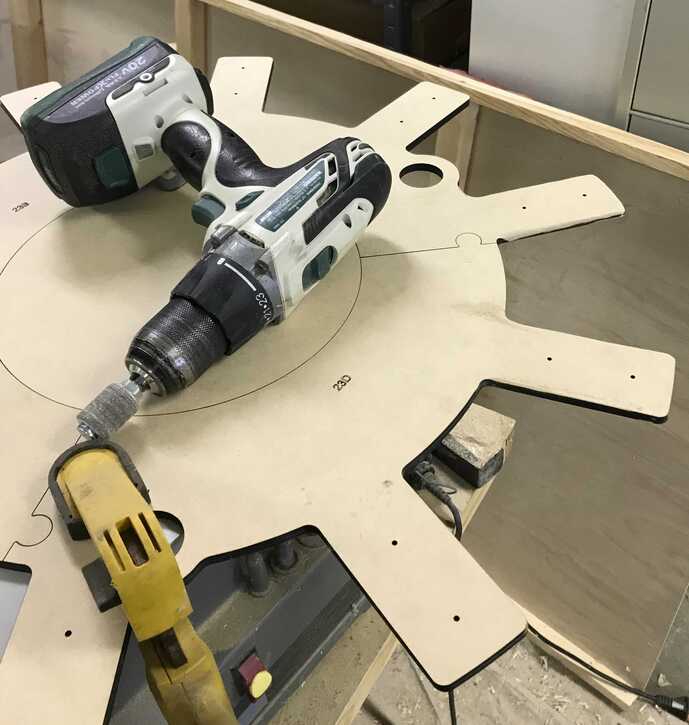
Parts cut with identifying assembly numbers etched in
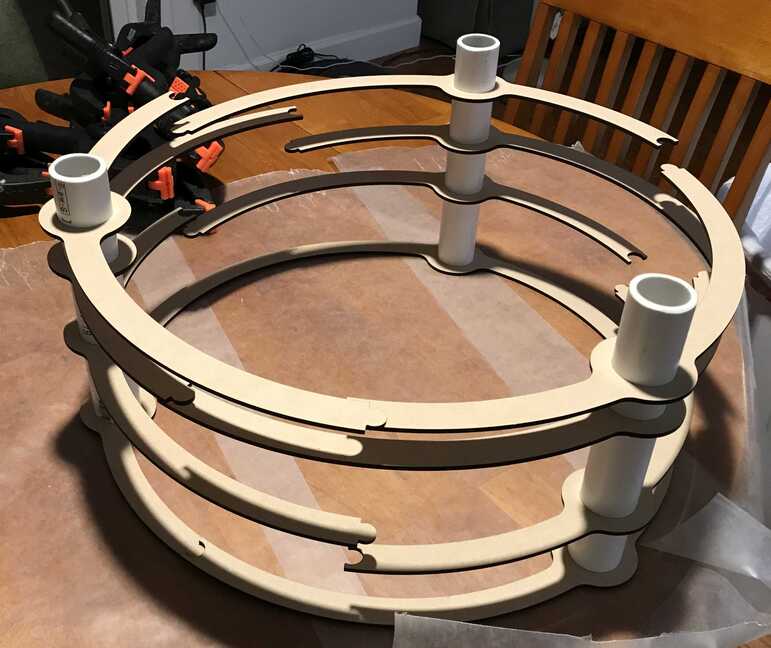
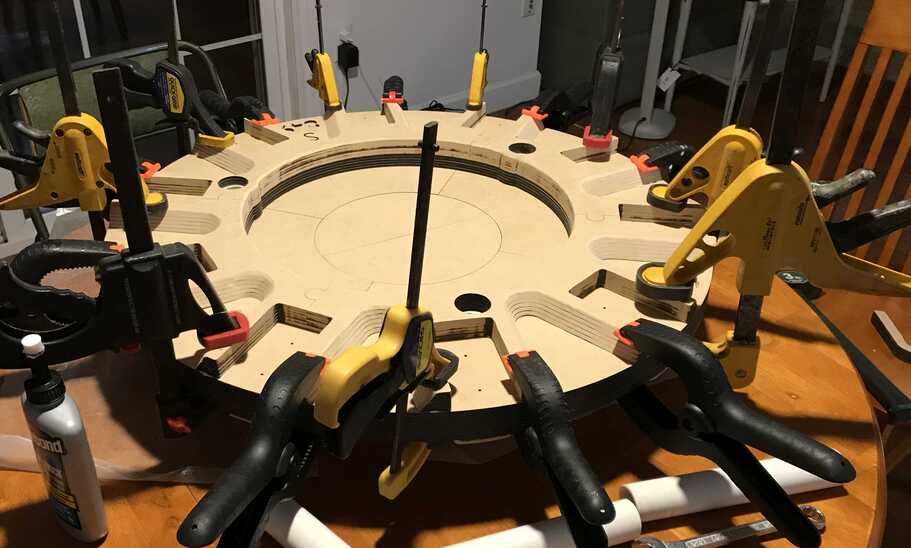
Preassembly of parts to make sure they fit. We used the PVC pipe as a line up tool. This is where the bolts will go through to attach the outer wheel assembly to the inner wheel.
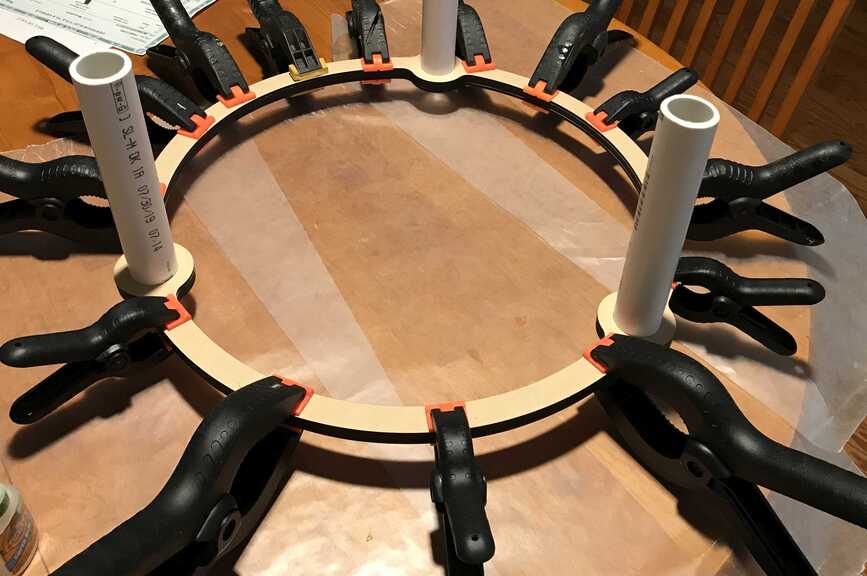
Parts clamped and glued
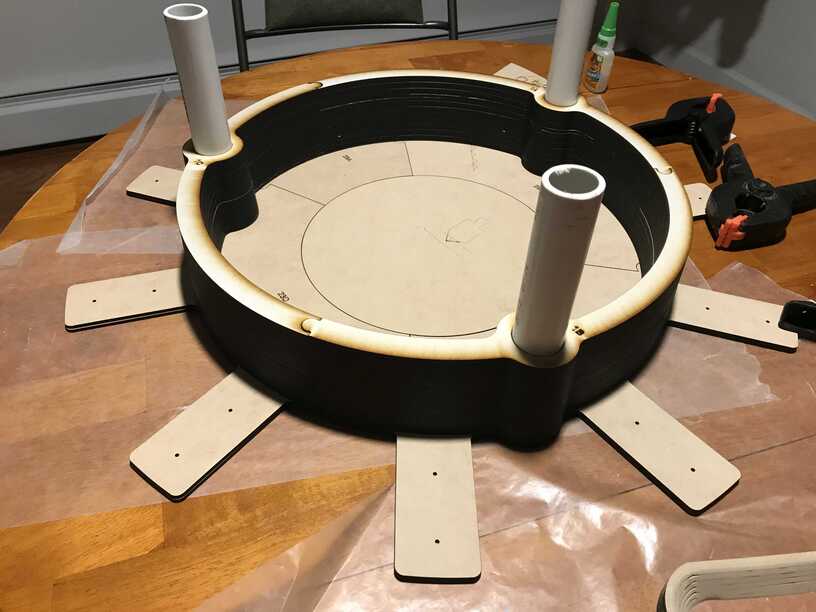
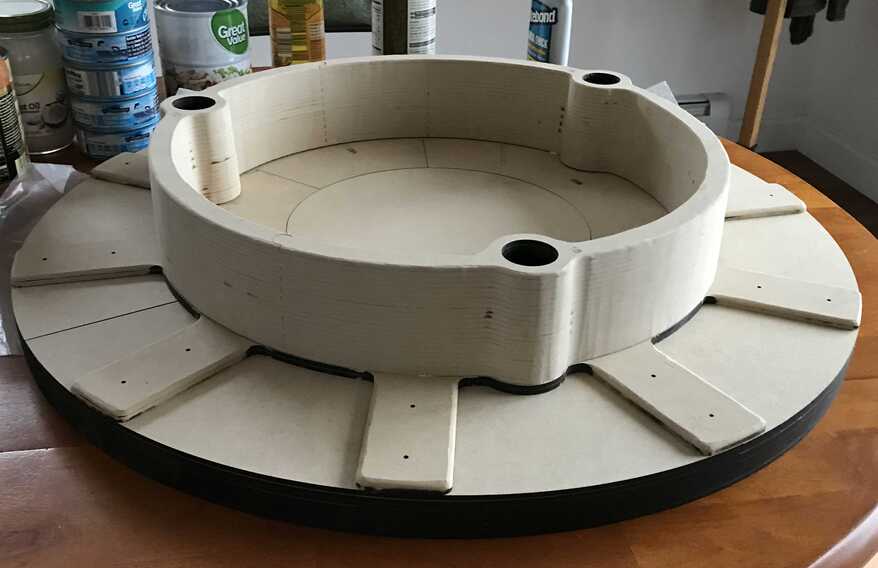
Build gets taller. You can see the taper on the left
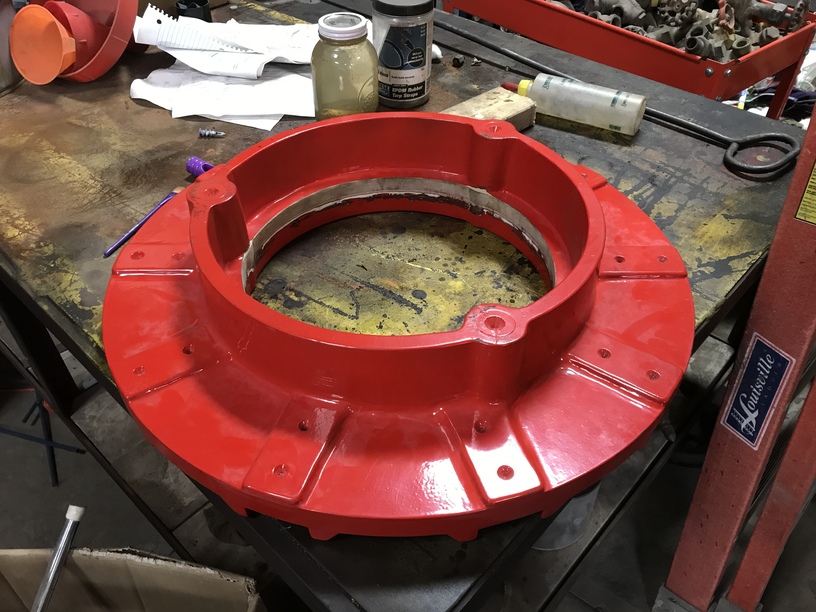
Other side of pattern. This is where the spoke of the wheel attach. The stair step areas are just relief to keep the overall weight of the casting down. They have to be sanded smooth.
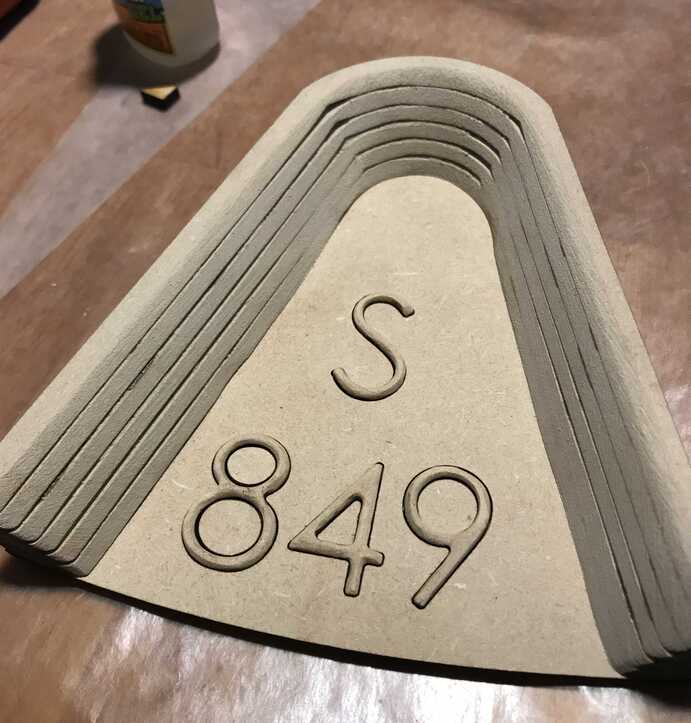
An example of the relief area with some pattern lettering (for authenticity). This is just a proof of concept piece to see if the layered concept would work.
All parts have to be sanded and radii added
Two halves of pattern being glued together
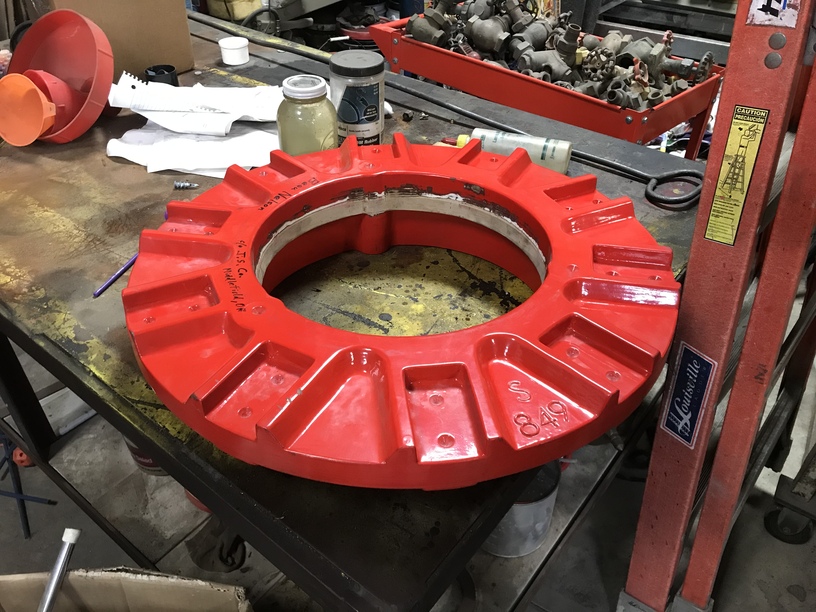
Glued up and partially sanded.
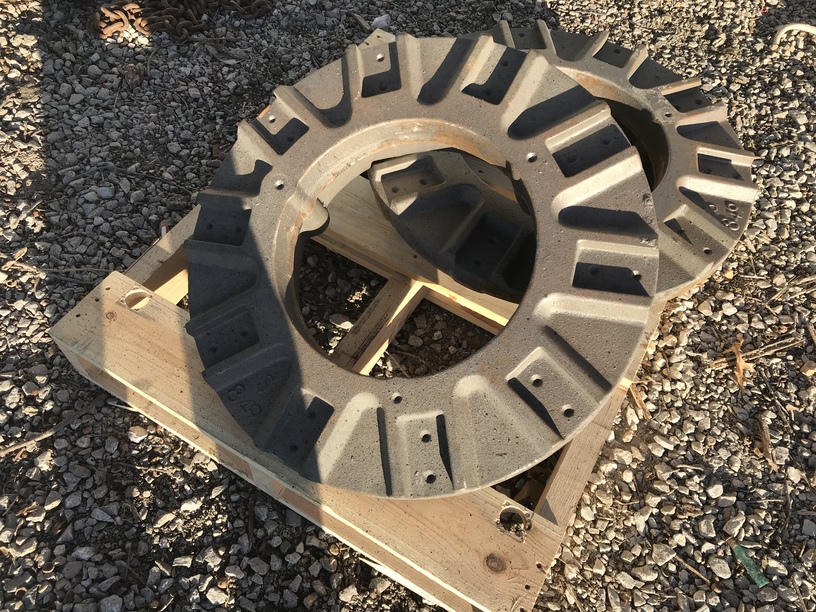
This is where we are at now. A few more hours sanding, then we have to paint the pattern to seal it and send to the casting foundry. The mounting holes and center will be machined out after casting.
Will post completed part when done and the wheel assembly when complete, but that might be six months from now.