Normally avoiding getting screwed is a good thing, but not on this project…
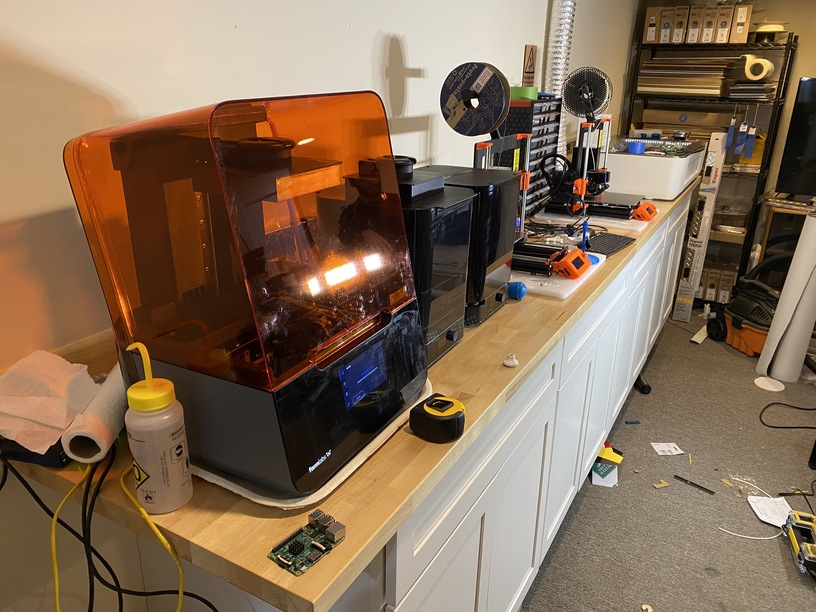
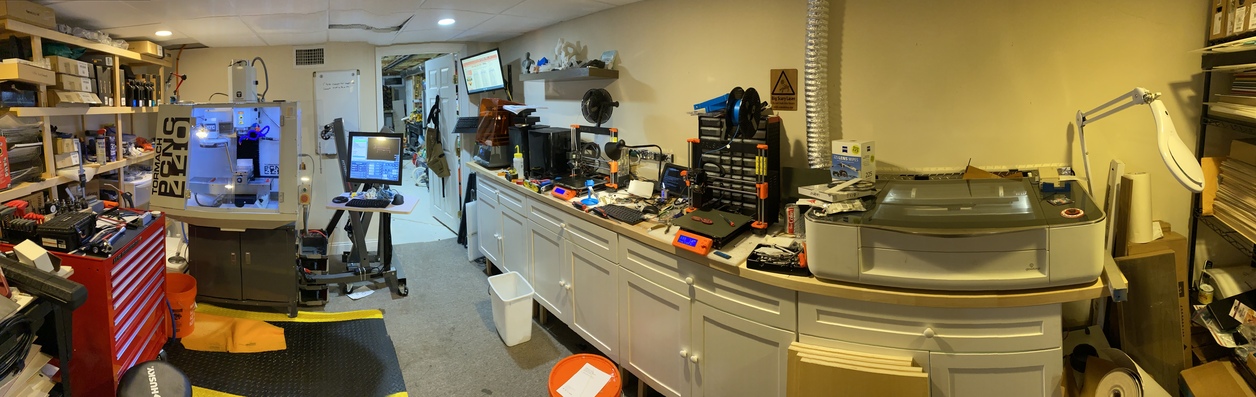
I am completely redoing my home maker space (and soon will have a Tormach CNC - which will become relevant to this story). So in redoing the entire room, I put in cabinets, counters, new electrical distribution and a bunch of other things (more to come later - I just go the email that apparently later this week the 1000lbs of tormach is arriving in my driveway. Not sure how it’s getting to the basement given the snow on the lawn to get it to the bulkhead).
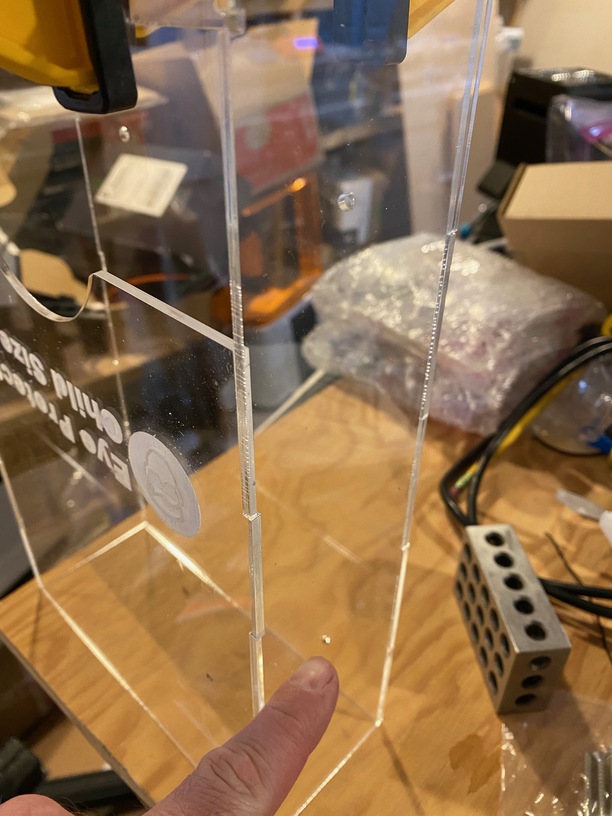
But anyway along with a real CNC milling machine you really do need to get more serious about eye protection. And lots of friends bring their kids to see all the maker toys in our basement. Well towards that end I wanted some dispensers for kid-size and adult-size safety glasses. Even with flood coolant and an enclosure it still will have steel/Ti chips flying everywhere. So I CADed up a nice dispenser, and cut it out of medium clear acrylic. After gluing it all up with weld-on #4, I saw one slightly serious design deficiency… (and yes, I realize in hindsight some key-holes would have made this a non-issue. But I didn’t and the box it too tall to fit into the GF without the tray.
So for the adult version it will have keyholes (or I could cut the front panel with access holes). In this case the rescue is to drill the front with a regular drill (ugh).
Wow. That is some Makerspace. The screw holes are always a challenge and getting key holes is great. Then getting the screws in to match keyholes is important and making a jig for that if you have two of them. I’m working on some kitchen shelves and thinking through this very thing.
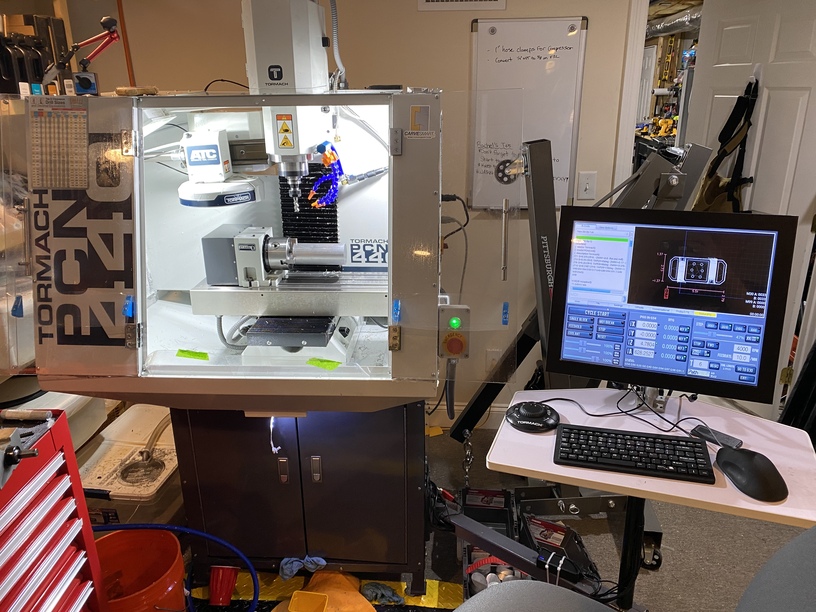
Pix of the Tormach when it you get it set up, please.
You are making me kind of jealous, and I think you also have lots of tools at work that would make most of us envious even though we don’t know how to use them. Nice space. I am looking forward to seeing more of your creations now that you will have a redesigned space in which to work/play.
What’s particularly funny was I accidentally clicked on “through all” in the hole definition, and then realized oops I don’t want to have the hole in the front piece (ironically I did as it turns out). And my brain looking at the solid model didn’t go “hey since I can’t see the holes I probably can’t get to them…”
It’s come a long way, considering when @Joe visited back in the PRU days to make the stamp (another equally silly screw up) it was in my family room with a hose out the window.
I was first thinking you rigged a whole surround for the machines!
For the glasses dispenser, how about making small attachment for the keyholes that welds onto the side or back (as appropriate for where you want to hang it)–akin to the hanger “bars” added to the back of picture frames… (I take it you’re able to keep the goats out of your work shop!)
What you don’t see is those cabinets are 9" off the ground as there is a baseboard heater on the wall. So those cabinets come with a foot (to sit on the floor) which my son and I built a jig to cut off (nothing like buying fancy cabinets and attacking them with a circular saw - cringe). Anyway then we glued 1" rigid foam on the bottom so the cabinets wouldn’t bake and then built legs out of square 1" poplar. They actually came out nicely. Getting them level was a challenge (they are bolted into the wall with 3/8" lag bolts) but they did come out very level (I mean not Rick & Morty “true level” of course). The counters were from Home Depot (saving over $2000 versus the cabinet store) which I had to clear coat myself.
For folks that are curious due to the ceiling height I ended up getting the PCNC 440 (I wanted the 770mx but I would have to cut a hole in the ceiling [I was willing to do that] and the ventilation duct above the ceiling [not willing] for the z-axis). As I intend to mill both Ti and 316L stainless (for orthopedics) as well as aluminum, that necessitated flood coolant. I know fogbuster in theory works but with Ti easier to cool/prevent fires if you use flood. As it makes a lot of complex jobs easier, I got the automatic tool changer (it’s 8). Supposedly the 4th axis add on is coming out this month. I will definitely order when it ships. for the ATC you have to (and I would anyway) ordered the power drawbar (I ain’t wrenching every tool change).
Well apparently the truck with the Tormach arrives at 2 tomorrow… (nice little 1100lbs) But sadly I am on call all weekend so can’t even start to play with anything…
I can print that out and put it on our wall in the tech room — but if my son (who owns & lives in this house) asks what it is, I will have to lie and say “an interesting makerspace” otherwise if he thought we might try to do this to his home there is not a single GIF that could animate him at that moment. LOL
Wow on the build and yikes on the lowering into the basement … would it have been easier to start from scratch and just build the house around the makerspace? LOL Just kidding.
This is what I wish we could do to get our (now virtual) Makerspace up and running again in a physical space. A ‘build it and they will come’ scenario – money is only thing standing in the way or a person that knows how to fundraise — my little bits here and there of making things and putting the profits into our 501c3 is slow as it is just word of mouth ($5 here and there).
Thanks for taking the time to upload…I expected great things from you (based on previous posts); but WOW just WOW times that by a thousand.