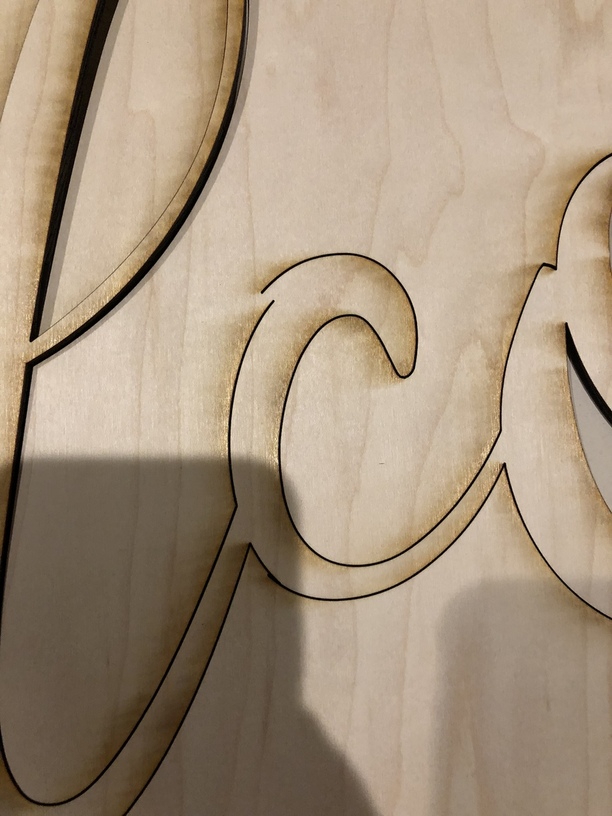
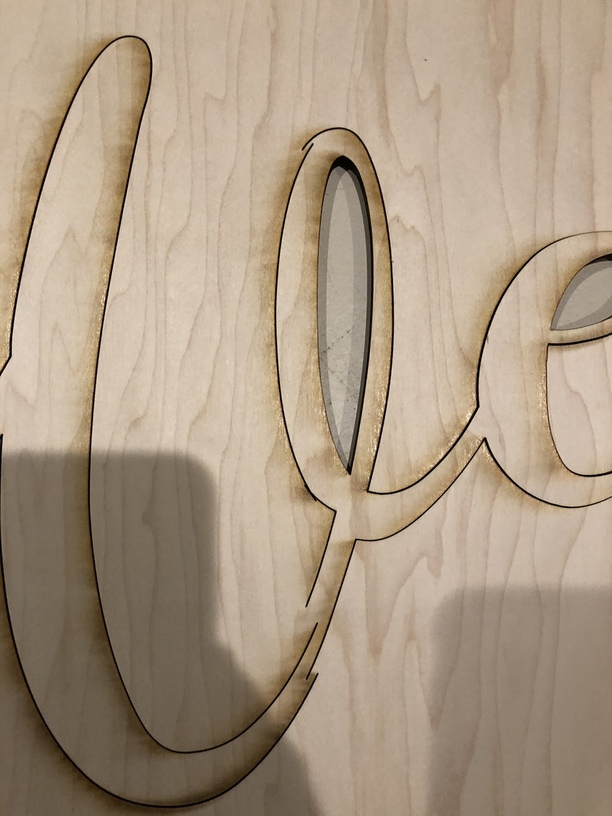
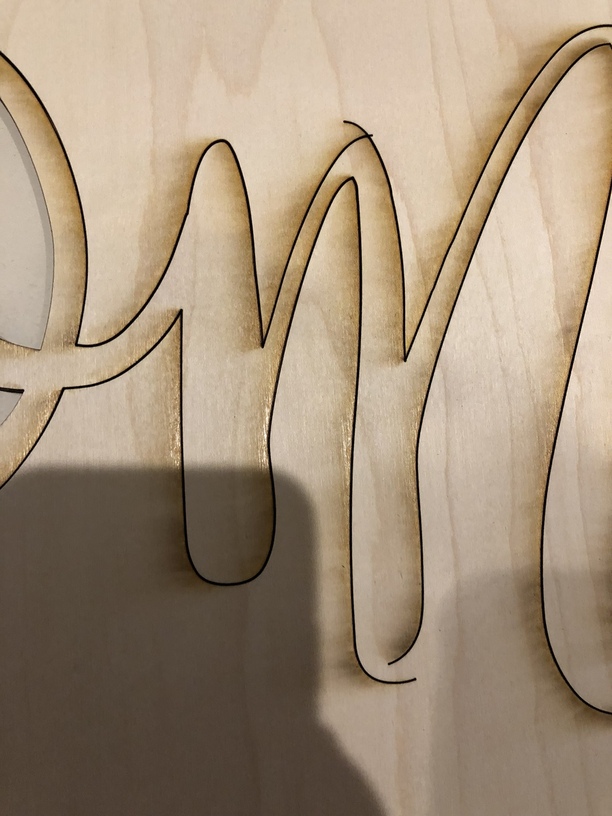
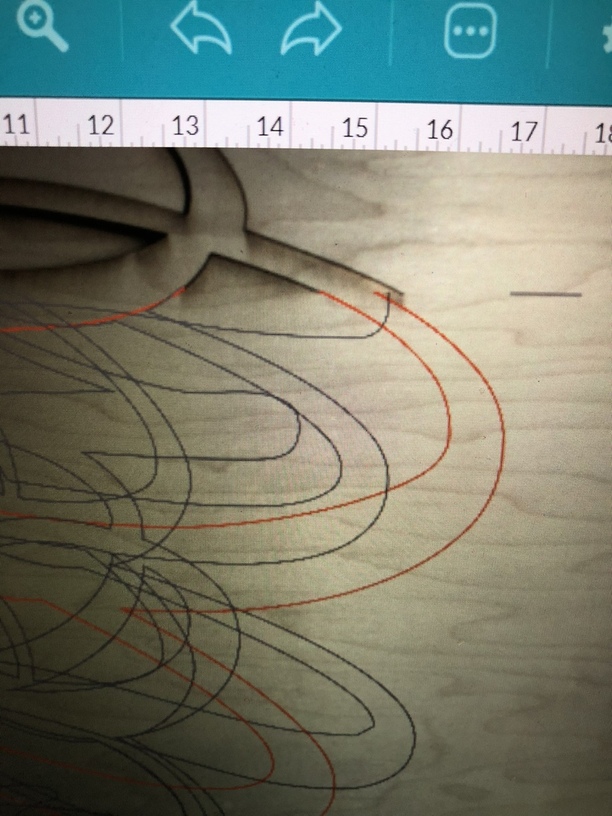
Ok I used your design to test cut! This is the outcome. I lined it up the best I could on the computer using the marks. But it’s like one side would line up great then the bottom or opposite wouldn’t and wood cut it off. I am attaching pics.
Okay, are you anchoring that against the right side of the tray? You have to make absolutely sure that:
- The piece of material is held at a perfect 90° angle at all times. That means making sure that you have the long edge of the material completely flush against the side of the tray that you are anchoring on. At all times. You have to go slow and check to make sure that it isn’t being fed in with even the slightest angle. You also need to pin it down everywhere you can to make sure there is absolutely no warp in the long sheet of material. If you haven’t printed a bunch of the honeycomb pins yet, you need to do that.
You are creating a three point plane using this method, and two of the points are caused by keeping the material completely flush against the side of the tray.
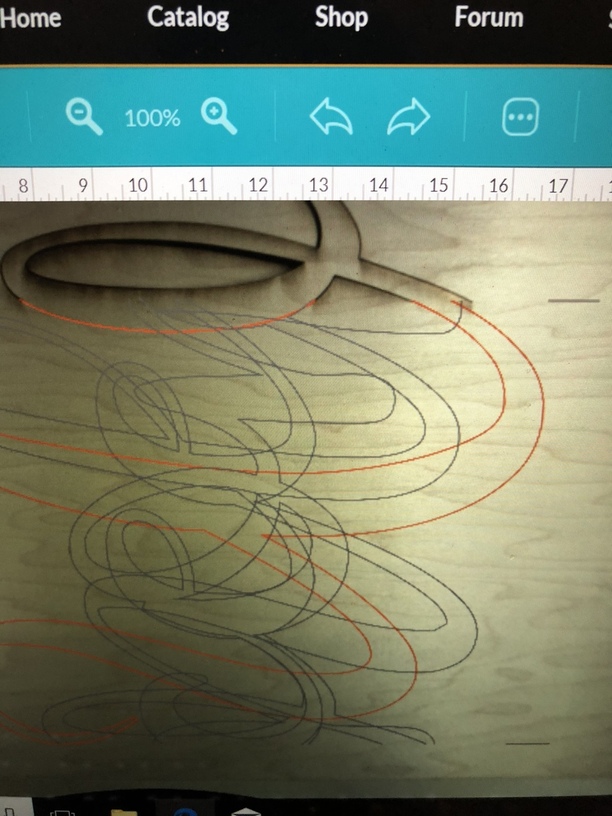
- You do not use the view on the screen to line up the cuts. You only use the two index marks that have been burned into the wood.
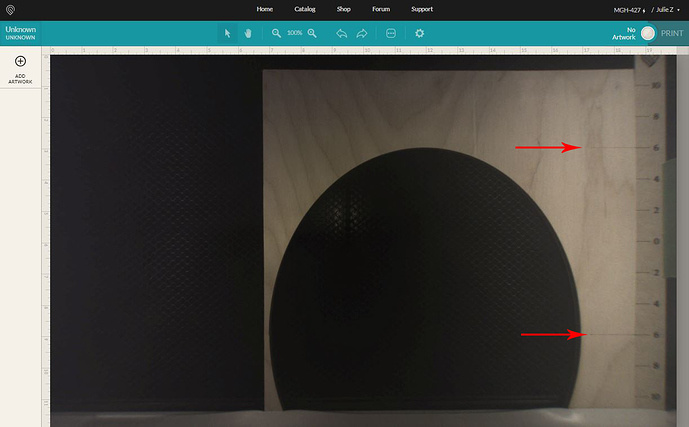
You open the lid of the machine, look down at it with your eyes from directly over the marks and line the top one up with the top 9 inch mark on the ruler, which you have taped into place on the side of the tray so that it doesn’t move. That eliminates the camera distortion. Ignore what you see on the screen except for the initial placement.
Align the marks burned onto the wood next to the ruler.
You might want to give it a try with just scoring on a long sheet of cardboard or two, to get the procedure down. It will save on wood, and once you see what is happening, you can try out the wood one. (Almost there.) ![]()
3 Likes
Thanks @Jules. No I didn’t use the honeycomb pins, but I am definitely using them next time!!! As for the edge, I did not put it flush so I will do that as well. Along with making sure to do a ruler.
So for the ruler did you just cut/engrave one on glowforge and tape it to the black tray?
I was using the actual lettering marks instead of the score marks. I have no idea why because I’ve read over your stuff a ton. Anyways, guess that’s what happens when you’re doing it late at night! haha. I will test this again tomorrow with cardboard 
You’ve been such a BIG help. Thank you so much for being so helpful and patient with me!
1 Like
Oh, you’re more than welcome!
If you go to that link in my last post, i actually have the files already created for the rulers, you just need to select the side you want to anchor on and print that one.
1 Like