I want to make wood business cards, I’m not sure how to get the image from my current business card, could really use your help.
Thanks, Dave.
1 Like
At least two ways:
-
Use the built in Trace function of your Glowforge per the support docs. Just place your biz card on the bed and use the Glowforge to trace it.
-
Either use a scanner, or take a photo with your phone, transfer it into Inkscape or Illustrator, and use the autotrace functions of those softwares.
There are many, many postings on the forum about how to do this. You might want to give searching the forum a try; use “trace graphics” as a search term. Also, try the extensive training available in the Glowforge Tips and Tricks section.
2 Likes
You will need to get the image into a graphics program like Inkscape, Adobe Illustrator or Affinity Design unless you simply want to trace it as cyndi11 described. Perhaps you should work through some of the tutorials and become familiar with your graphics program and how it relates to the Glowforge interface.
1 Like
You could also ask the person who designed your card to give you the file.
6 Likes
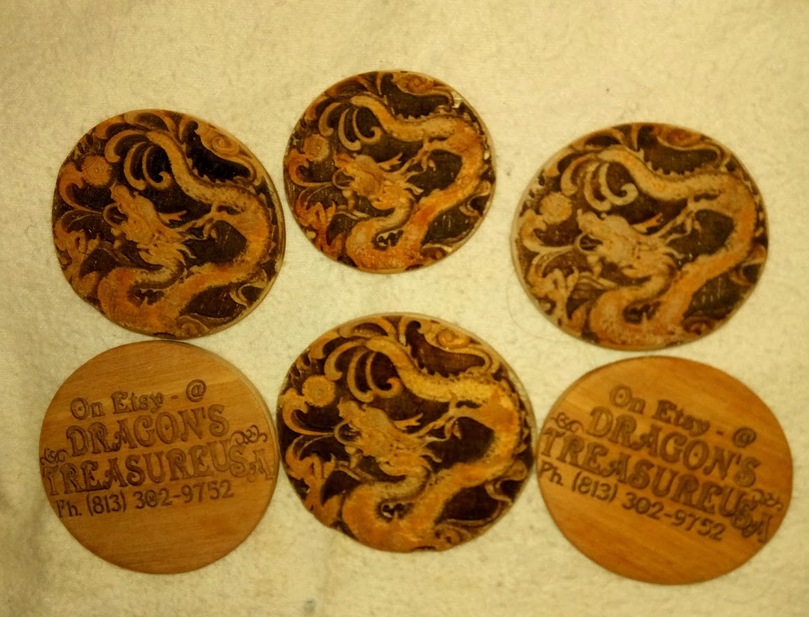
As I have new capabilities having a Glowforge I redesigned from the usual business card and made a nice dragon engraving on one side and the contact info on the other, so now they get this nice piece of artwork that they want to keep and show to their friends vs tossed in a drawer if I’m lucky or more likely the trash.
2 Likes
Would love to see what it looks like, can you post an image. Thanks Dave
Thanks Cynd11, I’m going to try everything that everybody posted. I will post my results. Thanks to all
1 Like
What’s the scale here?
Here is a vendor that sells blank wood cards
https://www.cardsofwood.com/product/blank-business-cards/
2 Likes
So after several times this is the best I’ve come up with, not sure where I’m going wrong. Are used Microsoft word to create the original saved it as a PDF, and I saved the PDF as a JPEG. Used 950/30 LPI 340 and Height is 0.02, could really use some insight especially how to get rid of the background of the print.
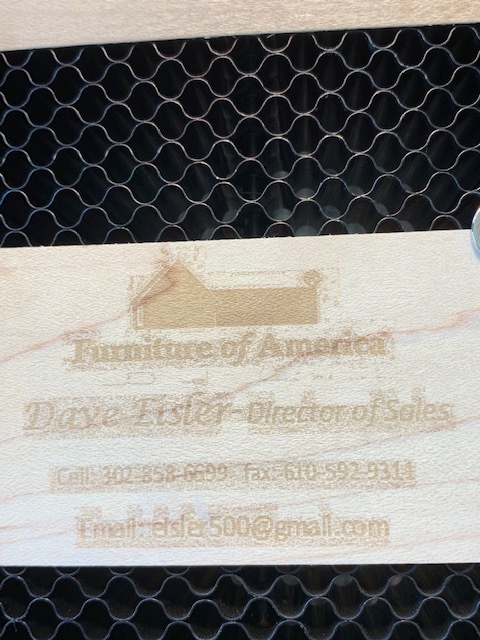
That’s JPEG noise/compression artifacts.
1 Like
If you create the file in a different program (something like Inkscape, Illustrator, Photoshop or GIMP) you could use a transparent background and save the file in PNG format. (Does away with the background noise completely.)
If you want to take the noise out - it’s a rather involved process and you’ll need to use a raster based drawing program like Photoshop or GIMP to select it and delete it.
Of the two, it’s probably quicker, and you’ll ultimately get a much better result, to just recreate the text in one of the drawing programs.
1 Like
What can I do about it?
Dave
Thanks for the link, and I have tons of wood biz blanks. Just need to know how to engrave it.
Dave
The problem is in the file, not the laser.
Step 1 is to do a Save As or Export as a .png file and see what happens. If it still happens then step 2 is to pixel whack away the “fuzzy stuff.” Step 2 can take quite a while. This can be done in Paint. It can also be done in Gimp, but no reason to go through the Gimp learning curve if you don’t have to.
If after step 1 above you still have fuzziness and you don’t want to do the time-intensive pixel whacking, what I would do is download Inkscape from here. Set the document properties of your new file in Inkscape to 20x12 inches. This is very important. If your log cabin-ish image is not already in .png format, save it as a .png. Then import your cabin and use the text tool to add your text. Place everything inside a rectangle the same size as your business cards. Then convert your text to a path. Upload to your glowforge, and ignore the rectangle. Details on how to do all of this can be found in the Tips and Tricks section.
If you are going to be using the glowforge with your own files, you really should learn the basics of Inkscape, Adobe Illustrator (AI), CorelDraw or Affinity Designer. As noted above, tutorials on these programs are in the Tips and Tricks section as well as the Internet at large.
3 Likes
Many thanks for all the tips I do have ink scape was playing around with it a few times got a little frustrated but will go back to it now.
Dave
Have you tried uploading the original PDF file to the Glowforge? You might avoid some of those artifacts by trying that.
When I created the PNG file, that worked very well. Now I just need to figure out how to darken it. And a fun journey though
Dave
#1 -on my stuff the edges are sharp because I did NOT make it a png. but it is filled vectors. The dragon is a png because I am using vary power to get the full 3d resolution. #2 when printing the dragons; it prints one at a time and took over 3 hours for 10. but as the text was still vectors and all engraved to the same depth it did them all at the same time and took a bit over an hour.
If everything is going to be black and white vectors are far more favorable as even a close look at a pixeled version the edges will be fuzzy especially when not straight up or sideways. So I would suggest going back to the text (Inkscape has two steps, the word will be a group of vectors when you make vectors and you will need to ungroup them and combine to make it regular vectors that will fill properly.)
if you have a tiny logo it may do to have Inkscape change that to vectors also as small enough will not show any detail anyway, and running from case to case to engrave what you cannot read can be silly.