does anyone know how to go about making an acrylic standee like this with the picture and everything?
1 Like
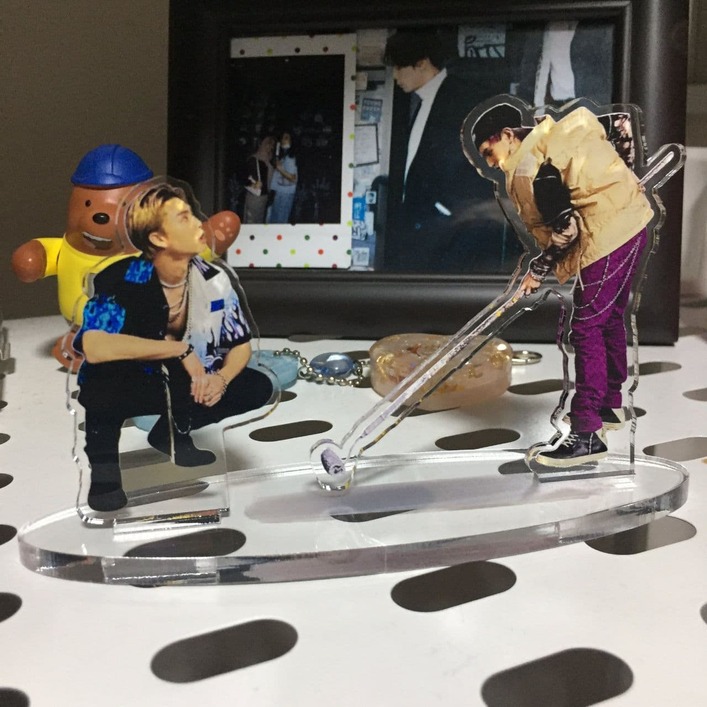
Do you have the pictures you want to use and acrylic?
You’re going to take the photos you want to use, and add a cut line around them. Looks like they used about .125 inches around the edge (if you are using GF premium, you can do this with the outline tool, and then export it to your computer).
You need to measure the thickness of the acrylic you are using as a base and add a rectangular tab to the bottom of the image outline the same thickness. So for the image, they used thick acrylic for the base, which would be like 1/4 inch. So the height of your rectangular tab would be .25 inches.
The on your base, you will create a rectangle where you put the image tabs into. Those will be the width of the tab you wanted, by the thickness of the acrylic with the photos (the image looks like it’s using medium acrylic for that, but it will be whatever you are planning to use). If you know the kerf, adjust for it, otherwise be prepared to use adhesive to prevent it from sitting loosely. Cut everything out.
Then you can glue the image to the acrylic, or if you are trying to sandwich it in between two layers of acrylic you can do that too, but make sure you create you file for that. Or if you use sublimation, you can add the pictures that way too.
1 Like
The stand is an oval with two rectangles. The width of the rectangle will match the rectangle you add to the bottom of each piece of standing artwork. The height of the rectangle will be the thickness of the material you’re cutting the standing artwork out of.
For the standing artwork, you’re taking some picture and adding an offset around it for the clear border, then welding/joining a rectangle at the bottom of the shape for the part that’ll slot into the stand.
Glowforge has a good introductory tutorial on using Inkscape to make your own designs for the laser. The rest of the skills involved in making this design you will need to pick up a bit at a time. There are lots of video tutorials out there for doing various things in Inkscape. For example, Google “inkscape offset” to learn how to do that part I mentioned.
3 Likes