engraving.pdf (198.4 KB)
Jules,
Will this work?
robert
Hello Glowforge universe!!!
No I don’t need an email, (you can delete that, I’m not going to repost the file here, just a partial image…)
Do you want the engraving like the one on the left or the one on the right?
May I have a version of both.
Jules,
The day will come when this neophyte will be able to create such images that swirl around in my head.
I long to empower students to help unlock their potential. Thanks again.
Okay, send you the file in a Private Message later this morning… 
Thanks again.
I have to learn to send a “private message” in the event I need to send copyrighted information again like I did this time. Also, is there a forum protocol of do’s and don’ts? Like “don’t post your email in the forum” (thanks brokendrum!!)
Just click directly on the User Name of the person in any of their forum posts - there is a teal Message button on the popup.
When you receive a Private Message on the forum, there will be a different colored circle pop up on your avatar in the upper right corner of the screen. Just click on it for a listing then click on the envelope to read it.
I’ll go ahead and send it now so you can see it.
With that file, I also rotated the objects to fit on the bed, and had to modify the file slightly - it was just a hair too long to fit on the current bed. (Advanced stuff that’s easier for me to pull off in Illustrator.)
I chose the non-kerf adjusted file, lately i’ve been noticing that kerf adjusting is causing some too-tight fitting problems, and the kerf adjusted version is using too large of a kerf, so it will be too tight if you try to use it unmodified. So you might need to use a spot of glue to assemble it.
I put both versions of the logo engrave on the same file - just delete the one you don’t want to use from the file when you process it.
Remember to set the Scores from Cut lines in the interface…you’ll need to be kind of careful about catching them all. (Most of the interior decorative lines.)
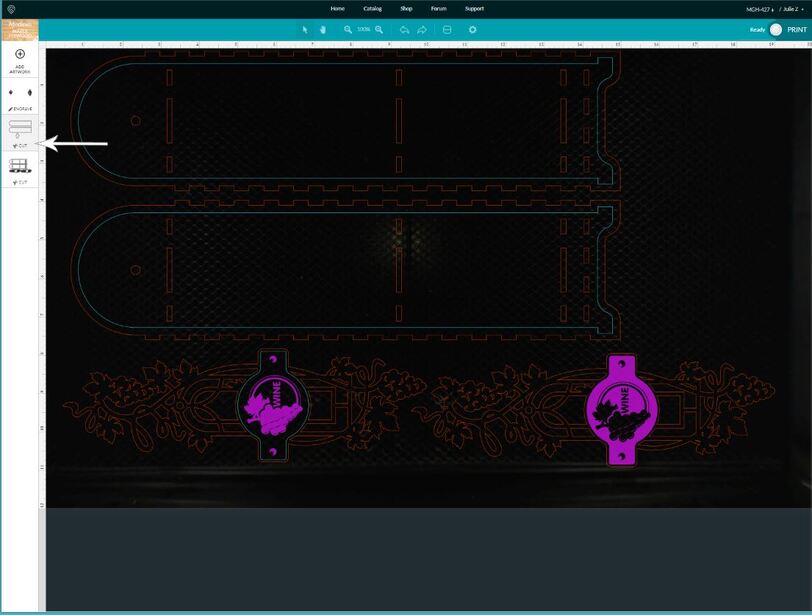
But they do load…I tested them. (Two files per box, so two sheets of plywood.) You can look at those and get a fair idea of what you need to do to set up a file for the interface. 
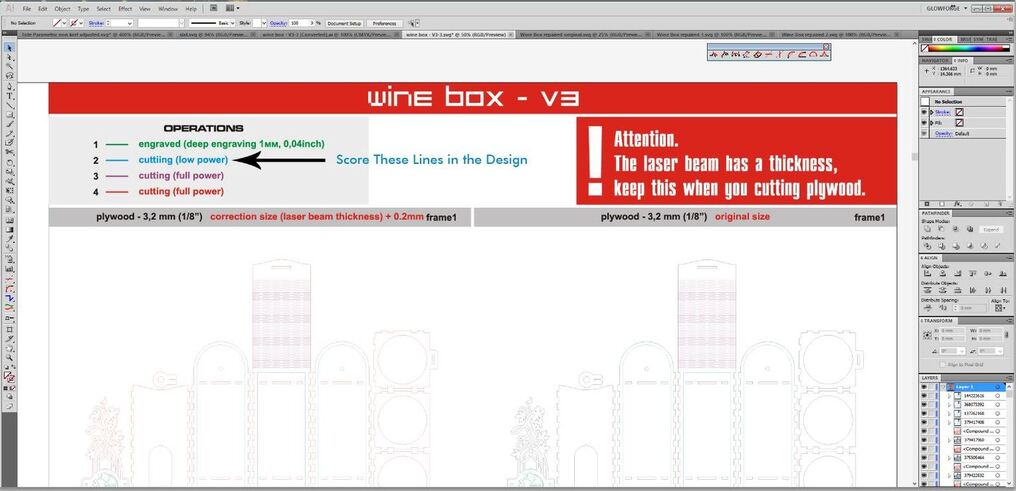
OOPS!! Please disregard the previous email about the kerf but what does this mean “Remember to set the Scores from Cut lines in the interface…you’ll need to be kind of careful about catching them all. (Most of the interior decorative lines.)”
Based on the original design write-up …oh wait a minute let me just show you what I’m talking about with a screen cap:
When you open the file, you will get a different Cut operation set up for the blue lines. He intends those to be Scored based on the Low Power cutting option that he lists in the instructions.
The GFUI is going to interpret those as a Cut. It interprets all unfilled vector paths as Cuts initially. You will need to remember to convert them to a Score before you print the file, or it will cut all the way through them.
Look closely at the lines, and hover the mouse over the thumbnail, then look at the preview on the board to see which lines turn blue when the mouse is hovered. Those are the lines that will be affected by that operation. When the ones that apply to the decorative interior lines are highlighted, change that operation to a Score.
This will all become more clear when you have practiced a little on some simpler files, and finished those tutorials I gave you - this one is a slightly more advanced file to wrangle with. ![]()
You Rock Jules!
You’re a pillar! I imagine your husband would agree.
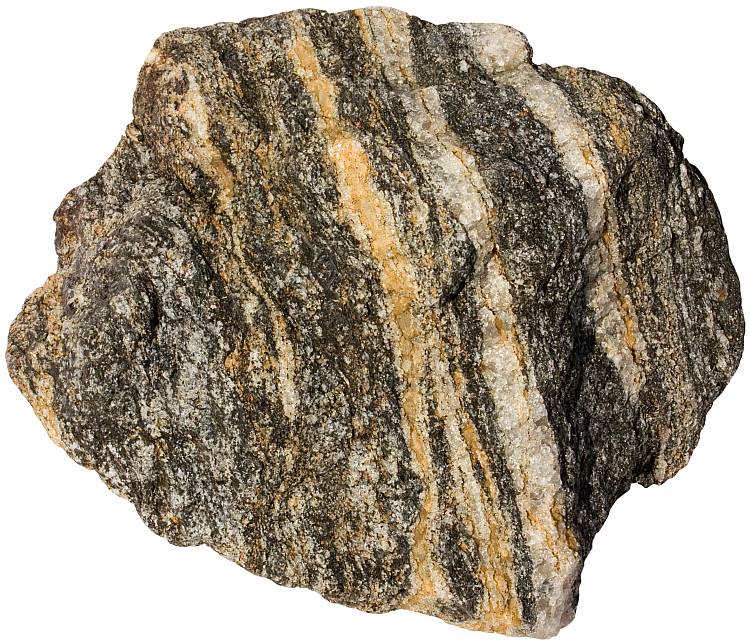
Schist - pressure in the struggle of life produces a metamorphosis. 
Oh man, ain’t that the truth! 
Thanks for those tutorials. The light is becoming brighter and much of this is making sense. I LOVE learning!!!
Good morning Master Jedi!!
Last night was a jubilant moment for me. My goal was to find a project that would put “Glowlocity” through its paces. And did it!!! The exhaust hose was in place but I guess I burned a lot of wood last night. Oh the SMELL!! As a result, I am unable to print indoors anymore (lol). What a small sacrifice!! Thankfully, she sits on a mobile workbench anyway so that is no big deal.
Thank you again for the tutorlage. OK, why am I writing? I’m writing to share the outcome from last night’s production run. See photo. It’s dry-fitted with tape so that I can put inscriptions on the sides later. I decided that my first project would be a retirement gift for an Air Force officer who I work with.
OK, here are a few questions:
#1: I want to add inscriptions to the side panels along with the Air Force logo. I assume that that is possible through Inkscape. How do that?
#2: What glue would you recommend I use since woodglue does not work well with finished wood?
#3: I don’t plan to score the back panel on this one (since I failed to switch on the score feature) but I was just curious. Can scoring be added AFTER a print is completed as a stand alone function?
Picture is missing, but I’m sure it’s lovely!
Yes, you can add text in Inkscape - convert the text to outlines/curves before you engrave it. Inkscape Text to Outlines
I still use wood glue (I prefer it for bonding) but rough up the surfaces a touch with an 80 grit sandpaper first. (Takes real guts to do that the first time…marring that beautiful finish deliberately is a heartbreaker.) You can also use CA.
Yes, if you do, you need to align to the Preview, not the cutout, and make sure you haven’t yet moved the cut in any way.
How to Add something you Forgot into an Open File. 🤔
Yes, you can add text in Inkscape - convert the text to outlines/curves before you engrave it. Inkscape Text to Outlines
This is interesting because I have been doing this since I saw it here on the forum. However, yesterday I had some text in the file that was just a note to self so I didn’t convert it. I got the usual warning when I set up the file in the GFUI but ignored it and proceeded to print the file and the text printed too!
Well, the warning about it always said something like, not yet, we’re working on it. Maybe they worked on it? Now they just have to work on removing the warning. This will suck if they don’t allow you to ignore text by color for the reason you pointed out.
It wasn’t a different color.