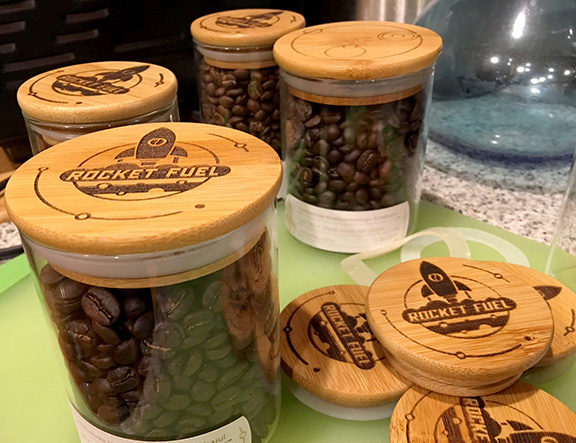
I wanted to engrave some designs on some kitchen jars I plan to hand out this Christmas, but I was having a heckuva time getting the designs to print right. The bamboo lids I wanted to print on are about .8” tall and I was getting pretty inconsistent results (to say the least). It turns out, this project is complicated by a few factors. Firstly, the camera registration is not yet reliable. Secondly, the laser can’t focus well on material that is thicker (taller) than .5”. Thirdly, placing a radial design on a circular object requires nearly perfect precision. What to do? Fret not fellow forger.
Thanks to earlier posts on how to print taller objects, I was able to construct the following approach.
Getting Started
1)Prepare your SVG file. Aside from your lovely design you’ll want to add a few handy registration marks to make printing more predictable.
A) Create a circle the diameter of your lid top. Add center lines on the vertical and horizontal so it looks like a giant target reticle. This element will be scribed/cut (speed 500, power 10) onto a cardboard jig plate that you will make later. The vertical and horizontal lines on the outer ring will help you align your target in a future step.
B) Create a circle the diameter of the lid plug. These lids have a rubber gasket to keep contents sealed. The plug is the part that will set into the cardboard jig plate. Make your hole a tiny bit bigger than it needs to be (like 1% bigger, not much more). You’l be taking lids in and out of the jig so a minute amount of wiggle room is ok in this case. I made this cut line red so its easy to see.

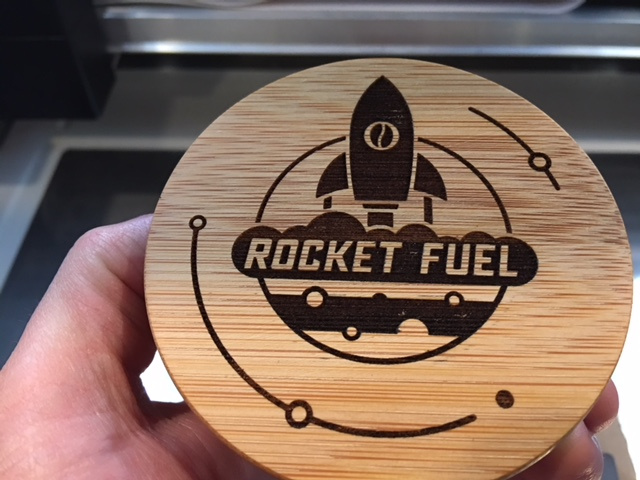
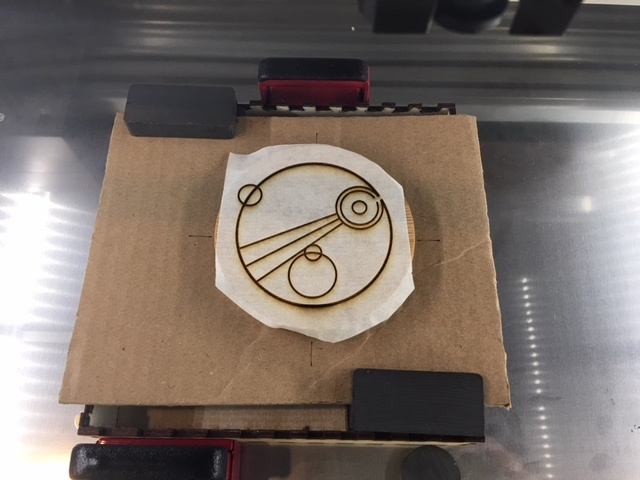
[Note: The grey outer lines are the register marks and the outer dimension of the lid. The red circle outline is the cut mark to fit the lid plug. The blue glyph in the middle is the design (Gallifreyan for coffee).]
Make a new crumb tray
2) For this job, you’ll replace the metal tray currently in your glowforge with something you build. This new tray will be hollow and secured to the GF with a bunch of magnets. Harbor Freight carries all manner of cheap and powerful magnets. ($10 is enough to get you a few bar magnets and some little rare earth magnets that come in a plastic vial). To lock down the box, I put magnets inside the box on opposite corners AND outside of the box all the way around. I also put a piece of scrap cardboard in the bottom of the crumb tray to take the hit from any overburn in future steps.
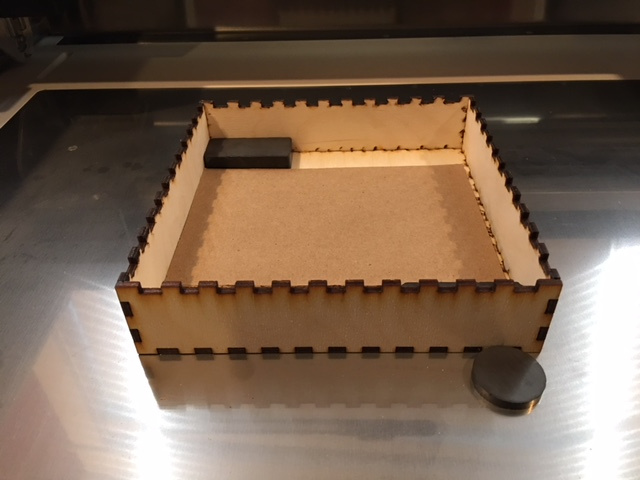
I used http://www.makercase.com/ to generate a custom finger joined box 6” x 6” x 1.367” tall (the height of my crumb tray). It generates a full cube so I just deleted the top from the SVG. I could have sped up the box cutting a bit by removing the top finger joins but opted to spend time elsewhere (like writing up these steps).
Make your replaceable jig plate
3) Cut down a piece of cardboard to 7”x7” (I use Amazon shipping boxes, which are about .115” thick) with a craft knife and place the cardboard on top of your new crumb tray. I used magnets to lock mine down. Its fastest. BUT you could laser cut the cardboard to puzzle fit with the top of the crumb tray. You’d need to adjust height measurements to get to a proper zero height but I thought about it. The problem is every time you go to print a project you’ll be replacing the jig plate so I’m going with magnets.
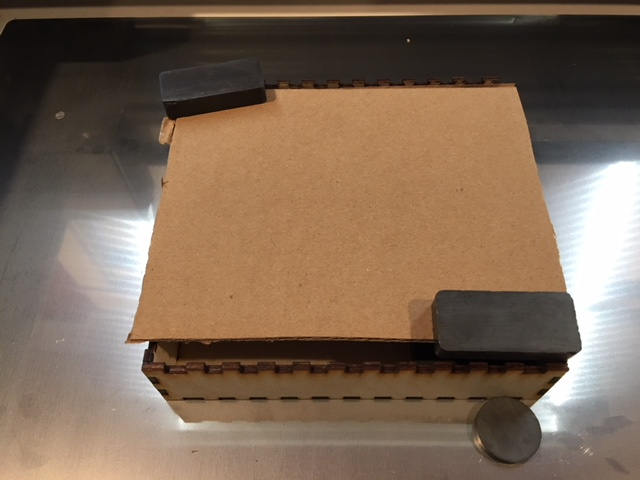
(Note: I cut this piece of cardboard to about 6”x 6” which is why you see into the box at the bottom. The cardboard really is flush with the box.)
Make with the lasering!
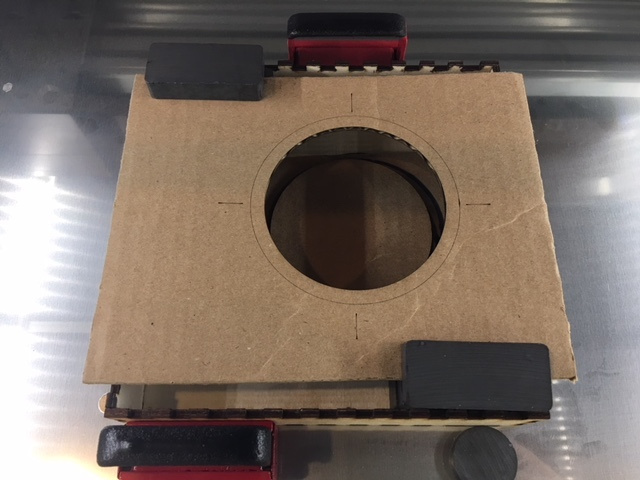
4) Load up your SVG into the GF GUI. Ignore your design for now. Your first pass will be scoring and cutting the jig plate. Position your art, set custom material to a height of the cardboard (.115”), set the outer circle and register marks to cut at max speed (500) / power 10 (or whatever value you have dialed in for scoring but not cutting through) and set the inner cut ring to cut. I use full power at 350 speed. This operation takes about 19 seconds to run.

[Note: more magnets = more awesome]
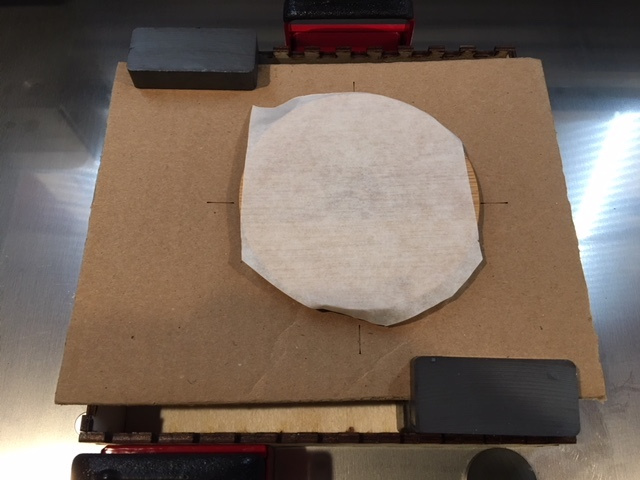
5)Prepare your lid (I sand mine, tack cloth it, and afix a sheet of laser contact paper) and set it in your jig plate. Rotate so the grain goes in the direction you want (thank you horizontal tick marks).
Modify your print settings in the GF GUI and fire away
6) Enter your custom “uncertified material” thickness. Remember, 0” marks the top of the stock crumb tray. Add the thickness of the cardboard and the height of the lid’s lip to get your custom material height. .354” was the magic number this time around. This number can vary depending on how much prep sanding you had to do on each lid.
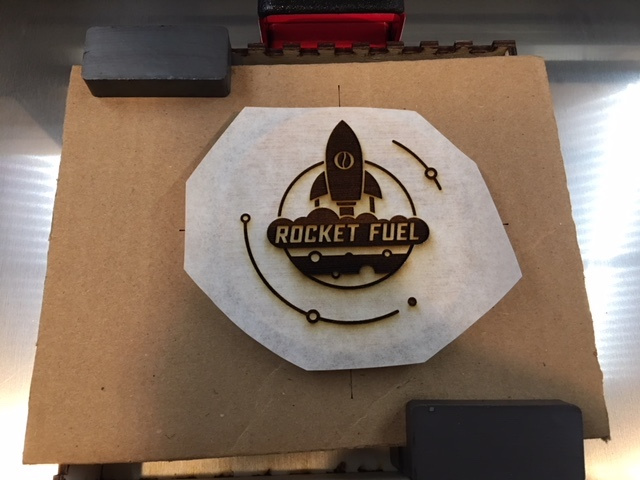
7)Select “Ignore” for the previously cut registration elements and activate your new design elements. Also, ignore what the camera shows. Some day the camera will just work, I have faith. But right now the camera is a bearer of non-truths. Fortunately, the machine knows exactly where those cut lines went down so as long as you don’t move your elements around in the GF GUI, your design will lock down exactly where its supposed to be. Just enter your engrave settings (or however you plan to print your design) as per usual. I was shooting speed 700, power 55 at a focus depth of .25 and 340 LPI. I’m very happy with the results!

 Not as classy as making a custom box.