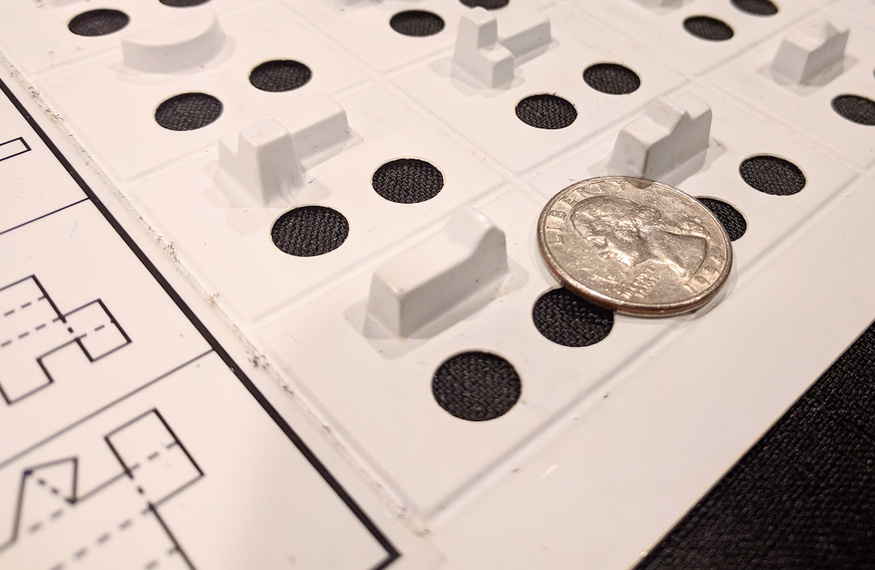
My wife administers a spatial reasoning aptitude test in the course of her work. The test is a large plastic panel covered in 120 vacuum-molded simple shapes. It is about 30 years out of print, and the plastic is starting to crack due to normal wear and tear. Unfortunately there are no new copies available. To safeguard this important item I would like to figure out how to make the test shapes on my Glowforge, so I can recreate the panel.
Some shapes are really simple, like cookie-cutter outlines. Others have inclines and curves. Because the original item is vacuum-formed, there are no overhangs to worry about, at least.
Most of those could be mimicked by cutting out small cubes or rectangles and gluing them together. I say “mimicked” because, as it sounds like you know, the actual shapes have a draft angle on them to aid in releasing the pattern from the vacuum-formed sheet. Getting this draft angle will be difficult.
Many of the pieces with angles can be cut from the side.
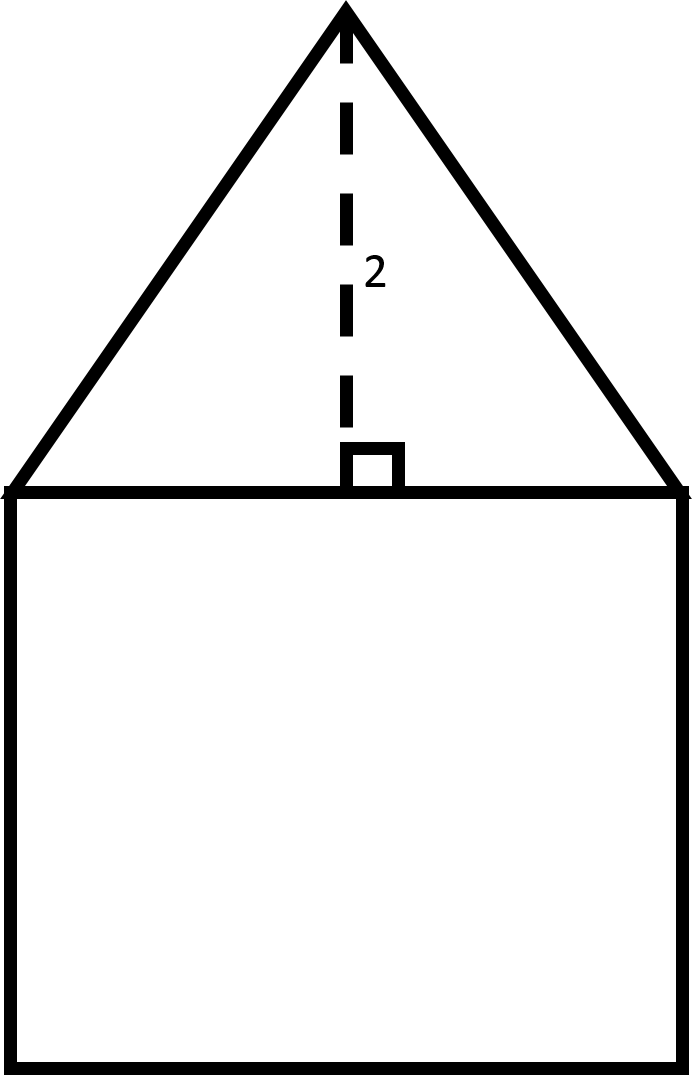
The shape shown in the top-right will pose a little more of a challenge, and as I bet you’ve anticipated, the pyramid is the feature that increases the difficulty of this shape. You can probably use the Glowforge to make it though… or, mimic it, at least. If I was tasked with making that shape, and I could only use a Glowforge, I would probably cut it in three pieces. The two ends can just be cut out as two small cubes/rectangles. The middle part could possibly be cut out in two steps. The first step would be to cut out the block with a pointed end, then take that block, turn it 90º, and do another angled cut to make the point/wedge into a pyramid. Glue the three pieces together and you have the basic shape (except without the draft).
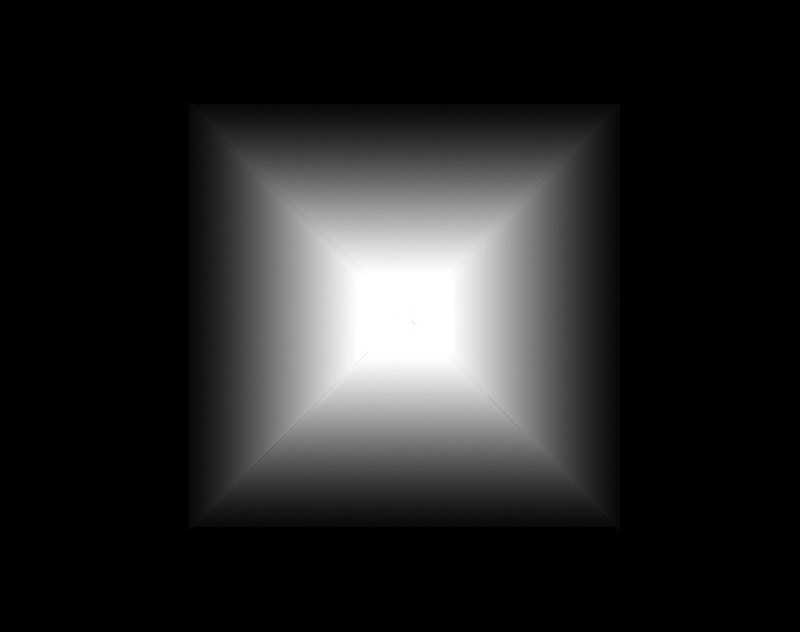
Another thing you could try is to use 3D engraving to shape the pyramid. You’d start with an image like this one…
You could, probably, engrave this image out of a thick piece of material and then cut a rectangle of the correct size to cut it out.
If that worked, you could use a similar method to 3D engrave the other shapes with wedges/angles.
These would probably be best-made with an actual 3D printer. That way making the angles and stuff would be straightforward and you could have the draft angle as well.
Another option would be to hand-file down some dense foam or something.
This would be pretty easy to make. The shapes there can easily be cut on a glowforge and then vacuformed under whatever material. All of those shapes seem to be simple 2d shapes except the one in the bottom right, but that shouldnt be too difficult to accomplish in 3 pieces.
I think the easiest way to accomplish the top right piece would be to make it out of 3 pieces, the center piece being the exact width of the bottom of the cone. cut it out, then turn it on its side and run the cut again to get the pyramidal top.
After that, glue it to the 2 side pieces and youre set.
The rest of the pieces can all be combinations of 2d pieces as well and would end up incredibly accurate. The trick would be to make sure you keep the pieces sized based on the thickness of the material you are using. It looks like 1/4" might be best for this
Pretty much that, except you can do 2 extra cuts around the original obelisk shaped piece to make the whole a rectangle that can hold it for rotation.
OR use your method and just cut that rectangular piece into 2 square pieces, but I would opt for the first method I mentioned as to not have to move designs around on the bed and it end up being misaligned. (cough cough numeric positioning)
It looks like some decent Glowforge suggestions have been made, and it may be a good tool for the job.
Other tools might also be good for the project at hand. You might consider creating a mold from the existing shapes and pour new, or you might do a 3d scan and recreate on a 3d printer.
Not on a GF, but are the shapes empty and accessible from the bottom? If so, you could fill with silicon and then either use that or vacuform over top of the newly molded shapes.
They are empty underneath, but the shapes are small enough and the material thick enough that copies made this way would not be very true to the originals. I have thought about trying to make silicone molds by putting compound over the top, though.
It is a test, so the cut-n-fold diagram matches one out of the four shapes in each row.
I’ll probably try the depth map method on a test shape and see how it comes out. If it doesn’t work well maybe it’s a good excuse to buy a 3d printer, but the rough surface finish still might be an issue, I dunno.