Thanks for the help, everyone - that’s right! Your Glowforge bed can accommodate materials measuring 18 x 20.4”. Your Glowforge has a maximum printable area of approximately 11″ (279 mm) deep and 19.5″ (495 mm) wide, and it’s reduced somewhat when the laser operates at high speed, as it can take space for the laser to decelerate.
This means not all of the bed is displayed, or available to be printed on, so there will always be about an inch of space on the left. This material can be reused as scrap later for small pieces. For example, a lot of customers use small pieces of scrap to print these pins available in the free laser design section: Honeycomb bed holdown pins
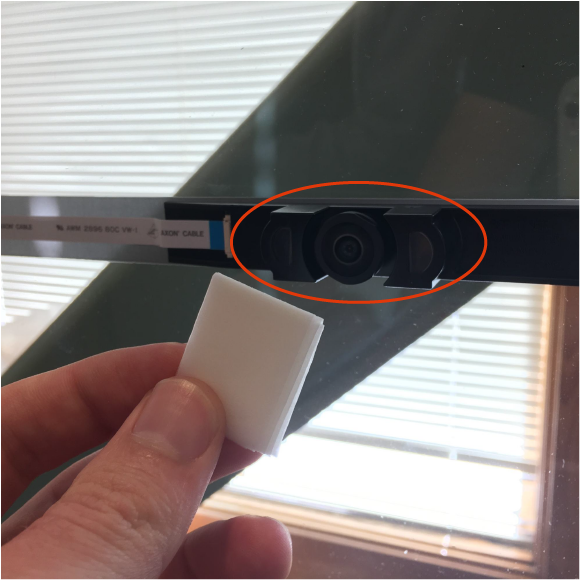
Regarding your camera, could you please do the following for me?
-
Turn off your Glowforge.
-
Using a Zeiss wipe, gently wipe the lens of the wide-angle camera on the unit’s lid.
-
Take a photo of the camera.
-
Place a piece of Proofgrade material in the bed with the QR code facing up.
-
Close the lid and turn your Glowforge back on.
-
Open any design in the Glowforge app. Wait for the lid image to update in the workspace.
Reply with the photo you took in step 3, along with a screenshot of what you see in the app after cleaning the camera lens. Please include the rulers, the visible QR code, and as much of the app as possible:
- Mac: Press Shift-Command-4 and click and drag a box around your image. You’ll find the screenshot file saved on your desktop
- Windows: Click on the Start Menu and search for the Snipping Tool. Open the Snipping Tool > New then click and drag a box around your image. Click the Save icon and name and save your file
If you’d rather not share the pictures in the forum, you can email them to us at support@glowforge.com.