Goodmorning everyone
First of all I apologize if I make mistakes in English. I am writing from Italy and I need your help
I have been using my glowforge basic for almost 3 years but I have only now decided to focus on photo engravings on wood.
I used a sheet of Baltic birch wood, 0.039 ‘’ (3mm) thick.
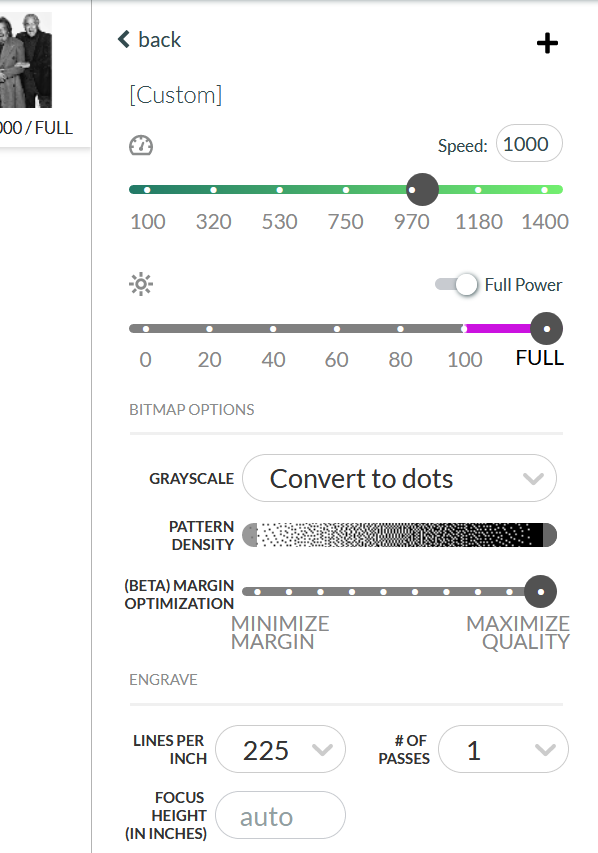
The parameters I used for the engraving are these:
Speed: 1400
Power: 40
Grayscale: convert to dots
Pattern density: 0-100.
Lines per inch: 225 (Lines per cm: 90).
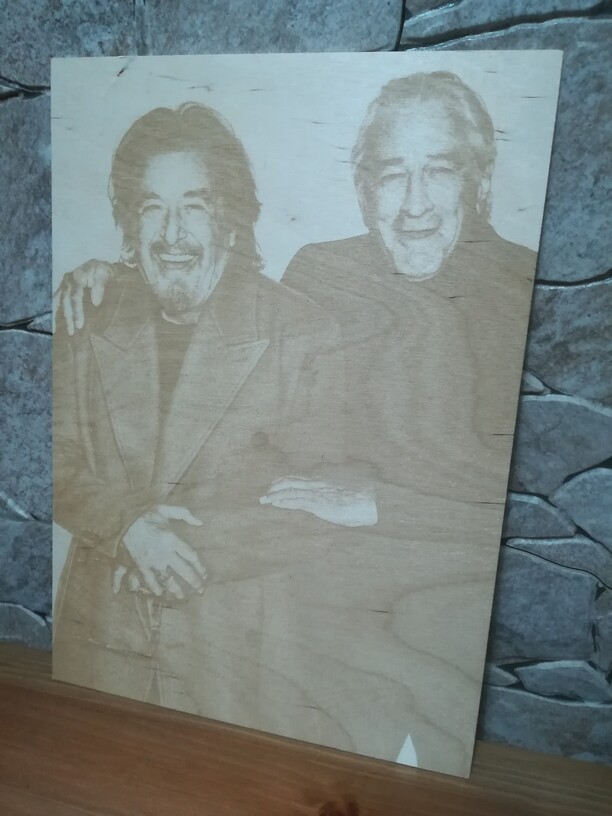
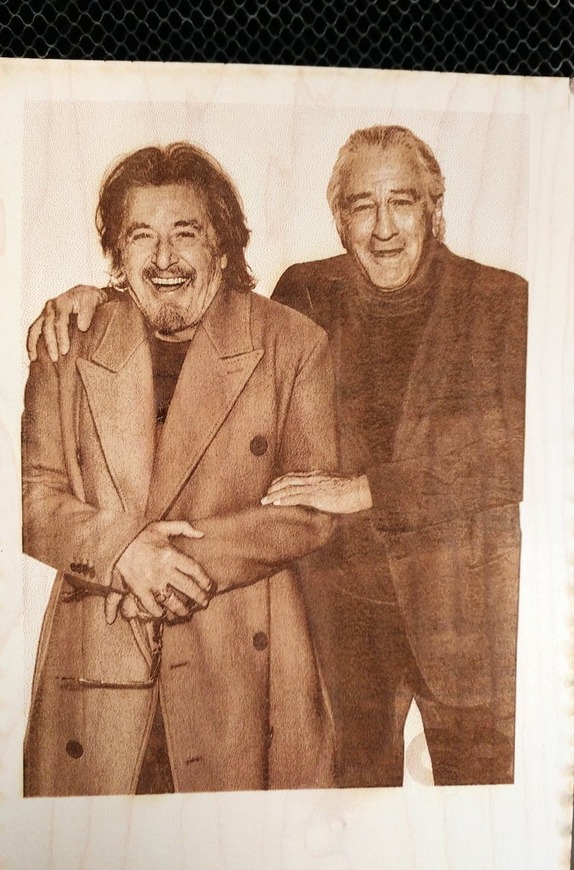
I am attaching the image I wanted to engrave and the result I got.
As you can see the engraving is very light, I would like to have it darker and with more contrast.
Do you have any suggestions for engraving parameters?
Do you think poplar wood is better?
thanks in advance for the time you will devote to me.
If you like, follow me on Instagram, I would be very happy
My name is: personalizzami.laser
First off, you have started with excellent subject matter! Next, use a photo editor to lighten the lightest parts and darken the darkest parts (just a bit). Then, up the overall contrast little by little so you don’t “blow by” the sweet spot of just-right.
Test various settings for depth of engrave “color” using just the part of the photo with the faces. Once you are satisfied, try a full print.
Another thing comes to mind: do a light engrave without upping the contrast, load a duplicate file with higher contrast and engrave again. It’s sort of like stacking astronomy photos to show details that would otherwise be washed out.
Looking forward to your final effort(s). You will probably make several that are wonderful but different.
Dot dithering is the way to go there. But every species of wood is different, and even a few cm apart can be quite different. If you want reliably dark, thin cork glued to your birch is a good option. Otherwise, going hot for deep holes in the dots through masking paper and painting the dots full with black paint before removing the masking (than can be difficult with all the holes) will get a nice black and the dithering will provide the shading.
One of our forum members, @jbmanning5, has created a set of Photoshop actions that work great for this purpose, specifically for the Glowforge. I believe you can find the link to them in his profile.
I’d slow down your speed and up the power. I did a quick test that looks pretty good, but it’s a bit too dark when viewed in person. So I’d either lower the power to 100 or I’d move the pattern density for black a little more to the left. (Hope that makes sense!)
thank you very much for having done an engraving test too. Your result is definitely better than mine I’ll start with the parameters you used and try to improve the result even more. I hope to give you good news.
curiosity: what kind of wood did you use for the test?
thanks again for your availability.
David
HELLO THERE.
Hope this helps. ive tried so many videos, so many different settings but this is what works good and best for me.
watch the whole video .