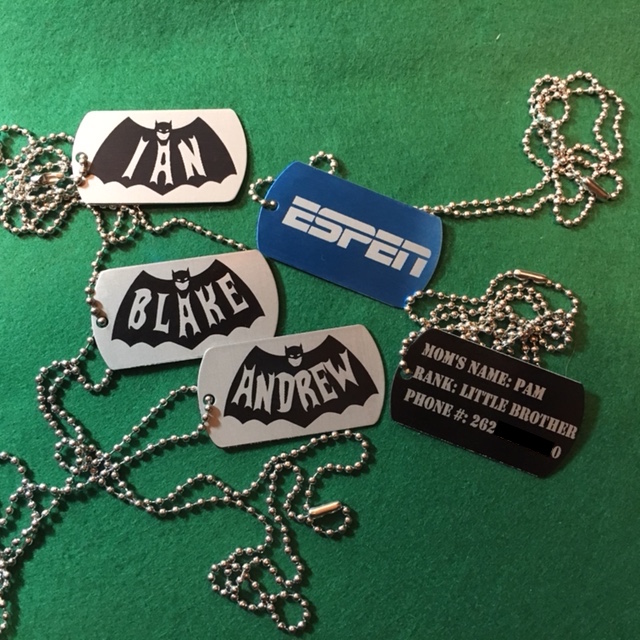
Here are some little Halloween extras that I made for the kids of family & friends. A few dog tags that I think the boys will like. The girls are very girly at this point, so I’ll have to think of something else for them.
I got the tags online @ theringlord.com. As long as you can get your alignment right, anodized aluminum probably THE most forgiving material to engrave on.
I set this file up with a number of different colors, all stacked on top of each other in the file. Separate colors for the outline shape of the tag and a color for each side. I put cardstock down with magnets and then cut just the outline of the tag, ignoring the other colors. Then I could just place the tags in the cut outs and turn off the outside cut line then alternate turning on and off the other colors as an engrave for each side. Much easier than trying to use nudge alignment. I’m using paper or cardboard templates for just about all of my pre-cut items. Just make sure to adjust the material thickness to match each operation.
Lots of Holiday presents will be lasered this year. Halloween is just the beginning.
Having trouble getting those crisp edges and lines, seem to be getting a bit of “bleed” on smaller details. Any tips on the settings you used to get such great quality?
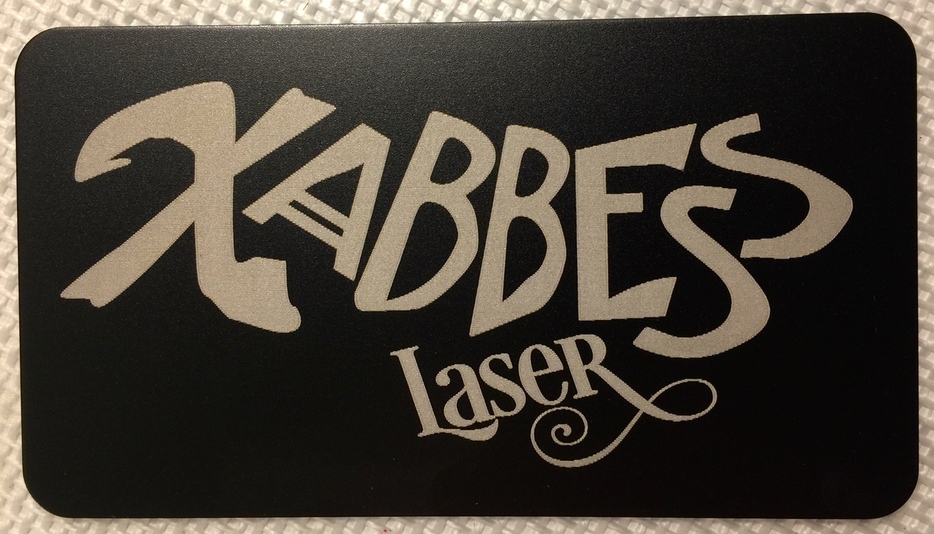
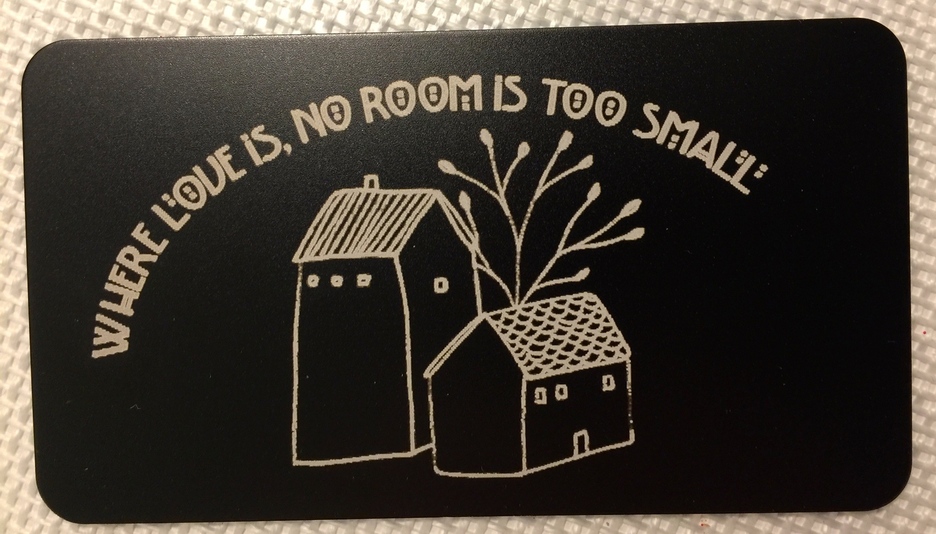
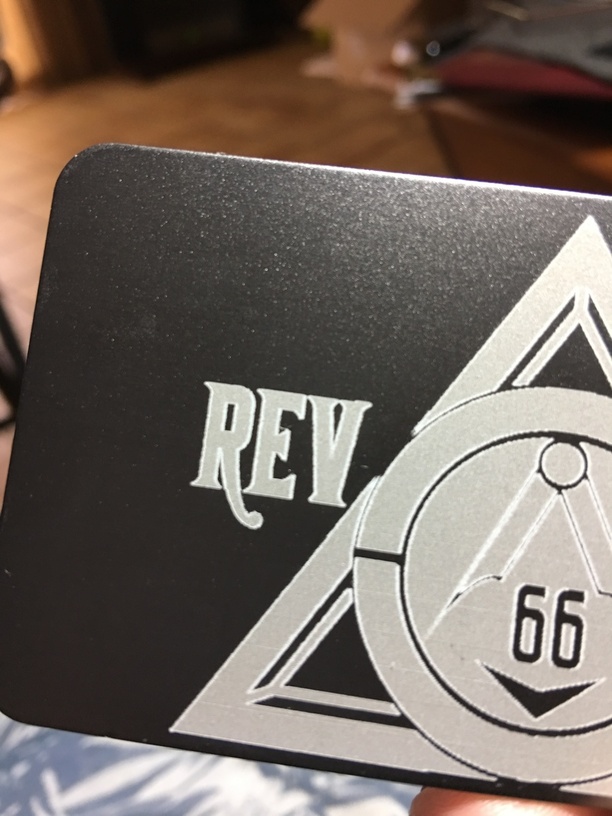
I’m not Bill, so hope you don’t mind me responding to your question. I recently did this ‘business card’ and I think it came out very cleanly. I have noticed that not all anodized aluminum is created equal. These cards are wonderful, but I have also engraved on some anodized aluminum bracelet blanks and they don’t come out looking nearly as beautiful.
No problem with you responding. The collaboration of ideas, tips, and tricks is what I most enjoy about this forum.
Editorial comment - Can’t wait for all deliveries to be done so the bulk of comments are about the best way to create.
@kyle Xabess is correct. Some blanks etch better. I’ll add that the type of graphic makes a difference also. Mine were vector graphics, I’ve gotten lesser results with bitmaps or traces, but part of that may be due to my file prep of them. If you have the option, use vectors and convert to engrave.
I’ve mentioned that here before too. We deal a lot with anodized aluminum, so I speak with some experience. There are different types of anodizing processes, that give very different results.
Tags like what bill got are done with a different process than what we do. Side by side you can visually see it. While I’ve only etched on our stuff, I have no problem seeing it would take very different setting between the different processes.
@xabess Thank you! The issue Im getting is like it sits longer on the turn around, its like a bright white outline on the edges of the graphics which bleeds into finer details. I was using vector graphics saved out as svg’s since its not taking eps’s Ill play around today with some other graphics and see how they come out.
I’ll try and grab some pictures too. Again thank you!
Are you doing a score outline instead of an engrave (which is back and forth passes like an inkjet printer). Running an outline score has left some burnout spots when the laser makes the turn. Maybe that is what you are experiencing?
If that is the case, you can try to convert your file to run as an engrave in the GFUI. It will significantly increase run time though. Hope this helps.
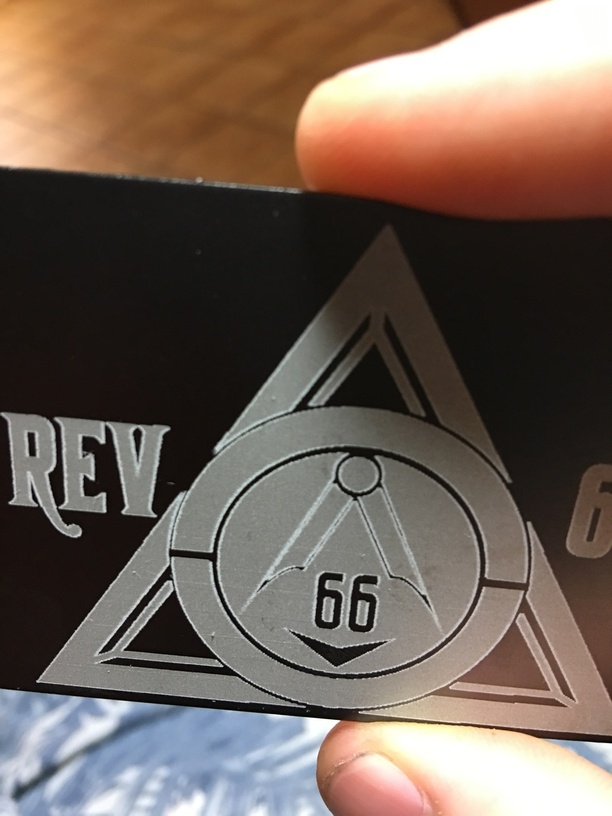
You’ll see here the “blur” I’m talking about. I reduced it some by lowering the power and doing 2 passes instead of one at full blast. But it’s still hanging in there. It kills the finder details, it tried same image on leather and draftboard at same size and it comes out great.
Oops, sorry, I read this as just turn, not turn around as in reverse.
I’m just guessing, but maybe one of these will be a good option to try. The blur seems to be in the center fine lines. The rest looks really great to me. The quick start/stop of the laser firing is causing the loss on the fine black line. Maybe if you rotated the graphic 45 degrees there would be an ever so slightly longer period of the laser being off, and less noticeable removal of the coating.
The other option is to slightly tweak the vector image to compensate. Make the space between the spots being lost just a bit larger. Not the best option since you said the file works great with other materials.
I have done some practice engraving on anodized aluminum bracelet blanks and the anodization on them, in my opinion, is not very good at all in comparison to these business cards.
I bought these on Amazon. They come in many colors, but they are sort of expensive. Way too expensive in my opinion to use as actual business cards. They came 10 for $20. The finish on them though, is wonderful. I wish I could get other sizes.