Had to use that handy guide to figure out how to cut without the crumb tray, and the foam shrinks a little on the corners (expected)
But it’s working out!
Still a lot more work to be done, though.
Had to use that handy guide to figure out how to cut without the crumb tray, and the foam shrinks a little on the corners (expected)
But it’s working out!
Still a lot more work to be done, though.
Very nice.
What foam are you using and what is your source?
Wow, that’s pretty awesome! I hope you post and image of the finished costume (please). 
That looks amazing. Did you draw everything out in illustartor/inkscape? Or did u use a pep file?
This is looking awesome!
How thick was the EVA foam that you needed to remove the crumb tray? Did you put something between the metal bottom of the unit and the foam you were cutting?
My user manual says “If the crumb tray is removed, use extreme caution to ensure that the laser only strikes laser-compatible material, and does not touch the metal bottom of the unit which could cause a reflection and damage the unit.”
I was under the impression that meant not to cut through things without the crumb tray (or some other layer) in place. I’m guessing your 'forge is still working fine, though? Does cutting on top of the metal bottom surface just a tiny chance of causing problems that they have to mention in case, or am I missing something here?
I’m using the cheap 1/2” floor mat foam.
https://www.amazon.com/dp/B013A4ASRW/ref=cm_sw_r_cp_api_gZZ8zbQPQ1HKK
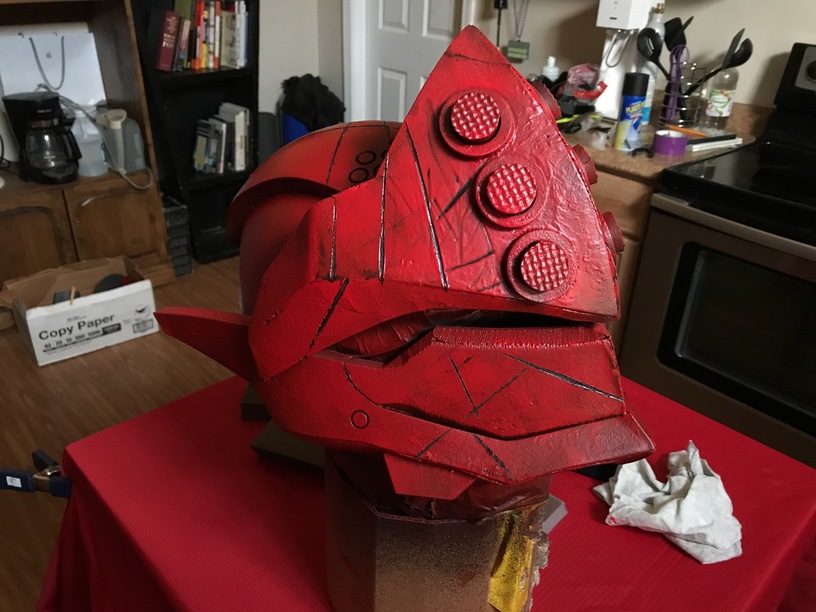
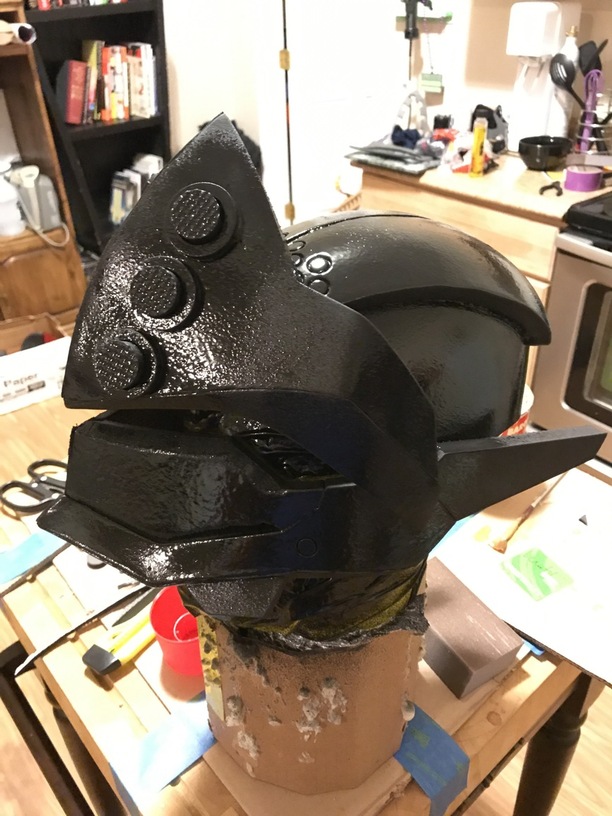
Currently working on some under coats and battle damage.
(This is my first time doing this ever, so I’m improvising a lot!)
I got it off of Etsy from this guy:

Since he posted a video showing the process, I figured it would be a good one to try as my first?
I’ve seen a few of his videos. He’s a really good source to learn from. If you get a chance check out evil Ted youtube videos. He makes amazing things and breaks it down to simple methods.
Looks good! I am using EVA foam too, but didn’t have to remove the crumb tray. There is a noticeable thickness irregularity in the foam pieces I have in the same package. What cutting settings are you using? When experimenting, I settled on a light cut, multipass approach. I think I do 10 passes of 500 speed at 10 power, then another 8 passes, 500 speed at 30 power. The result takes awhile, but it cuts cleanly without too much melting.
When I tried multiple passes, I noticed a “stepped” quality to the edges that I didn’t like too much.
I’ll try that out because I did find the melting to be a little more extreme than I anticipated.
You have to raise the material up to at least the level the crumb tray is normally at… I just stacked a bunch of corrugated cardboard underneath and measured the total depth of the cardboard, and foam, and subtracted the height of the crumb tray… I measured it with a depth gauge (the depth of the total height on the side minus the depth of the honeycomb against those raised sidewalls on the tray.) but can’t remember the actual measurement. Someone might have posted that number elsewhere on the forum.
Most of us are running between 1.37 to 1.4"
Nice, thanks.
I’m also doing my first foam project - a steampunk hat. The craft store foam only comes in 9 x 12 sheets so I’m using a yoga mat for the structure. I’m not convinced the brim will hold its shape but we’ll see.
How well does that foam take a shape? From the picture it looks lit it does pretty well.
To smooth out the surface I bought a cheap iron at Goodwill and ironed the surface with a piece of aluminum foil between the iron and foam. If you get it too hot and the foam sticks to the foil don’t try and force it off. Let it cool for a bit and the foil will release.
No Glowforge cuts for me. I’m using a sugical steel scalpel and son scissors. With the forge I would be able to skip printing the templates and get cleaner cuts.
Good to know foam cuts well. I’ll be using this to make detail pieces for contact-safe LARP weapons.
Yep, sounds about right
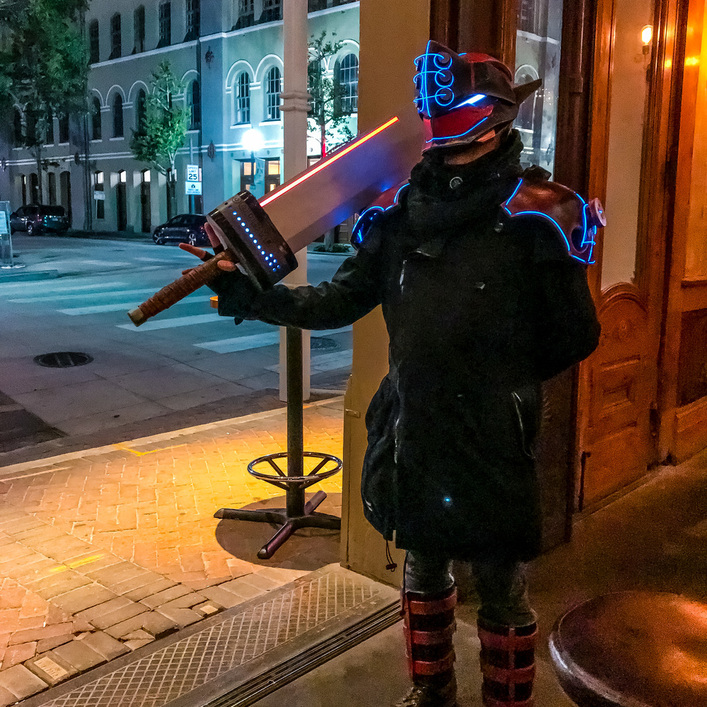
Mostly done. Done enough to wear in time for Halloween! My sword hilt wasn’t fully complete, but some gorilla tape at least made it functional.
If I’d had more battery-pack/inverters, I’d have loved to wire up the shin guards, but alas, not enough.

That is too cool! I’d love to play around with that EL wire.
My next project will opt for wired LEDs and some form of controller. EL wire is fun (and cheap!) but I want to be brighter next time. (Also: Blue is a very dim variety of EL wire, to be fair.)
Adafruit has some that’s twice as bright as standard but LED lights will be even brighter. I like the smooth light of el-wire for some things vs the point lights of LEDs.