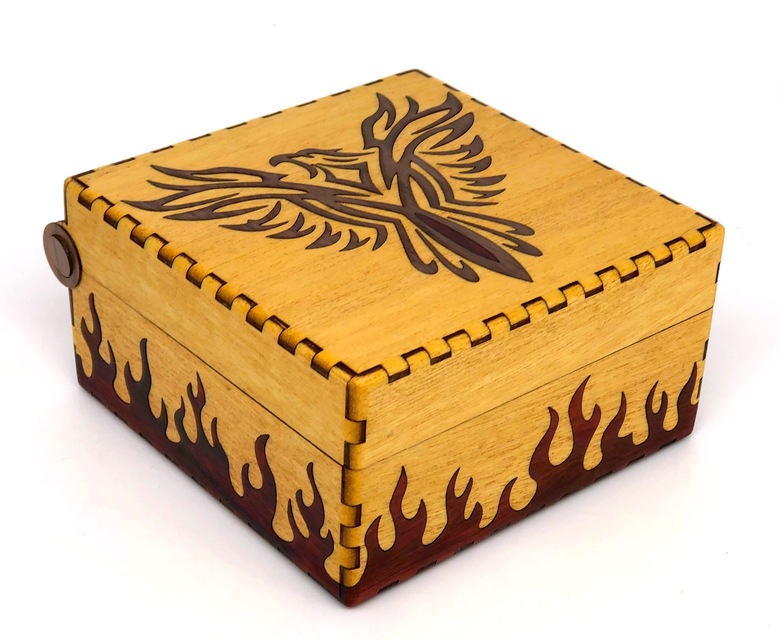
Okay, I finally worked up enough courage to try a hardwood box, thanks to a peer challenge over on FB. And now I know why they call it HARD! This took me forever, and I made 573 mistakes, but I did it, and I’m pretty proud!
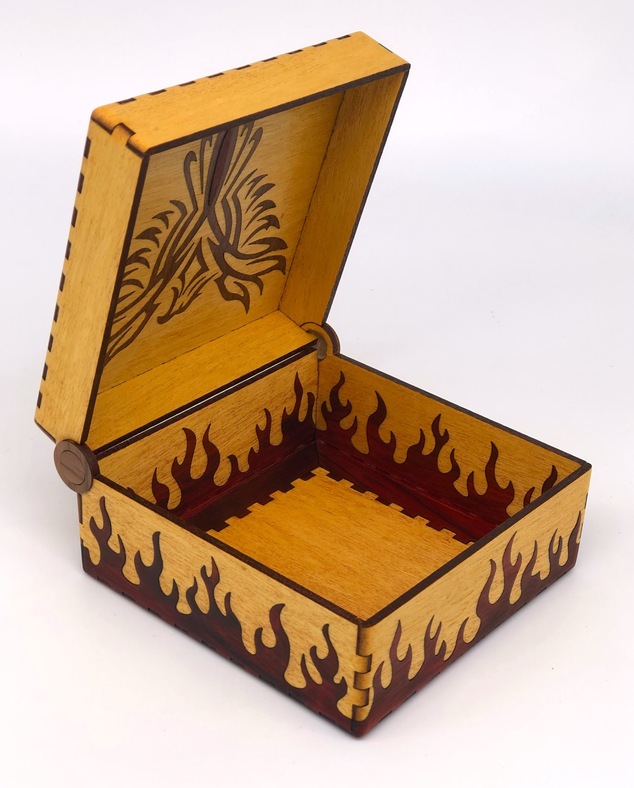
It’s made of yellowheart, redheart, and PG walnut hardwood, sanded and finished with tung oil. The construction of the box was dictated by the contest (everyone used the same design) so the fingers are wider and have a looser kerf than my usual stuff, so I got to do some gluing and clamping. I also had to adapt the joint, since the hardwood alone wouldn’t have been strong enough to survive the opening and closing of the box. I used acrylic for the inside circle part of the hinge, and glued veneer onto the outside to strengthen the hardwood.
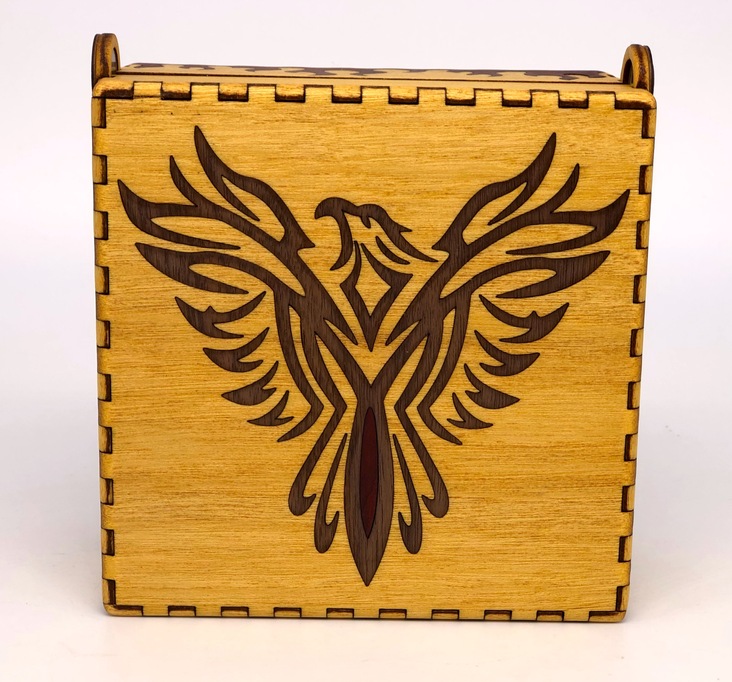
Due to some of the aforementioned mistakes I didn’t have enough redheart to do the phoenix inlay, so I used PG walnut hardwood and put some redheart in his tail to try to pull it together a bit.
Thanks, that’s actually one of my favorite parts of it, and what will probably push me to do more hardwood stuff in the future.
Another cool thing is that the redheart is slightly thicker than the yellowheart, and since I was sanding by hand, rather than flattening out it kind of just rounded, so the flames have a tiny bit of a 3D effect that doesn’t show in the photos but is really nice in real life.
That’s actually a pretty cool idea. You didn’t plan that? Happy accident if not.
I bet someone who hates sanding a little less than me could take that technique and really run with it.
I cannot find even one. The solution to having the fingers a tad short is genius. Fingers on the end grain is easy but small fingers on the side grain can be tricky. And your solution for keeping fingers out of the fire also amazing.
I was greatly impressed originally with that style of hinge, but much less so presently. By making the center of rotation align with the box opening it makes that connection very weak and I have even gone so extreme to save the box as to build in a bamboo skewer to beef up the connection.
If I ever do that sort of hinge again I would increase the height of the back wall flipping the outer part to the lid so the whole diameter of that inner piece is in that back wall. You only get 90 degrees of turn that way but it is a lot stronger. The veneer is a nice trick too.
I would have thunk that by breaking up the intarsia design you could have made more of the parts from the redheart scraps.
In any case that would be a fabulous design to display under UV,
Your inlaid box looks great. I have made several and they keep getting better and better. Mine are just trays that I keep junk grouped together on my desk.
That is why you always use a sanding block!!! Heh heh we had a shop teacher who would go ballistic on you if he caught you sanding with a folded piece of sandpaper & no block. If you really want to blank something down perfectly true, glue the paper to the block. That way it can’t undercut the softer material. Nice outcome on the inlays for sure.
There are times I want to do that and a lot of scraps end up with a sandpaper coating, but I also wrap sponges with sand paper because I want that rounded edge.
Right you are @rbtdanforth. Good to know the techniques, and some times the effect you get is a happy accident. Love trying things and noting what happened for future reference.

 Great work.
