Introducing Snapmark (September 2018)

I’ve read through posts trying to figure it out. But I am taking the example svg file with no changes and still can’t get it to run. The original file can’t be wrong can it?

1 Like

The original file has the wrong size snapmarks if you open it in Inkscape. I had to adjust them based on numbers I found on the forum.

2 Likes

I don’t use Inkscape, but I know that sizing has been a consistent issue for many. I know too, that the dpi needs to be correct (can’t remember now if it’s 72 or 96). I’m sure before too much longer, someone will give you some very good ideas about your problem.

I’ve tried both adjusting to the correct size in inkscape with both inches as well as millimeters. I’ve
also tried opening it straight from the download folder and into the Glowforge webpage. I might try with firefox next as I’ve been using chrome.

You might want to read through my notes too…I list a bunch of stuff that can keep the marks from reading.

Thanks for the notes Jules. There were a few things I changed, but still nothing. I’ll add the print I’m using and a photo of what my screen looks like but I’ve done the following:

  1. Changed it to Geometric bound boxing and saved it as a plain svg file (new to me!)

  2. Changed the size to exactly W0.332" x H0.405"

  3. Check to make sure the snapmark is on a single path similar to this persons issue

  4. I’ve input a thickness of .01 inches

  5. I’ve cut it on a white paper for high contrast

Here is a picture of my UI

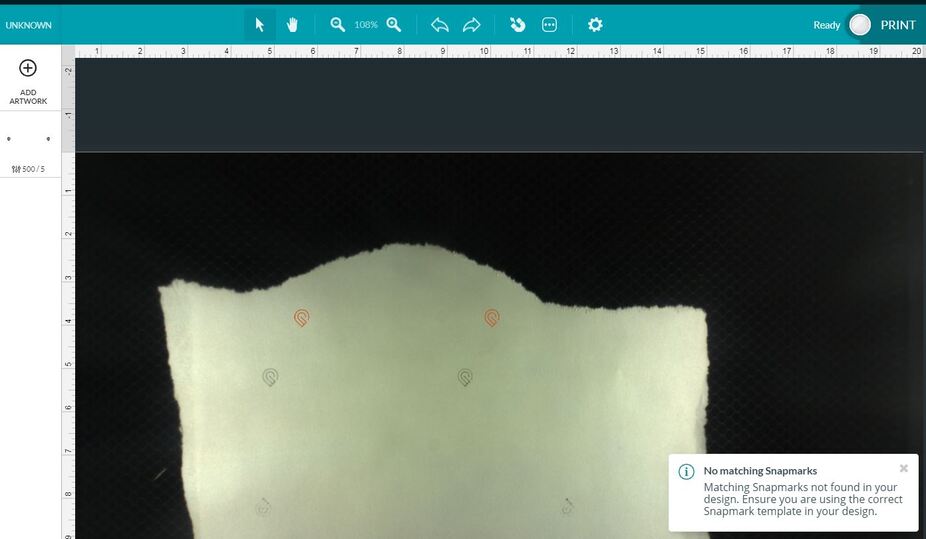
Any help would be amazing.

Snaptestprint|20x12

Grab your calipers and actually measure the size of the marks that were scored on the paper, and measure the distance between them - point to point. See if it matches what’s in the file.

The only thing I can think of is that there might be some resizing going on in the Inkscape SVG export. Different versions of Inkscape can cause slight variances due to the export DPI used. (You want to export it at 96 DPI to keep sizes constant.)

You might also want to just try the original file that you downloaded…bring it into a workspace, score the marks, shift the design…then snap it back into place and score the marks again. Take a screenshot of the results with the rulers showing if it prints so they can see them.

If that isn’t it, Bonny might need to have the team take a look at it.

1 Like

I got my calipers out this morning and everything seems spot on. I clicked export PNG and it says it is exporting at 96 DPI. I also tried downloading the original file without opening it up in inkscape. I even did it on a chromebook that doesn’t have inkscape so I know the file wasn’t coverted in any way. Still nothing. Time to take it to support? @bonny?

1 Like

I’m wondering if the camera just can’t see the marks. I would try a couple of other things before throwing in the towel…first, try a print on a different material…something thicker like a draftboard scrap would be good if you have a piece lying around.

The other thing is to clean the lenses and the little windows on the side of the lens in the head…they might be dirty.

I cleaned all the lenses I could find and cut out the design on proofgrade draftboard with still the same error message. Thanks for all your help though!

Yeah, no problem. Sorry we couldn’t find it but I’m outa ideas. :neutral_face:

Did you clean the camera lens on the bottom of the head?

The DPI you listed won’t be of much help - what version of Inkscape are you using? They had a fundamental shift a couple versions back in the way things are scaled (that broke a lot of files for people).

I cleaned both lenses on the bottom of the head. I am using version 92.3.

1 Like

Hi @jhileman, taking a quick look at the log from your last run, it doesn’t look like the Snapmarks in the template is set to the correct size (it’s opening as 0.322" x 0.393" for me, the template size is W0.332" x H0.405")

1 Like

I tried fixing that and still nothing. I even tried downloading the original template from the website onto a computer without inkscape and still nothing.

Hi All,
I use Coreldraw for my design so maybe this is a path issue but hey. I Downloaded the snapmarks template etc as described and resized to the stated size and locked them in a layer. I’ve attempted to use the snapmarks feature 8 times so far with no luck. I placed my snapmarks from 6" - 12" apart and even tried 3 sets of them in the design in one print! I increased the contrast of the snapmarks.
It scans, says ready for print but doesn’t move the design to the correct location. In one print it started the engrave 6" to the right of the design! I’m obviously missing something here having followed all of the tutorials and instructions. I have cleaned all lenses, restarted the machine and browser app. I’m all out of ideas.
If only we had a zero reference point for the laser head and a XY grid to reference our design to it would be a lot easier.
Do I give up with snapmarks or is it possible to get it to work without burning through $$ of material?
Any help would be appreciated.

@bonny will probably want to have the team take a look at it. (From the description of the 6" variance.)

1 Like

On another note, when it scans for snapmarks for the first time, the head positions itself slightly off center to the bed. If I cancel the print , change the artwork from ignore to engrave fr example and then scan again for snapmarks, the head tracks to the farthest right and grinds itself against the side wall!

Yeah, that’s definitely something we saw on a couple of machines in early testing. I think it’s something they have to fix on their end. Sit tight until you hear from @bonny.

1 Like

Thanks you!

2 Likes