Introducing Snapmark (September 2018)

When I click scan for snapmarks the head doesn’t move anymore, I’ve been using the feature for weeks and its suddenly stopped working even for files that have worked in the past. I’ve restarted the machine a few times and no luck, snapmarks are the proper size in illustrator and everything. I’ve cleaned all the lenses but still no motion from the head. Anyone have experience with this issue?

Hi! Did you cut your jig out by hand or use the GF? I need to engrave a ton of spoons and I have Snapmarks but never used it and I can’t wrap my head around making the jig??

You would cut the jig in the GF, from something like cardboard. Imagine spoon-shaped holes. There is more to it than that, but if you can get your spoons’ outline into a vector, that’s one of the first steps.

4 Likes

There are instructions for how to use the Snapmarks to create a Jig (specifically) here:

3 Likes

I placed the spoons on the cardboard in the Glowforge and took a pic with my phone. I uploaded the pic and created a larger outline of the spoons in my silhouette software and then imported it to CorelDraw to create the snapmark svg. I am sure there are easier ways but this is what I did. Good luck!

1 Like

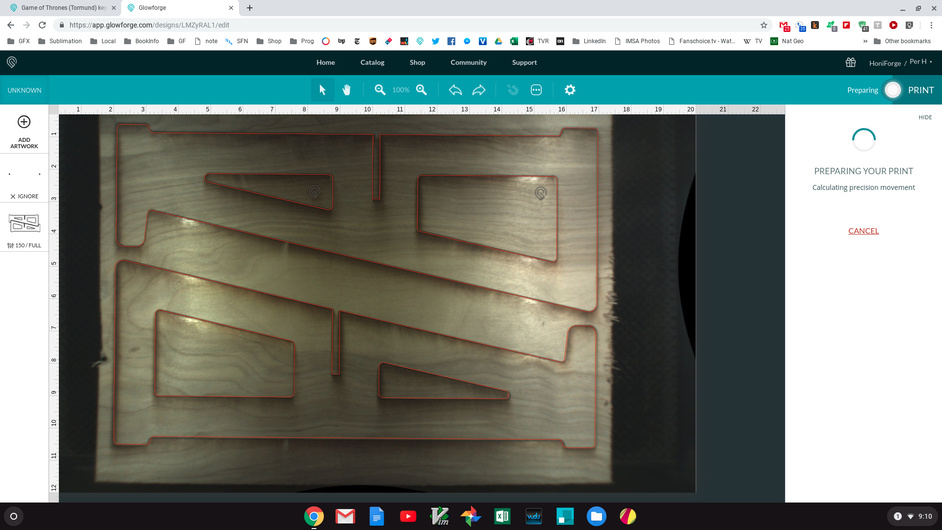
One of the things I’m doing with Snapmarks is adding them to designs that use Baltic Birch or other non-proofgrade (non-PF :slight_smile: ) materials because those are the ones that normally don’t cut all the way through first time until I’ve nailed my settings.

The seconds required for adding the Snapmarks allows me to remove the piece and decide whether to cut again or not, then have a “quick” way to get back into the machine to cut a second time if needed. This has saved plenty of material at this point.

This design was shared here: Yet Another Laptop Stand - 2 Piece - 1/4 Inch/5 mm (I should go back and add Snapmarks to that too!)

10 Likes

Sigh I really want snapmarks. It’s a big part of the pro for me, perfect alignment on larger projects.

Same here, the tool is basically a giant paperweight until this feature launches. Setting up a cut should not take longer than designing something. :unamused:

1 Like

Okay, I want a 500 word essay on hyperbole from you by the end of the day. :grin:

5 Likes

:grin: I expect there are some folks who can’t use their GF for their specific use case without some of the promised features (although I would wonder why they took delivery) the 98% case is likely not that and are finding it useful. The forum is full of examples of that.

I feel bad for the people who took delivery thinking they were weeks or maybe only months away from getting what they need (filter, automagic pass through alignment) and are watching it get dusty and their warranty is trickling away.

That latter issue would have kept me from taking delivery until what I needed on the software is hardware side was released.

2 Likes

How have you been getting by without them? In other words, they are a relatively recent feature…have you not been able to use your Glowforge at all?

I think many people have been able to successfully use the machine without snapmarks. I certainly don’t think it is a paperweight. Jigs are not that hard.

2 Likes

Edited to add - Problem SOLVED!

Can someone please help me figure out why I can’t get snapmarks to work? I posted in problems and support and was sent here for help instead.

I have spent countless hours trying to get snapmarks to work, but have only ever seen the “no matching snapmarks” result. I have tried scoring them (with the pencils)…didn’t work. I am currently trying a print and cut, and I keep getting the same result. I have spent many hours, over the course of many days, trying to get these things to work. I have read the how to. I have read others problems, and answers. I have reread the how to. I just can’t get it to work. What am I doing wrong?
This is the file I’ve been working with all day today, with no luck. I have printed this on my home computer (with added graphics), and now I’m trying to cut it, but it’s just not working. I’ve checked the size and made sure they are the correct measurements.

The laser head hovers over them and scans, and then I get the no matching snapmarks.
And I don’t know why I can’t get the file uploaded…
… apparently the file did upload but I can’t even see it.

test%20mermaid%20earring%20card

Edited to add that I cleaned the camera and lenses so that’s not the problem…and tag @bonny …and add I’m using a Mac, with chrome.

1 Like

Okay James, I’ll go with you on that, print and cut is just about impossible without snap marks but that’s the only thing I’ve run into.
I actually prefer using the pass through with out them as my setup time it’s much quicker.

1 Like

The only thing I can think of is…are you positive that your snap marks are exactly the correct size? Have you tried re-using the exact snapmarks as were provided to us by Glowforge? In the beginning, I found out after some trial and error that mine weren’t quite exact. Just a thought.

1 Like

I have checked and re-checked. They didn’t load into my program the right size, so I resized them to .332 x .405. Oh, and I am using Make The Cut software.

Edited to add that they load into Make The Cut as .3583 x .4208, which is weird, because this is the first file (ever!) to not load the right size.

Glowforge markets the device as if pass-trough works without manual side indexing. That may explain why many took delivery . A new customer is not reading the community board. They are reading the Glowforge marketing page and believing what they see. What do you see in this image?

I see a piece of material too large to fit into the machine without the use of the pass-through slots, in what looks to be the middle of a second round of cutting and /or engraving a a part that while skinny, appears to be longer than 24 inches. I do not see any sign of a side index or indexing pin being used,

2 Likes

I see several hours and many linear feet of material spent trying to dial in a non-Snapmark pass-through workflow. :stuck_out_tongue_winking_eye:

/experience

1 Like

@shronimo, I’m not familiar with MTC, and I can’t recall anyone who was using MTC software with these during testing. It’s likely the source of the errors that you’re seeing. (Each program has it’s own way of interpreting an SVG file when it is imported, based on the import DPI settings for that program. So it could very well be importing the Snapmarks at the wrong size.)

What is equally important though, is to make sure that when you export the file to SVG, (or save it, or whatever you do in MTC), that you have the export settings at 96 DPI. That is what the Glowforge interface expects to see, and if you export your file at 96 DPI, the marks should not be resized.

(First thing though is to always design your files on a 20" x 12" artboard. It’s a workaround to fix the incorrect sizing issues that pop up from all of the different design software.)

So your options are to:

  1. Design on a 20" x 12" artboard. (Always.)
  2. Export the correctly sized Snapmarks (you might need to resize them in MTC first) at 96 DPI.
  3. If you can set the import DPI on your MTC software, set it to 96 DPI as well, and you won’t have to resize the marks in the program.

Hopefully doing that will allow the GFUI to correctly interpret the size of the Snapmarks for MTC files. (If not, you’re going to probably need to use Inkscape for your Snapmark files. I don’t know that the team has addressed using MTC files yet.)

1 Like

Must be some goodly experience in play to pull that off without snapmark or any apparent side indexing.