I want to see what everyone is making … and I want to use them too … I am very encouraged by the Snapmarks … just wish I had them available. Please show what you’re making ---- if someone doesn’t want to see them, they just don’t have to open the thread! 
2 Likes
I confess that I have Snapmarks enabled but haven’t tried using them yet. Maybe this weekend. But I remain concerned about getting to love them, and then losing them.
2 Likes
Personally the way it’s working now … I cannot see them disappearing on us … I just can’t wait to try them out.
I bought the Pro (wayyyyyyyyy back at the beginning) and I bought it for the pass through so I really want to get some of these larger projects underway and some will take the full width so marking stuff on the board is not a doable solution as I am wanting to cut some acrylic that wouldn’t look good with marks on it for alignment.
So I can reproduce what you are seeing and have been having the same issue, I reported it about a week ago, but in the wrong place lol. For me I am loading a snap mark file I’ve used fine before, then I add some artwork which will be an SVG with no text at all. I will load the file into the GFUI and get no errors. When I hit the magnet it comes up as scanning for a few seconds, “blinks” the camera then the status bar goes away and nothing.
So the catch or what I’ve found is that after loading, if you hit refresh on the browser (I’m on mac safari 11.1.2 (13605.3.8) the GFUI will then throw an error about unsupported text and that it has removed it. In my case there is none present, I’ve checked the file etc, even if I delete the newly imported graphic it will still throw this error. If I open the svg with a text editor there are “text” tags and I have no idea why. On one of them it listed a font I had used in a previous different jig file. I manually edited one of them out in text editor and saved and when I reloaded the file, one of the 3 squares of my jig was gone. I refreshed and got the text error still but the snap mark worked. If I copy and pasted one of the other squares to replace the first it put me back in the text error/no work deal again.
I’m using inkscape .92
Interesting point. I’ll try that today and reply back with the results…
A quick wipe with a paper towel dampened in Alcohol will wipe away residue and dry in a few minutes.
1 Like
Yay! I just tried the pencils tutorial yesterday. Using Snapmark worked for me. ![]() This phrase reminds me of “Hooked on Phonics worked for me.” And, now, I have a “using Snapmark worked for me” earworm.)
This phrase reminds me of “Hooked on Phonics worked for me.” And, now, I have a “using Snapmark worked for me” earworm.)
4 Likes
Still no snapmarks… 
1 Like
Still waiting…no email…no magnet… sigh
2 Likes
For as long as I’ve had my pro, I’d yet to do a full pass-through job. Did my first yesterday, a cardboard test run for a catapult. Great results! I was also pleasantly surprised that snapmarks lightly scored into cardboard are good enough for snapping. Impressive!
5 Likes
I’m surprised that was dark enough to read. (They must be tweaking this heavily behind the scenes.)
2 Likes
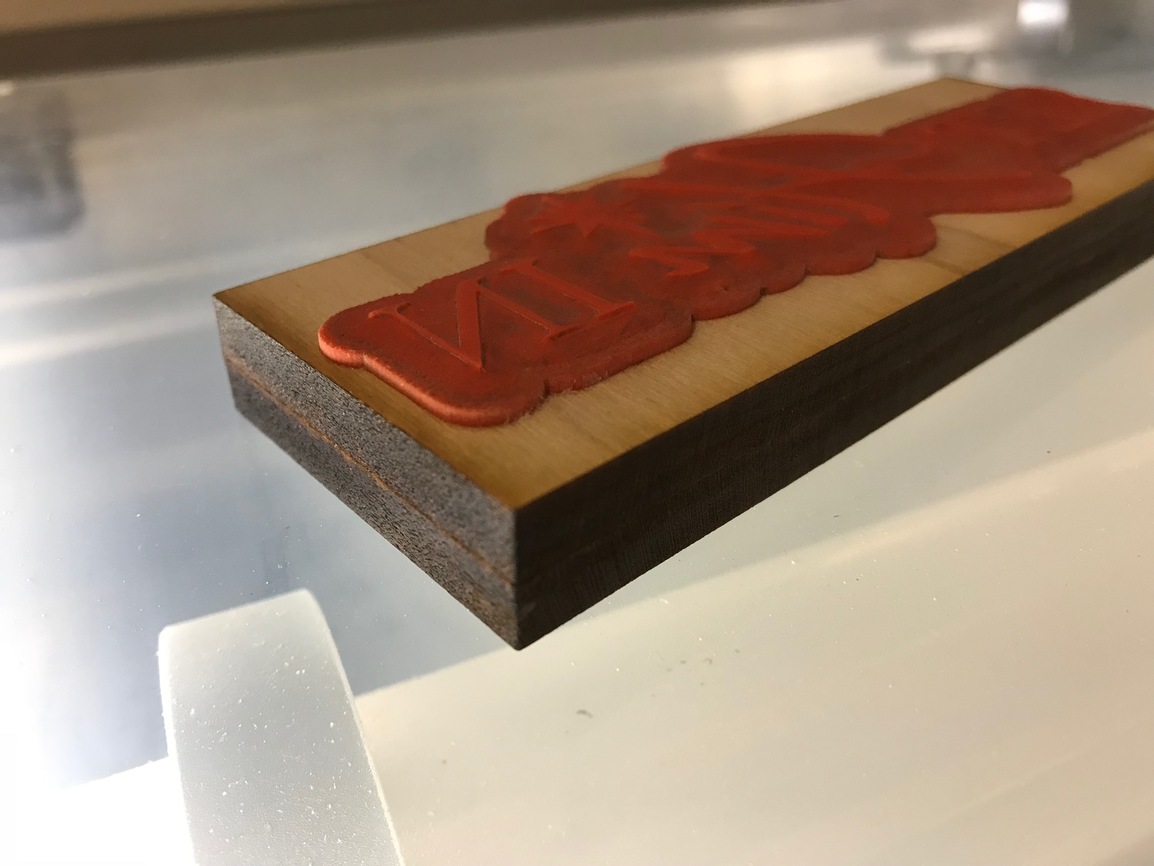
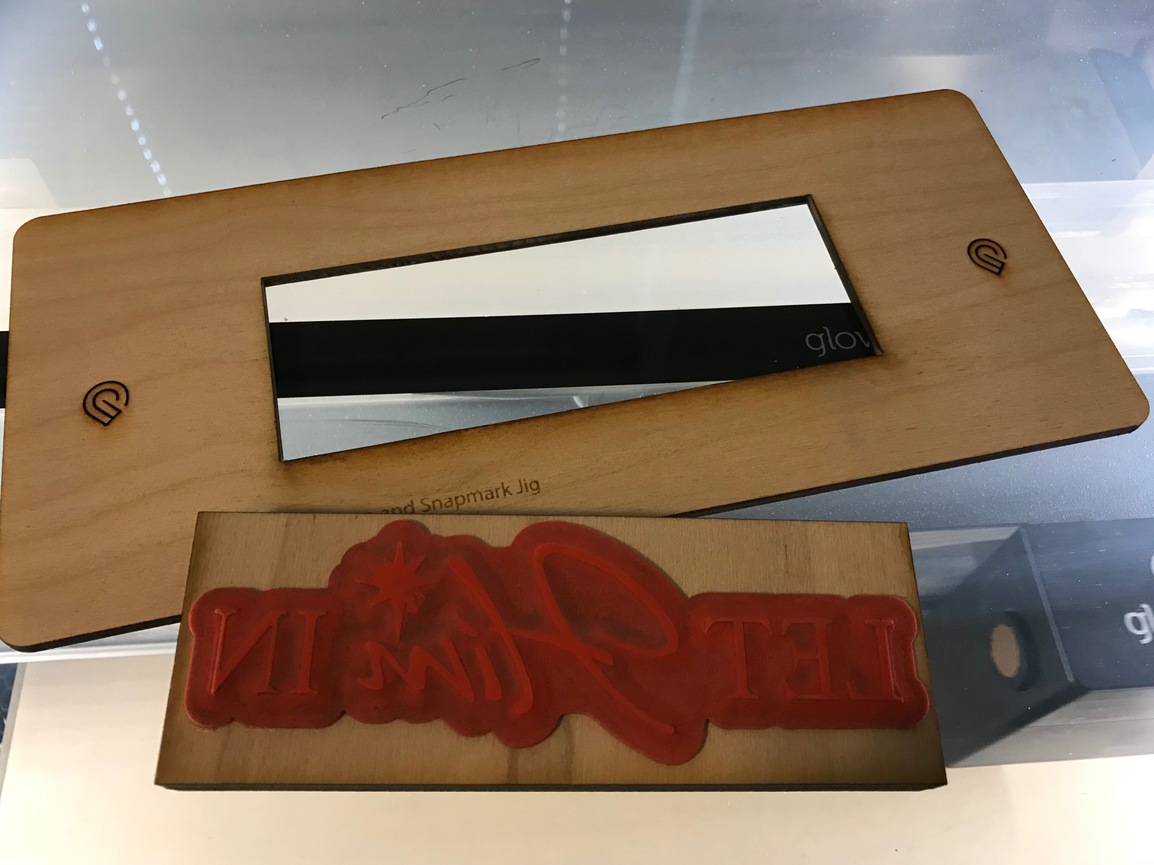
How I used snapmarks in making this:
This was a first try at something I haven’t done before. I might have wanted to go back and do a second pass… I might want to tweak it, and at the price I had quoted when I thought I was using linoleum, then changed my mind and bought rubber… well. I didn’t want a lot of waste. (like Glowforge, I had promised something and then discovered materials and timelines were not what I had estimated.)
So I designed, I tested in cheap wood, I designed again, and I really tried to zero in my file. I chose snapmarks in case I’d want to go back.
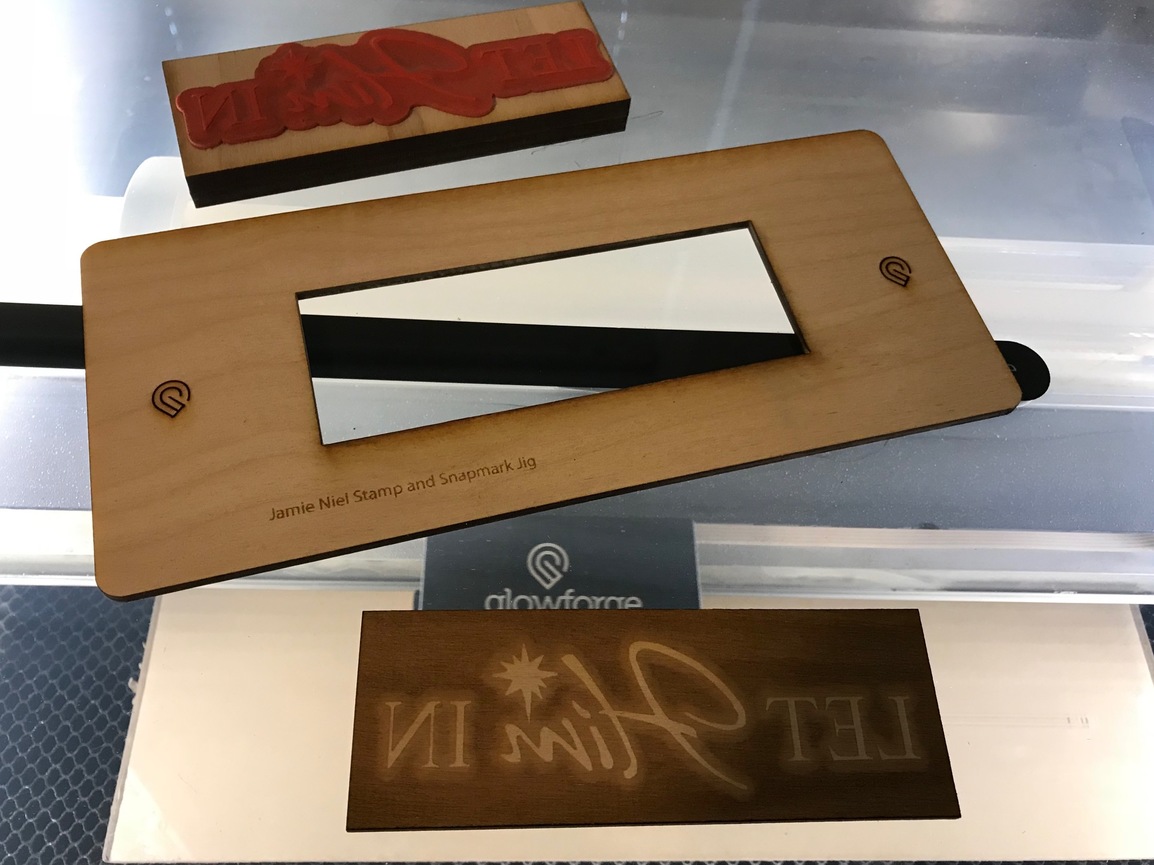
It turned out a good plan. With a stamp, you want the image on top of the block as well as on the rubber.
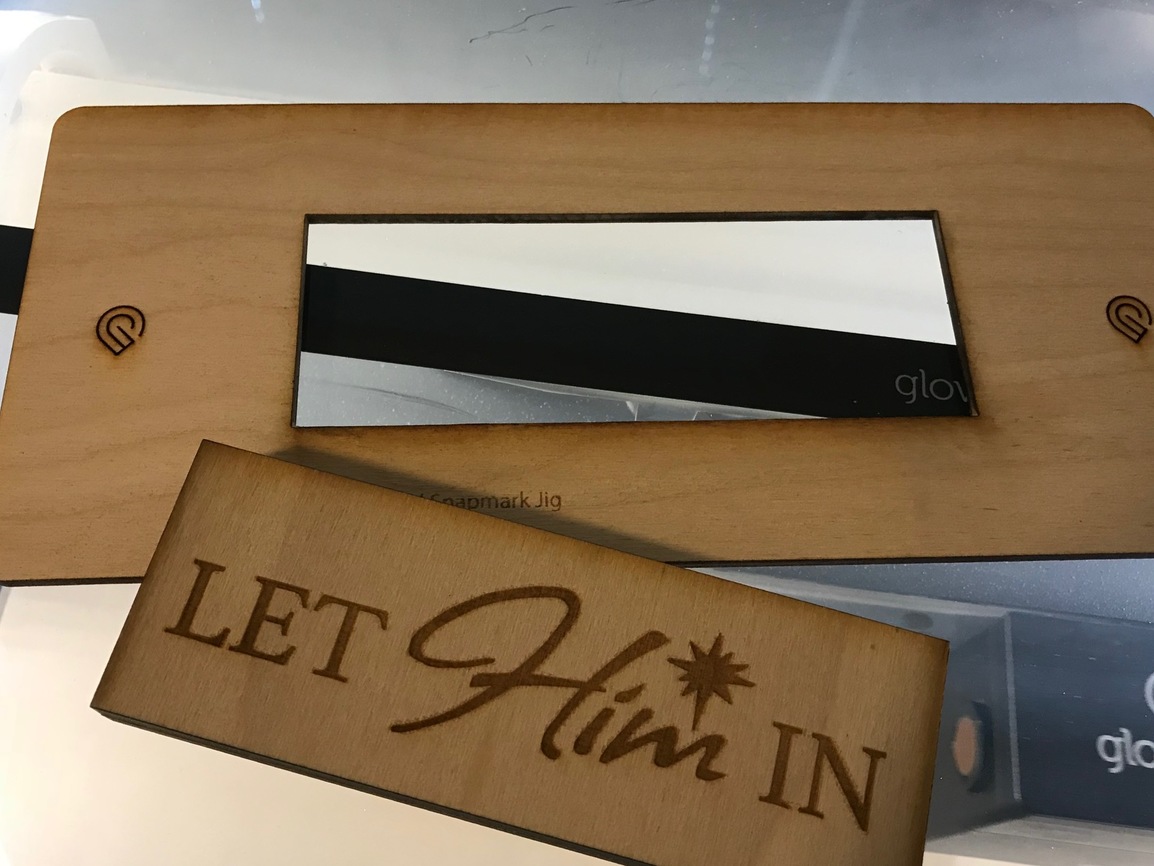
Also, I engraved the stamp rectangle but didn’t like the edges and decided I wanted to go back and cut a skirt around the design. My edges are great because - after the fact - I engraved beyond my margin. (Or shrunk my outline to fit inside my margin… whatever.)
I didn’t know HOW I would use it exactly at the beginning; but Snapmarks helped me make a professional product without wasting the material that I felt was in short supply. It helped me iterate something new to me, again, with less waste.
15 Likes
Nice job! 
1 Like
I got snapmarks a couple of days ago. I’ve been doing the testing using cardboard and I got the same results tim did. I was surprised it could find the lightly scored fiducials on the cardboard but it worked fine.
4 Likes
@bonny REPORT: At just after 9:30 CST on my machine, a snap quit early with no message and left the head near the center of the machine. I tried to resnap, and the alignment was obviously off. The head hit the right edge of the machine and made a grating noise. Power cycle, and all was well, snap successful.
Just had another such event at 1:11 CST… This time snapping worked, but the head hit the left edge when I started the job. Did it twice in a row, after a restart. I’m repositioning to try again.
Third time’s a charm! I slid my piece to a slightly different position and the process succeeded. I hope you can get useful logs from the aborted jobs despite my power cycles…
7 Likes
What did you open the file in? I am using Inkscape and the size of the Snapmark markers is slightly off from the recommended size. No problem I just resized them. My question is, do I need to change the size of the cutouts for the pencils also? I can measure them to find out but wanted to know if others have ran into this.
Probably. If the Snapmarks resized, so did the rectangles. (You might still be able to get pencils into them though.)
Edit: Original size for the rectangles was 190.47 mm X 7.27 mm.
@Jules will know better than I. I simply resized the Snapmarks according to the directions. The pencil slots fit the pencils I have perfectly.
I used Adobe Illustrator.
Let us know how your pencils turn out!
Okay…checked the Poll results, thanks for voting! ![]()
Since the last two don’t outnumber the first one, it looks like the “Ayes” have it.
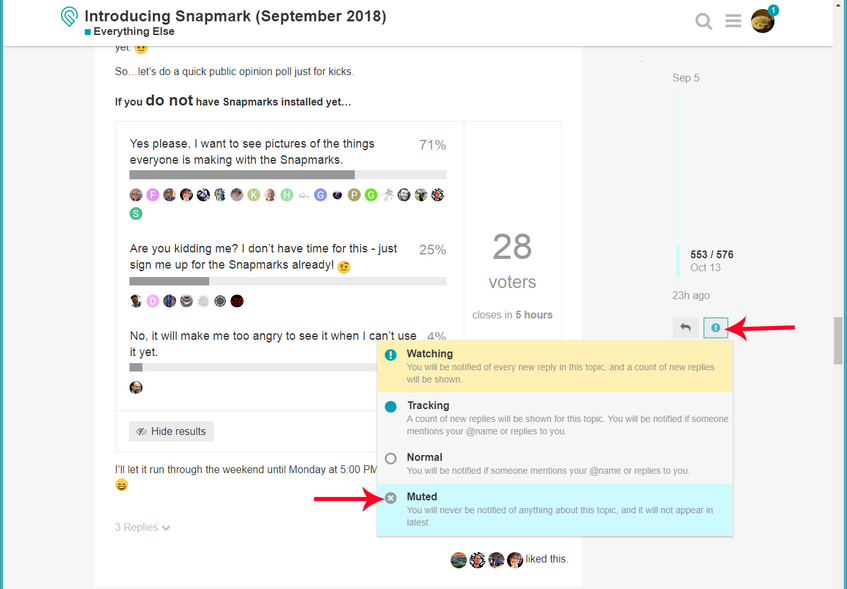
I’ll limit displaying them to this thread though, and there is an easy way to avoid seeing them…just click on the little blue icon under the timeline, and choose Muted for the thread.
Okay, this one is a writeup on a test performed in late June, to see how the Snapmarks handled aligning split engraves.
**Split Engraving Alignment Tests **
(Birch ply - 0.20")
I took a bitmap image into Photoshop, removed the background and split it into two PNG files. Then brought those into Illustrator to create the split image SVG file.
I engraved the first half of the fish, then shifted the whole shebang and let the Snapmarks realign the engravings.
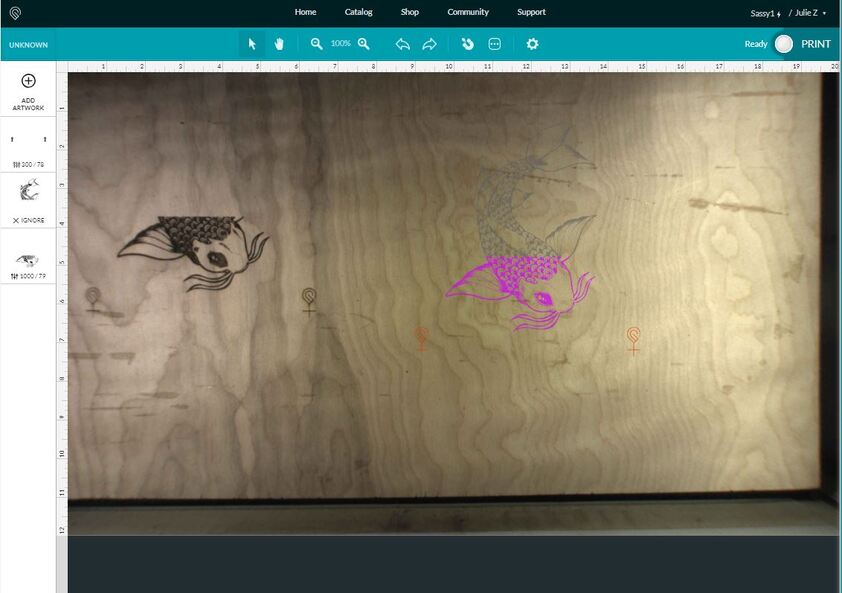
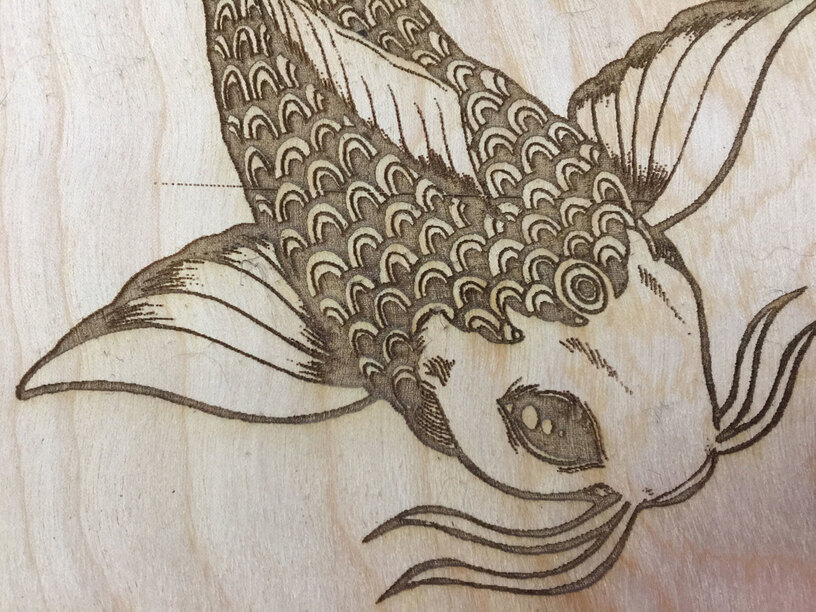
Results were perfect: ![]()
If you look really closely at the results though, and I mean really closely, you can see a minute thread about half the width of a human hair where I thought it didn’t align correctly:
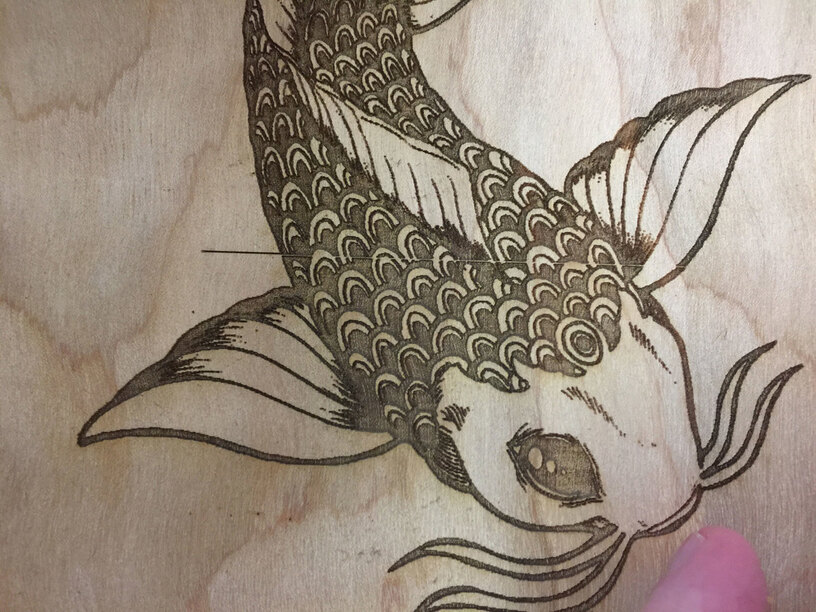
(Ignore the black line out to the left side…that was something I deliberately added so I could find the join once the image was processed.)
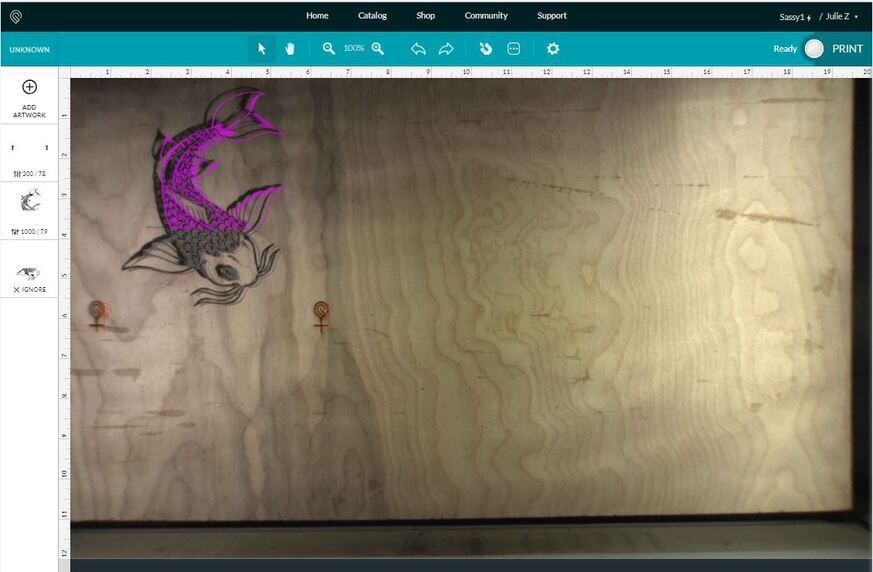
Then I ran a straight up engrave of both the top and the bottom in one operation for a control.
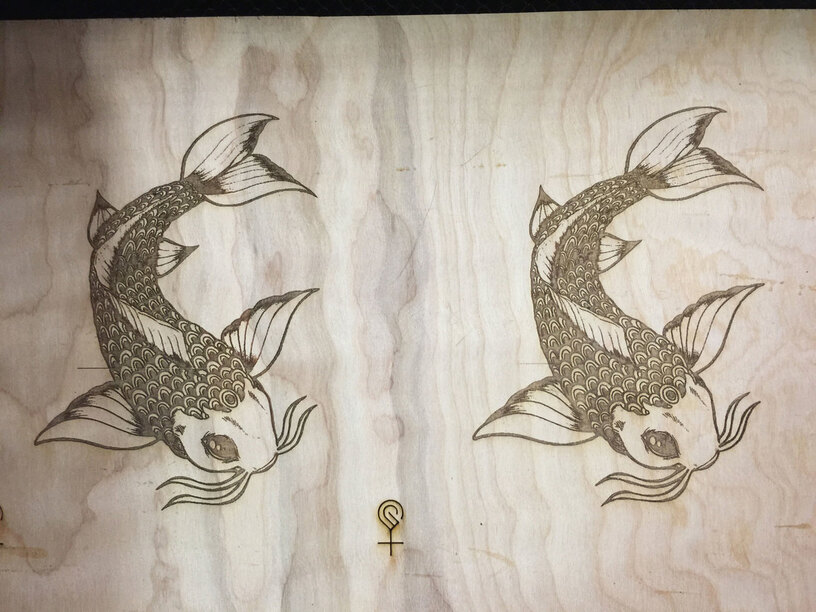
A closeup on the second engraving shows the same 1 pixel wide misalignment that the first one did…
Which means: The problem was in the file!
The alignment from the Snapmarks was perfect. (And while I still haven’t figured out a good way to split a raster image that doesn’t result in a pixel wide gap, the results are so close with this that a touch with a colored pencil takes care of it.) ![]()
12 Likes