Have to do the tutorial  pencils…
I’ve been meaning to post some things that I’ve made on this wonderful forum, but I need your help to get a project finished. I’ve used Snapmarks successfully on a few simple projects (including the pencils), but it does not like the one I made for this height guide fixture. I’m printing a ruler on one side and have some markings for the back side. I used the exact same file as a base to add the back side artwork, with the snapmark layer locked, and I get this “Snapmarks do not match” error.
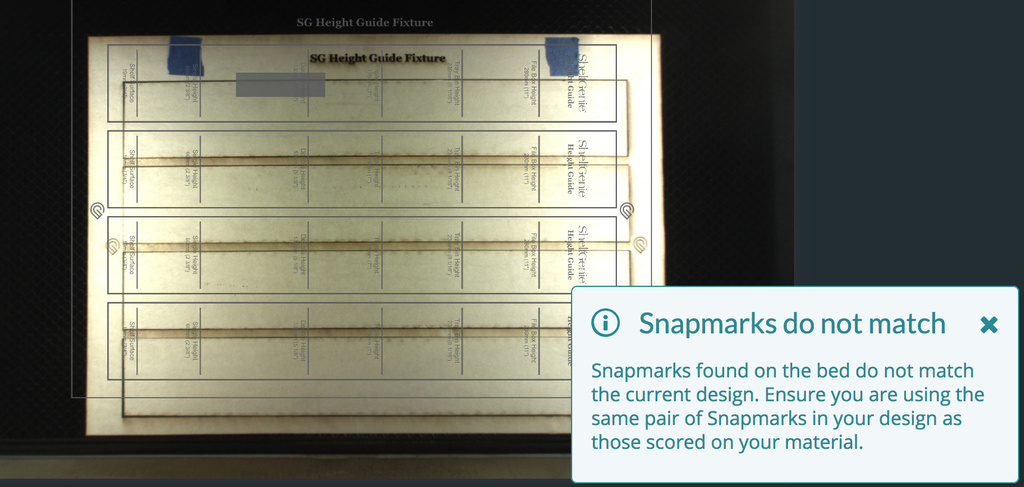
I have tried multiple times to copy and paste the snapmarks from one file to the other, and that didn’t work. I also tried 2 sets of snapmarks (hence the blue tape covering them up), which had the same error. I made a sample score on the same material (0.2" NPG maple ply) which worked fine when testing the snapmarks (not with the same exact artwork), so I know the contrast is okay. I’m all out of ideas- am I missing something?
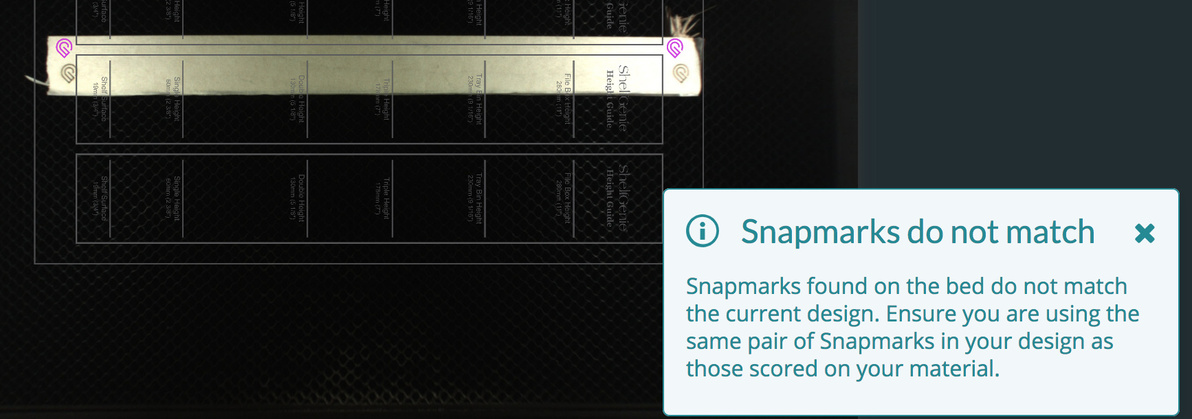
Quick update- I just used the same file to score the snapmarks on a test piece. Then I moved the artwork in GFUI (leaving the material in the exact same place) and tried to use the magnet to realign the artwork, and I get the same error.
Any suggestions?
You could try placing a sheet of white paper underneath the jig on the left and right sides. The Snapmarks might be scored too close to the edges, and the red laser dot that takes the height measurement is falling off of the material. (You want to not cut too closely to the Snapmarks at the outside edges of the jig.)
Other than that, you’ll want to check the distance between the snapmarks in the file, and compare it to the distance between the printed snapmarks. They have to be exact. (But it sounds like the first one, since you can’t snap one that you immediately scored.)
2 Likes
So - I have not seen this answered elsewhere, but does the type of machine you have (basic, plus, pro) have anything to do with if you have been given snapmarks?
Ie - are others that are slumming with basic machines like I am ( ) getting snapmarks enabled?
Jason
2 Likes
Getting or not getting snap marks has nothing to do with which model of Glowforge you have. It has to do with particular metrics of each individual machine…metrics about which we are not informed. (Even if we were, I’d have no clue what they were talking about). I have a basic and I have Snapmarks. It’s sort of a crapshoot.
1 Like
The first few attempts were done with snapmarks where the blue tape is on the first photo I posted, which are well inside the boundaries of the material. I tried adding a second set of snapmarks more in the middle of the bed (about 1/2" from edges), and when I got the same error with that, I tried covering up the top snapmarks, but no difference in results:( . The head unit never moves at all (when working properly, it at least moves to the leftmost snapmark and then to the right one).
The measurements are spot on. I’m wondering if it has something to do with my artwork file.
It might. If you want to zip it and post it here I can try to load it. What design program are you using? (Illustrator, Inkscape, CorelDraw?)
That would be great- thanks Jules! Here you go. I’m using Inkscape.
SG Height Guide- heights (outlines) new.svg.zip (111.1 KB)
Okay, that took a while cause I’m extremely slow in Inkscape (but using Illustrator introduces size variations) so anyway…all I did was shift all of the information in your file over so that it was on the artboard before saving it as a Plain SVG and it snapped just fine and reburned the marks right over the tops of the originals.
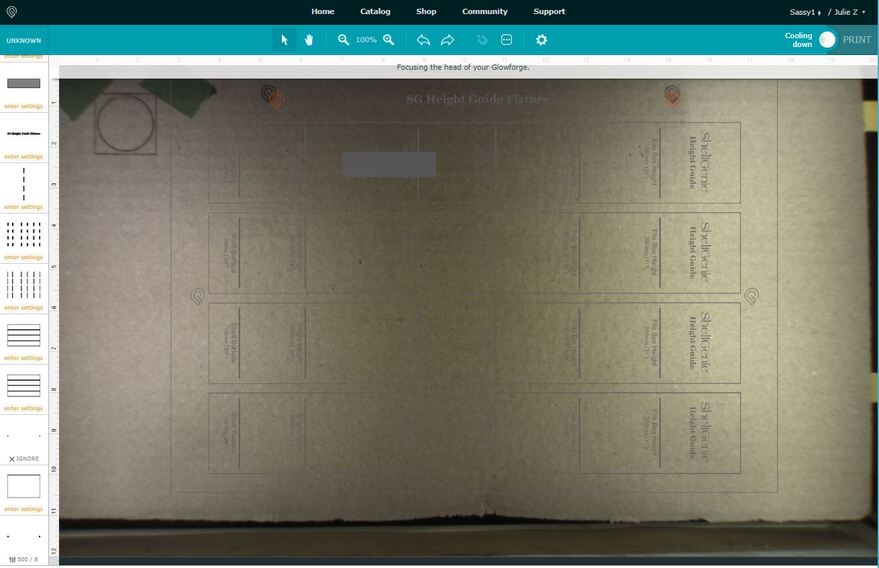
When I loaded your SVG file, I got the same error message.
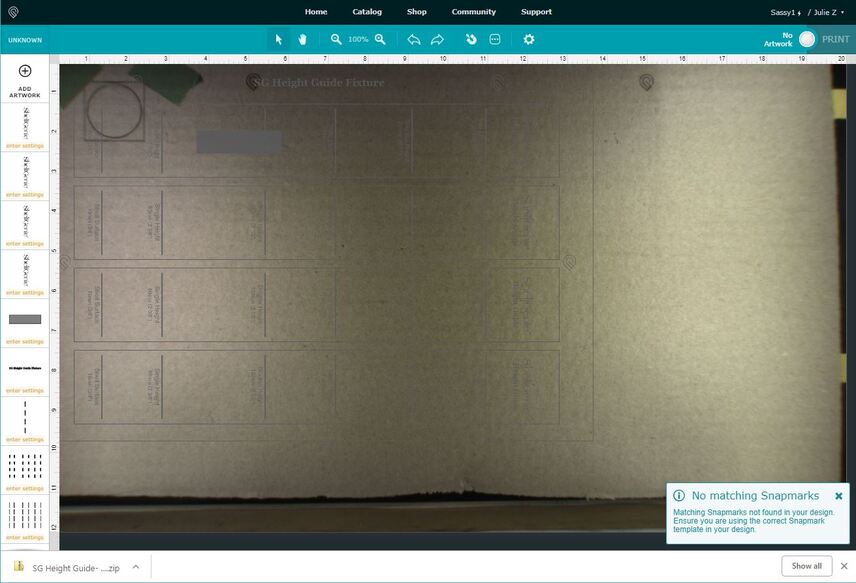
So I’m guessing you’ll just need to create your files on a 20" x 12" artboard, and make sure that the entire design is on the artboard before you save it. ![]()
2SG Height Guide- heights (outlines).zip (120.2 KB)
I don’t have snapsmarks yet but I do a lot of work on the passthrough and if my work is outside the maximum area that the glowforge can cut then it won’t work. I am sure that snapmarks are the same. You can’t be outside of the max cut area not even a millimeter or it won’t work.
I have found that your artboard can’t be any bigger than the max size the glowforge can actually cut 19.5 x 11 otherwise you run the risk of setting something outside the are the glowforge can cut and will run in to problems. Open this file on inkscape or illustrator it’s the max area that you can cut on the glowforge.
Use it to make your artboard the same size.
As long as you are within the same size then I hope everything should work for you
max cut glowforge.ai (1.0 KB)
So… when you made that suggestion to measure, apparently I didn’t measure correctly at that time, but after taking a second look, it’s off. I noticed that your file actually snapped to my test sample, but the snapmarks were spread farther. After reading more posts, it looks like I had the 90dpi vs 96dpi issue using the previous Inkscape version. I’ll be re-testing with everything in the new version, but I’m optimistic it’ll work fine. The weird thing is that I’ve used the snap marks for other projects (created in Inkscape) and it’s worked okay…
Somehow I missed all the [many] conversations about this issue! I’ll confirm once I’ve tested. Thanks for your help, Jules!
2 Likes
Thanks mrniceguy1849- I’ll test this out later today.
1 Like
hi @bonny - I got the snapmark email on Nov 7th. Finally got some time to test this out, but no magnet on the toolbar. I have not had my machine replaced and the machine has had several opportunities for a firmware update after being powered on a couple of times over the past few days. Could you please take a look, thanks!!
Dan,
From what I’ve read so far, Snapmarks has great merit. For those of us who have projects which incorporate both sides of a piece in a final product, accuracy is essential. Without this capability, the Pro has a hit rate of less than twenty percent. I suspect that having the ability to create Snapmark jigs would increase that hit rate dramatically. I’d hate to see Glowforge abandon this technology without having ever had the opportunity to use it. I do understand “support” and the costs it creates for a manufacturer, my life for the last twenty-five years, so for me, this would be what I would be willing to do for this capability:
Rather than abandon it, make a paid feature at a reasonable price, without support. Basically “buyer-beware”. As you so aptly state in several places on the site, you have some very smart and innovative people using your product. With community sharing, those with the feature will learn it, adapt, and share.
My two cents.
~Ron
I finally had the opportunity to use snapmarks, and they worked a treat. But it brought up a copyright/use question: when using them for certain objects or operations (such as pass-through), the snapmark will have to be engraved directly onto the item. The item will then have a Glowforge™ logo bug on it, possibly several of them. How is this supposed to work in terms of copyright?
do we try to cover/obscure the mark on the finished product?
do we add “Made with a Glowforge 3D Laser Printer” text around the bug to highlight the mark and consider it to be fair-use?
use-case for this thought was a leather dog-collar that was too long to fit in the bed and had continuous design elements.
Should be able to use a small mask in the area of the Snapmarks. Score lightly and remove when done.
1 Like
That would work in certain cases. For this particular project, I would have had to mask the entire piece of leather, or the bits of design that fell onto the small masked registration points would engrave slightly lighter than the rest… but then I would have had to weed it, which I wanted to avoid.
maybe I’m overthinking it, but I think it would be great to be able to just define a specific element of your own file to be a snapmark, or to have alternate snapmark options that were not a corporate trademark… like traditional printer’s reg marks.
4 Likes
@jbv : Would it work to make a “carrier” for the collar that has the Snapmarks, from which you remove the non-Snapmarked collar after the operation? In that way, the carrier could be reusable for any design you’d like for the collars.
Yes, that could work, but it would be almost 30 inches long… kinda unwieldy. With just the loose strip of leather I don’t need infeed-outfeed support beyond a couple pieces of tape.