Is there some way to get PNG files to upload with the correct dimensions?

Let me just make sure I understand what you are saying: trace the image, break each discreet shape apart. Apply “difference” under the path menu to subtract the inner shape from the outer shape and then engrave the resulting shape?

I could see how that would be more precise BUT it would take many, many hours given the design.

Cardstock. I don’t know the weights but it is 0.008 thick.

8 Likes

Absolutely gorgeous! So was it an engraved vector or an engraved bitmap?

Bitmap… Thanks! This thing is so much fun, exploring technique and material is like a treasure hunt to me. :sunglasses:

2 Likes

I have the same feeling but I’ve only had a little while to play. The one good thing about getting my GF so long after crowdfunding (and the US backers) is that people have done a lot of experimenting already and have provided lots of settings and advice to use as starting points :slight_smile:

5 Likes

awesome thread! Learned all about something i’m NO Where even attempting to touch my mouse and even explore… but damn Great read… Thx

3 Likes

Thanks for the help with this, everyone. This is a very interesting and informative thread! @traci_akierman, since your original issue has been resolved, I’m going to move this topic to Everything Else so the discussion can continue there. If you run into any other trouble, please post a new topic in Problems and Support, or email us at support@glowforge.com.

2 Likes

If you have cut paths that you would like to engrave, another way to convert cuts to engraves in Inkscape is to use the Stroke to Path tool. You set the visible stroke width to the size you want for the engrave (remember that no matter what width of stroke you set, the GF will always cut down the center of the visible stroke). Then select the stroke elements you want to engrave and apply the Stroke to Path tool. Make sure to set Stroke Paint to none and Fill to your color choice. You now have an engrave-able line.

I am missing something somehow. I get that the Stroke to Path essentially splits a stroke into two separate objects using the stroke width to separate them into an “inner” and an “outer”. How does this help me engrave it as a line, and not a filled object in the GF app?

Never mind… I just tried it again. I think I had some stuff grouped before so it wasn’t working. That is WAY easier than I thought it would be and now I see what @rbtdanforth was saying. My small amount of Inkscape know-how was working against me. Thank you so much you guys!

1 Like

Ungroup and Break Apart are needed to obtain individual objects so that some operations work correctly. I still fumble around with this until I finally get Inkscape to give me what I want. Good luck with your project.

There are two fairly fast ways to get to where you’re going if you start with a vector.

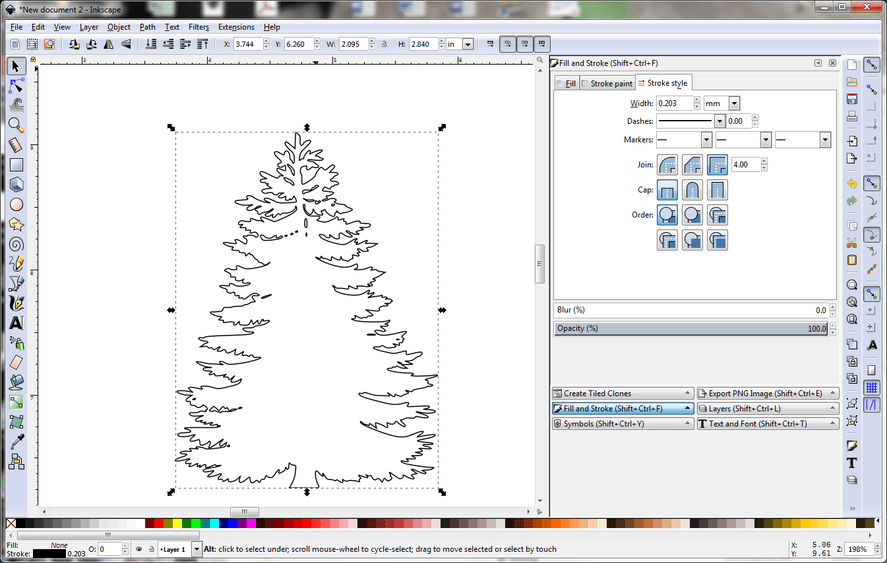
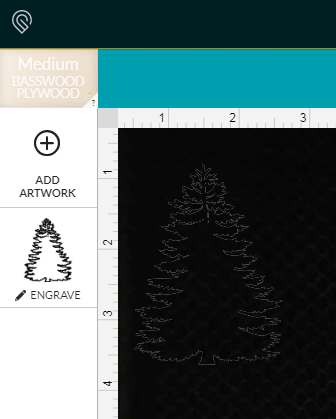
Here is a complex tree. The stroke width is set to .203mm, or .008" - the width of the kerf in many 1/8"materials and my default for working in Inkscape. For engrave-cutting you probably want to go as narrow as practical (so you can still see it in Inkscape.)

With the tree selected, go to Path and select Stroke to Path. This creates a double set of stroke lines and a fill between them.

If you go to your Fill and Stroke panel you’ll see that the Fill paint is selected and under Stroke Paint it is set to No Paint. When you upload it to the GFUI, it is set to Engrave.
image

In your example you had three “layers”. If you set your fill color different for each layer you could use one file and just ignore the colors you don’t want for each of the three engrave-cuts.

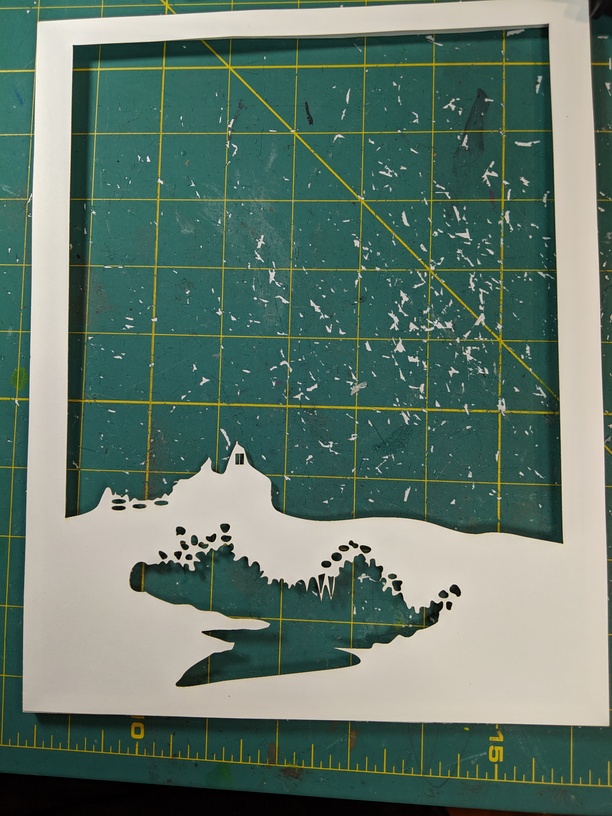
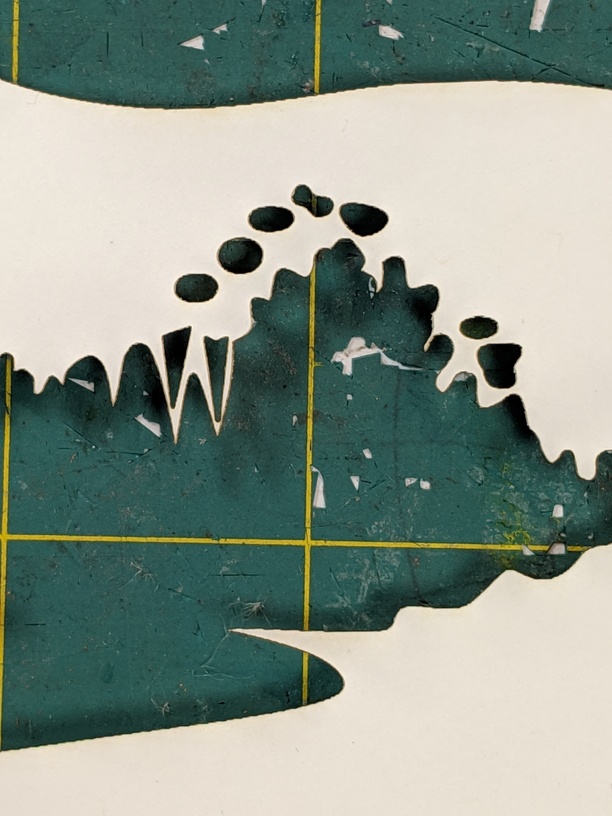
Another fast option is to select your vector object and then go to Edit->Make a Bitmap Copy. This will create a raster of your vector (it is overlaid.) You now have a vector and a raster as shown here. The raster is on the right and the two vectors are on the left. I moved them from their original overlaid position.
image

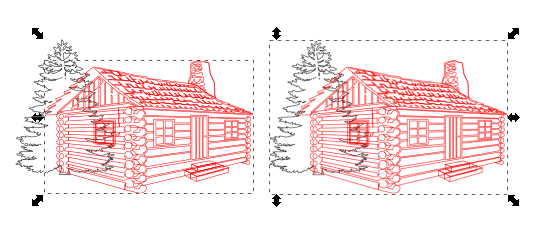
The problem for your specific situation, as demonstrated here, is that you have to convert one vector at a time. If you do the cabin and the tree at the same time you get a single raster with two colors (as shown.) If you selected the tree, made a bitmap and then selected the cabin and did a bitmap you would have two bitmaps. Note that you would want to do both the tree and cabin as black in this situation. Unlike a vector-fill (what I did above) the GFUI won’t recognize red and black as two separate operations: it will be one operation. Also, unlike a vector-fill, the glowforge will scale power based on color in a raster. Therefore, the power applied to the red will be less than the power applied to the black.

Generally, for engrave-cuts you’ll want to do a vector-fill over a raster, but I could imagine situations where using a raster to cut would be the better solution.

Tanget: When you set the fill to none after doing a Stroke to Path and then set the stroke paint to some color, do a break apart, and then delete one of the strokes, you are on your way to doing inlays.

4 Likes

I wanted to show you all what I was able to get by vector engraving my white cardstock, rather than cutting it. I will post a picture in the “Made on a Glowforge” section when the lightbox is done. I cut the frame on my GF too out of birch ply

7 Likes

This topic was automatically closed 30 days after the last reply. New replies are no longer allowed.