Hi everyone!!
I’ve been playing around with my GF and trying to soak in as much knowledge as I can about designing for the GF on Illustrator.
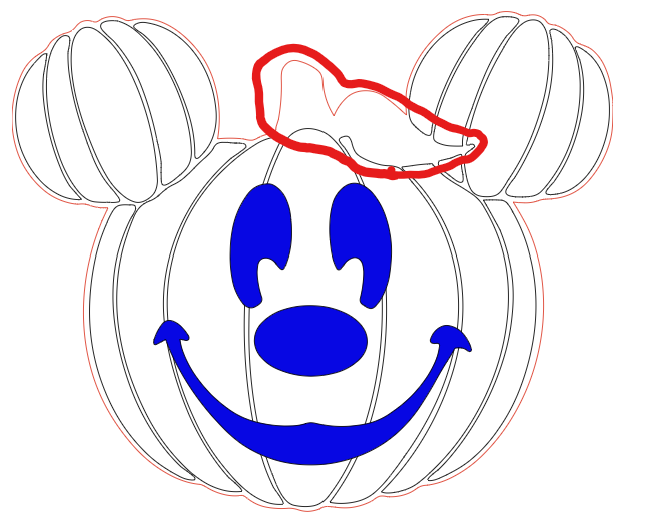
I found a file and was wondering how to isolate a small part of it so I can engrave.
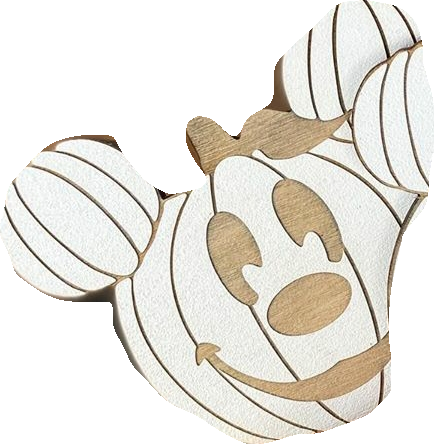
The way its designed, I’m only able to score or cut the line around the outside, but I actually want to engrave the stalk and leaf. The white pumpkin, is what I’d like to accomplish. Any thoughts or feedback would be really appreciated
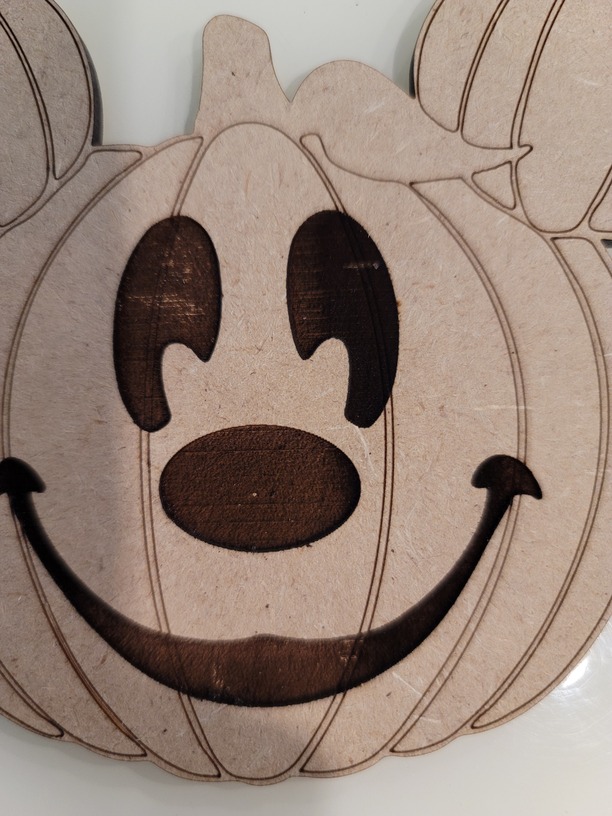
Also, in the attached pics of my practice piece; can you see how the score lines engrave into the eyes and mouth? How would you recommend I get rid of those? I tried the magic wand tool, but that didn’t work out too well.
First, it’s against forum rules (and also illegal) to post a purchased file here, so you should remove it ASAP.
Second, you need to create a separate shape for the part you want to engrave. Easiest would probably be to use the pen tool to draw on top of the existing design to create the shape you want.
To “isolate” the stalk and leaf you need to create a new filled shape.
To get rid of the lines inside the eyes and mouth you need to delete those parts of the lines. There are dozens of ways to do anything in AI but I believe this is the easiest for this image:
New stalk leaf shape: use the lasso tool to select this area
Create a new layer, hide your original one and then “paste in place” ctrl+shift+v on the new layer. Note, these shortcuts are for Windows, use cmd instead of ctrl for Mac.
Now to close the gaps, select a pair of points on either side of a gap with either the lasso or white arrow tool and “join” ctrl+j. Continue until you have all the gaps connected. If there are lumpy bits clean them up with either the “smooth” or “pen” tools. Turn on your original layer, make sure your new shape is actively selected and use the “eyedropper” click on one of blue shapes to make the new shape the exact same fill color.
To remove the excess lines inside the eyes and mouth: select the eyes and mouth and lock them ctrl+2. Switch to outline mode by hitting ctrl+y, this will make it easier to see what you’re doing. Zoom in tight to the top of the one of the eyes. Select the score line shape to make it active, use the pen tool to place a new point at the exact intersection of the score line and they eye shape. Repeat everywhere these intersections happen. Use the white arrow to select the unwanted LINES and hit “delete” just once. Switch back to regular view by hitting ctrl+y and “unlock all” ctrl+alt+2. Note: not suggesting using a boolean subtract here because it would result in extra score lines around the nose and mouth and would have to be deleted
Your file should now be ready for to use in GF as you described in the white pumpkin image.