Hey folks, fairly new Glowforge Pro owner with an issue. I am trying to scan and engrave some older recipe cards for my mother. When I scan using the Glowforge, it engraves, but I want to modify the image before I engrave. The file I send to the Glowforge App comes up as normal, I have an engrave and a cut, but when I send to the Glowforge, it goes through the motions like it’s engraving, but isn’t actually doing anything, just spittin’ blanks!
What I have done:
Scan image in on my scanner
Modify in Photoshop
Import into Illustrator, saving as an SVG, embed the image yada yada
I’m no designer, I am an IT guy (hardware, networking, server administration), but I am sooooo not up to snuff on this design stuff. I’ve attached the file I am working with. Any assistance in learning this stuff is GREATLY appreciated!
We can’t see the image in your SVG because the forum strips any embedded images from SVGs. If you want to zip up the SVG and re-attach it here, we’ll be able to look at it.
That said, it sounds like you’re scanning something (which creates a raster/bitmap image), editing it in photoshop (the result still being a raster/bitmap), then bringing it to Illustrator and exporting as an SVG…
This last step isn’t really doing anything useful. It’s still a raster/bitmap, it’s just embedded inside an SVG.
You can probably skip that last step, and just drop the JPG/PNG into GFUI (app.glowforge.com).
And engrave that.
Let me know if that description helps at all and/or update your SVG so we can have a look, and we can probably help you figure this out.
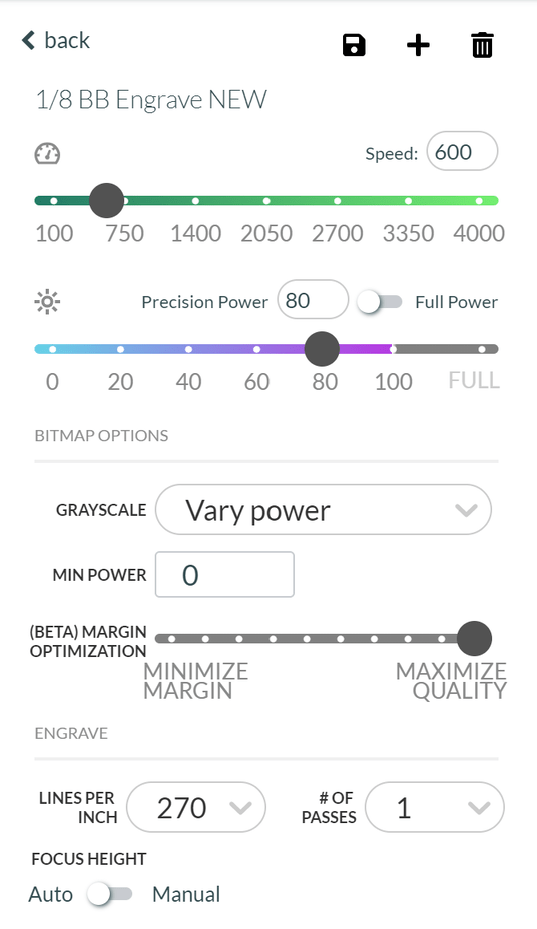
So I sent the PNG over just to test and it’s actually engraving, YOU ROCK. It’s kind of faint, so I think I may need to touch it up in PS to darken it, but I am at least making progress! I am engraving on 1/8 BB from Woodpecker, and my settings are attached.
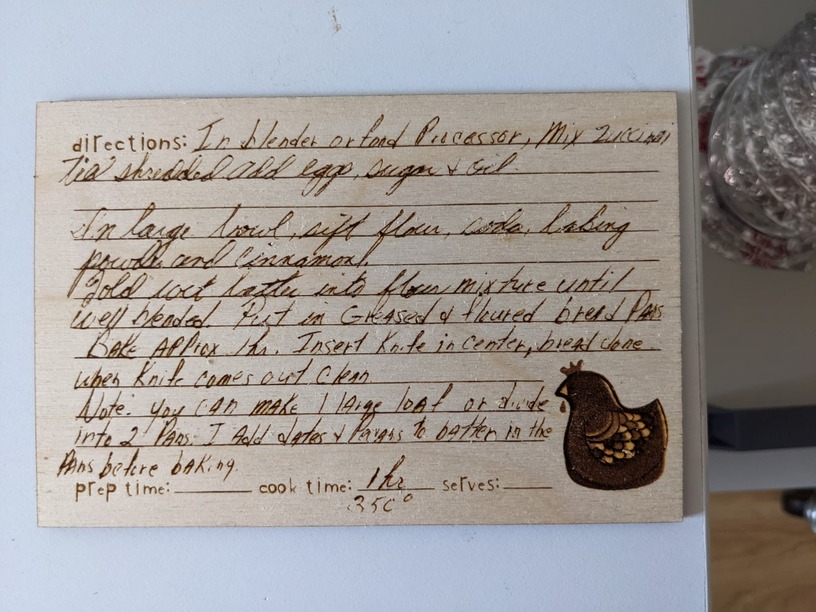
I assume I would just have to import the cut element in separately if I am going to go this route? I am including the SVG and the PNG in zip format, as in the future I am sure I’m going to need to pull raster/bitmaps in to Illustrator. I’ll include a shot of the finished product once the Glowforge finishes up.
Thank you so much for all your assistance! This was a front and back recipe, so for the second side, I played around with the contrast and whatnot in PS and its a night and day difference. I am going to take this out to the shop and hit it with some poly to see how it looks finished.
Again, you rock. I’m sure I’ll be back again soon to pick everyones brains!
There’s no reason you shouldn’t be able to embed a bitmap in your SVG. It’s a good way to set up a file that has multiple steps. Still not sure why it wasn’t working that way.
Disclaimer, I haven’t looked at your zip file (I’m on the phone). But it was mentioned that the scan was kind of light or faint. This, in combination with vary power, is likely why it was coming out lighter than you’d like. You have 80 power set as your max power. If the scan was pure black, it would engrave at the 80 power, but it sounds like it’s not black and it’s some shade of gray. So the actual power is somewhere between 80 and 0 depending on what the actual shade of gray is.
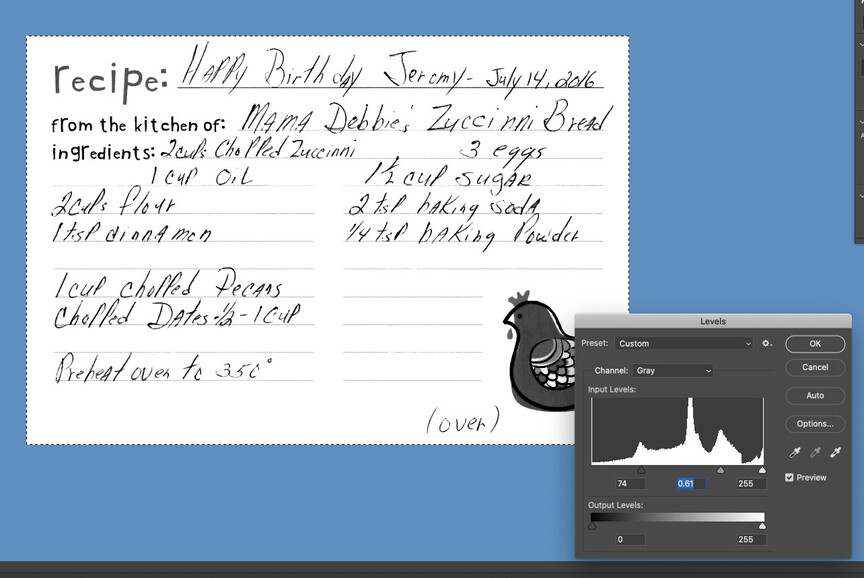
For example in reference to the above post, RECIPE is showing to be 36.8% black.
Some of the other printed text is in the 50-85% black range.
The handwritten text ranges from 16% black to 70-80% black.
Using vary power (which is what should be used for this type of stuff) the power ranges would be kind of all over the place, which is what you were seeing.
PS is kind of crazy in that you can get to the same or very similar end result in about 50 different ways. Personally, I would use the Levels tool to bring up the blacks. But contrast is another way!