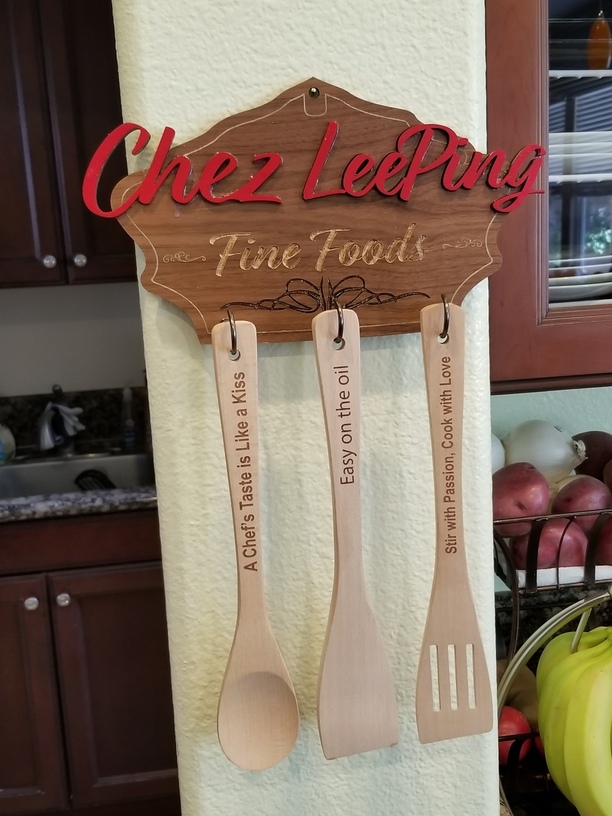
Finished up on a sign for our kitchen this morning with raised letters and hooks for utensils I engraved previously. Thick PG walnut for main plate, with medium Draftboard for raised letters.
.
Finished up on a sign for our kitchen this morning with raised letters and hooks for utensils I engraved previously. Thick PG walnut for main plate, with medium Draftboard for raised letters.
.
That makes a great set! 
Very nice, and this way the utensils are on display also!
I am sure she saw the love that went into this fine job.
Yes, a fine job, indeed!
Such a cool sign! I love how the script text extends beyond the plaque edges–just totally makes it.
The entire sign is actually a very complicated series of scores, engraves and cuts. The base is cut with the letters extending past the edges of the frame, with all of the letters engraved. The raised letters were then glued and dropped on top of the engraved shadow image.
I bet she loved it!
How is the lighter-than-base engrave (eg “Fine Foods”) accomplished? Hand cleaning out the engrave after lasering?
Before I removed the masking, I hand painted the “Fine foods” engrave with a mix of tan and gold
This looks great!
So nicely done
You’re cooking in style now!
Hello,
I am attempting to print raided letters but can figure out how to do it. Can you give me some tips on how you etch the background of your project leaving the lettering raised?
The Chez LeePing letters look like they were cut out and then glued to the backing material. If you want to make raised letters by engraving away material, like in this sign:
You make the letters white and the background black (or any color.) If you make your artwork black and white you can use the invert color command in your design tool. The glowforge engraves every color except white. In the photo the wood was pre-colored merlot, the burned away part exposed the natural wood color.
I engraved an area on the base, then glued letters cut out from a separate piece of wood onto the engraved cavities.