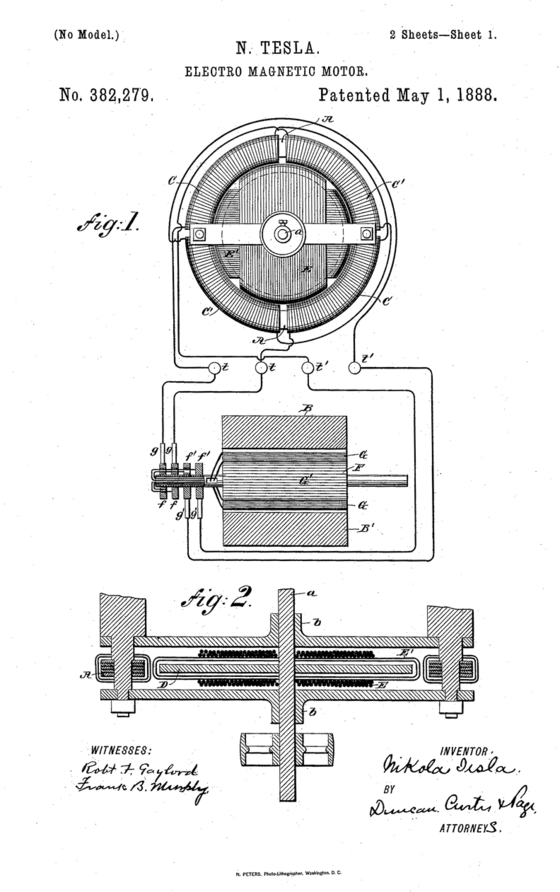
Aside from paper stuff that I’m always blabbing about, I had a few little personal projects I’ve wanted to do and decided to tackle one today. I am a huge fan of electric transport, Tesla, and correspondingly have been very interested in Nikola Tesla himself. Interesting story there, but I came across some of the original patent illustrations for his AC motor (which basically is the mother of every electric motor ever used since then) and I thought it would be cool to engrave that.
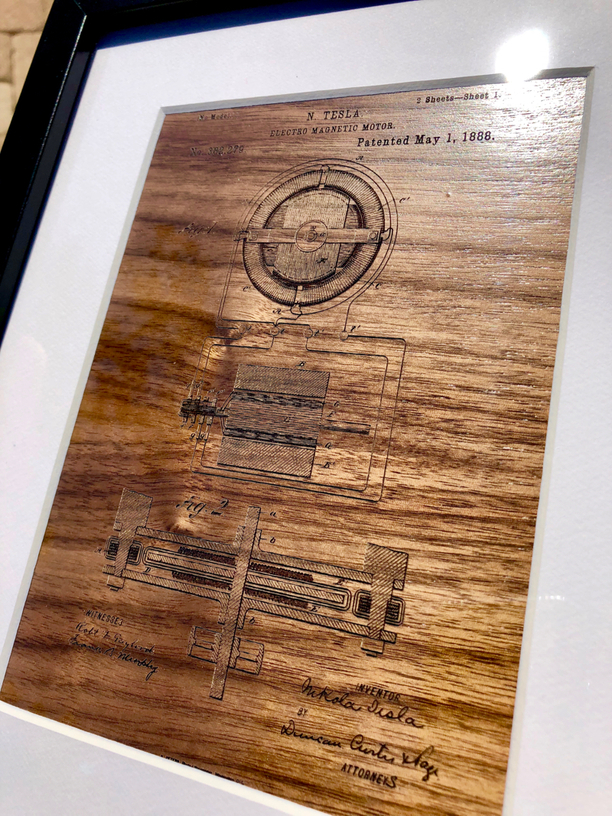
My first try was into the walnut veneer and the detail is great but I think the darker wood obscured some of the visual impact, I felt it looked cooler when the masking tape was still on it. I think I will try doing this on a lighter wood to see how it compares.
This is small, just 5x7 and used the bitmap PNG that I brought into Illustrator just to add the cutline. It is so easy to do this stuff on the Glowforge, it just blows my mind.
(Oh, the tip to use Gorilla tape to weed out that masking it truly a lifesaver. There is no way on earth I could have gotten out all the bits from in between those fine lines without it. If you don’t have a roll, buy some immediately.)
Gorilla Tape is an absolute lifesaver. Alternately, I’ve used a pick to help with weeding small areas, rubbing across the masking, not digging into it.
A little bit of acrylic paint (before you weed) can make it pop. I learned that from some suggestions here! You can even drop the piece back in and (very) lightly laze back over the acrylic.
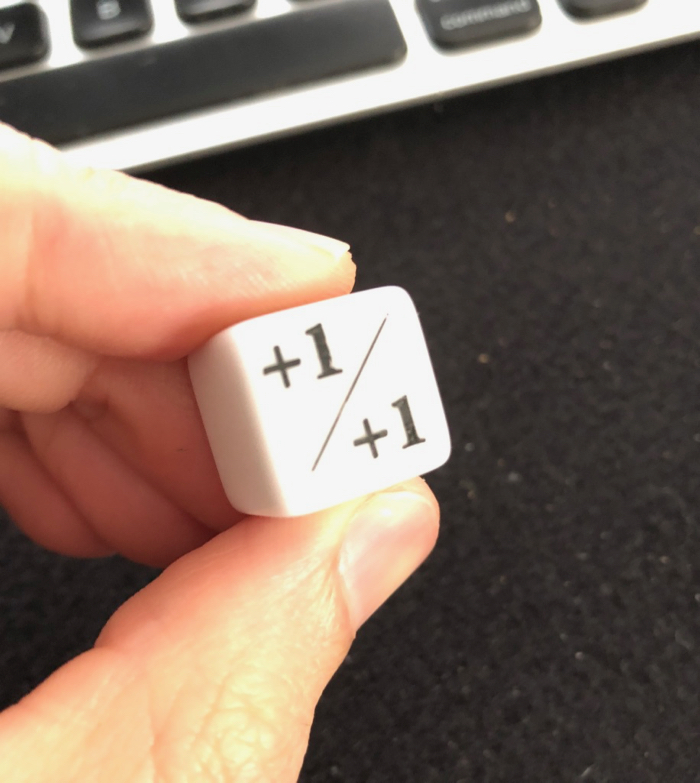
My daughter and I play Magic: The Gathering and while you could buy a set of special counter dice (for a crazy $25) I thought I’d give a stab at making some. I bought a pack of 50 plain white dice off Amazon for just a few bucks and whipped up a “plus 1” design in Photoshop. Slapped it into the GUI and engraved and then used the classic black Crayola to fill it in. It looks great! Next time around I will up the power just a bit and also am going to cut a little jig from draft board so I can cut 4 dice at a time and keep things aligned.
The dice is .632" so I did ave to remove the crumb tray and I stacked up roughly an inch of scrap acrylic underneath, measured the entire stack with die and then subtracted 1.5". That gave me a focus of .22" and it worked a charm.
I’ll come up with the other 5 sides and then just laser away. For about $.50 worth of dice an half an hour I can have a nice set.
These are fantastic! Please do break them out into separate threads, your work is too cool to bury in a single thread. (And we like one thread per project).
I’m with the other user. I’ve made many things that I stain the board before lasering and then infill with acrylic paint. Often you can let the paint dry and then just clean it off of the stained board with no issues since it doesn’t like sticking to it
So what is the exact sequence there? Take off masking, stain the board, laser, then cover in acrylic, let it dry and then just wipe? Any particular type of paint that works best? Do you use a brush, or dab it on like with a foam applicator?
I make it so easy. I just stain the solid board, laser it, and in a perfect world paint the etch before you take off the masking… But it’s not all lost if you do… Just takes more clean up work. Stains are made to protect and repel so acrylic craft paint just washes off with very little effort after it dries. I find it even easier than trying to clean up the overage when it’s wet Wet q tips are your friend.