A most amazing box!
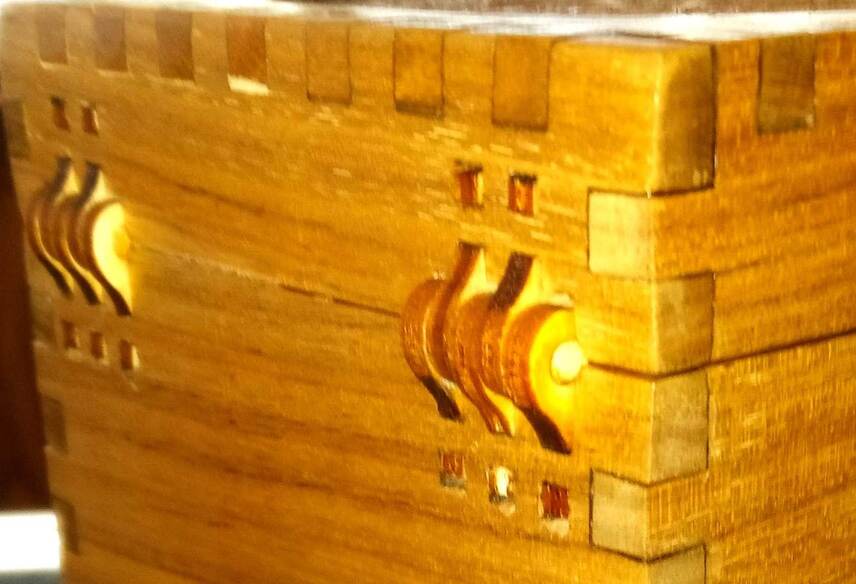
Those are different Kumiko patterns than I had found before and I like them the most! I have always been a fan of tiny fingers as well. Those look like the basic Festi hinges that I have been using as well. I have made a few changes however slimming them down a bit and making them in thin Baltic Birch that is much stronger than most materials.
6 Likes
You’re right, they’re just the basic ones. I was using inside ones for ages and recently switched to the outside kind and I love them so much more!
4 Likes
Thank you and welcome to the forum!
2 Likes
I made these for 1/4" wood out of 1/8"BB.

they are designed to have the smallest outside footprint.
8 Likes
They look very sleek for with 1/4", great idea to use thinner wood for the hinges.
2 Likes
Very nice, lovely curve to them.
6 Likes
Beautiful box… that fuchsia acrylic is ![]()
7 Likes
Exquisite!!!
3 Likes
Ooh, what a lovely project!!
4 Likes
Oooh, that is pretty!!
4 Likes
Great work! Boxes are always fun!!
6 Likes
Wow. I had never considered wooden hinges. These are wonderful.
4 Likes
beautiful work.
3 Likes
Over at the Pen Blank Press thread, I line the wood clamping faces of the press with a layer of acrylic specifically because the wood glue comes off so easily.
I’ve never found wood-to-acrylic to bond well and always look for ways to incorporate a mechanical bond instead. CA glue is better and epoxy probably best, but none of these is as solid as a mechanical bond. Having put it to use now on several occasions, I can attest to the ease with which I can get a 1/8" disc off of the acrylic without damaging it. Couple taps with a wooden mallet and presto.
For a design like yours my most likely approach would be to cut two strips of wood to glue to the inside of the lid on either side. They would be face-glued to the side of the lid with the edge butted against the acrylic. This provides a super-solid wood glue joint supporting a mechanical fastening that is pretty much guaranteed not to fail.
As to design, having the edge of the support come out as far as the existing edge would add way too much visual weight to the sides. Instead, I’d probably make the strips about 3/4 of the height, 80% of the width, and incorporate the kumiko design so rays fanned out from the top toward the edge. The short sides would slant in along the same angles as the hexagons in the top design. A contrasting wood such as walnut would cement the look as more intentional and artistic than as a compromise in the name of functionality.
Of course the assumption implicit in the phrase “my most likely approach” is that I could design a pattern like that in the first place. Because if I could design that box, the supports I described would actually be possible. In real life my supports would be closer to a couple of popsicle sticks glued inside the lid if I had to design it myself. Big props to you on the design and execution.
Hey, I just realized - sometimes it pays to think inside the box after all!
6 Likes
Beautiful!
3 Likes
![]()
![]()
![]()
2 Likes
Beautiful!! ![]()
2 Likes
Thank you so much for your thoughts and suggestions, it;'s funny I was pondering a very similar approach over the last few days even before reading this, I was thinking I could actually make two rails to hold it in there and when I assemble the lid the act of putting on the final side would hold it in place. I could add a couple of dabs of glue here and there to stop any potential rattling.
I love how we can cocreate on this forum! It’s very inspiring, thanks for taking the time to share your thoughts!
I’ve been offline for a few days as we had a Derecho in my area and the power has been off. So happy to have it back on so now I can get to box making!
6 Likes
This had me chuckling as well!
3 Likes