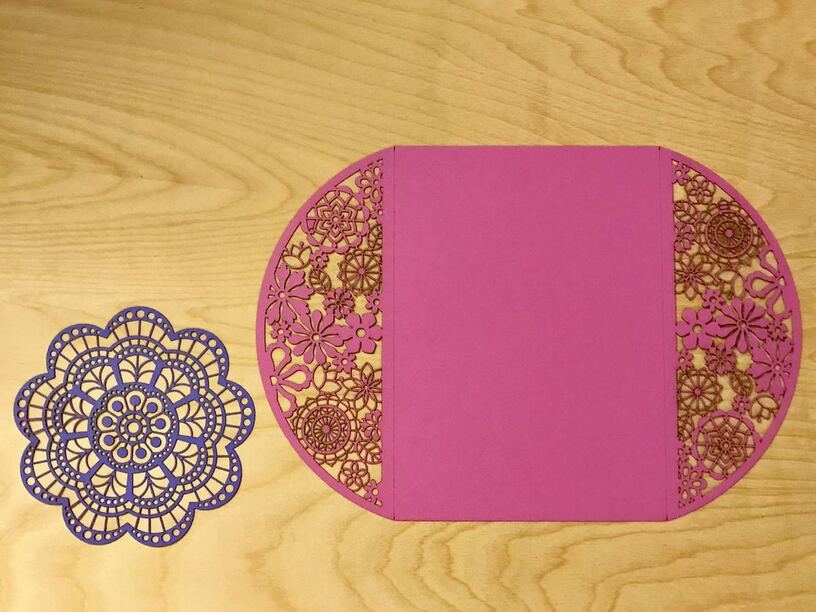
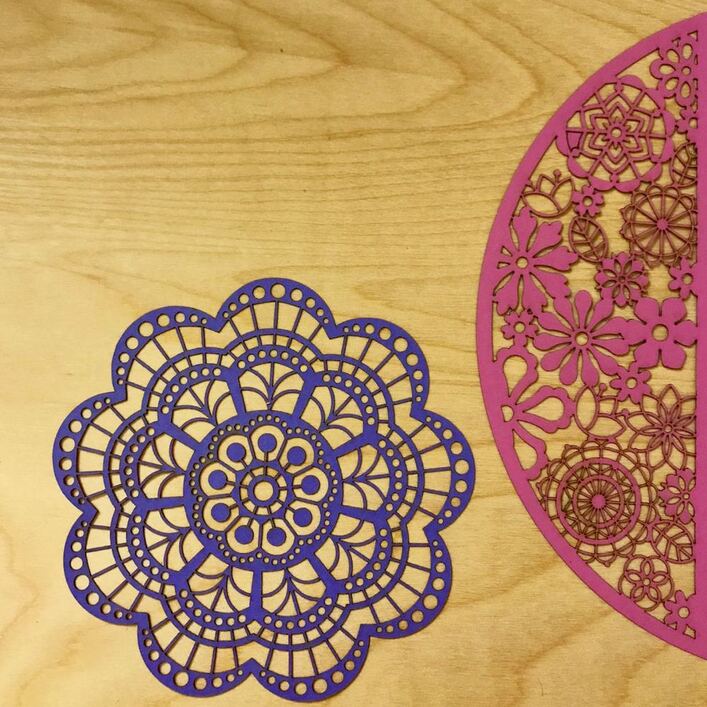
Watching some laser cutter videos, saw one cutting lacy patterns into paper. Source was found on Monica’s Creative Room and gave it a try. The doily came out well. All the tiny curves in the invitation slowed down the head enough where there was some charring on the finest details and some discoloration on the reverse side from backflash. I used 500/60 to get through the cardstock regardless of speed, otherwise I was left with some fast moves not quite cutting all the way.
Still, I’m impressed with the detail I was able to get. Some of that filigree is extremely thin. I think improved power ramping on high speed cuts would improve results, as would perhaps cutting over a mat.
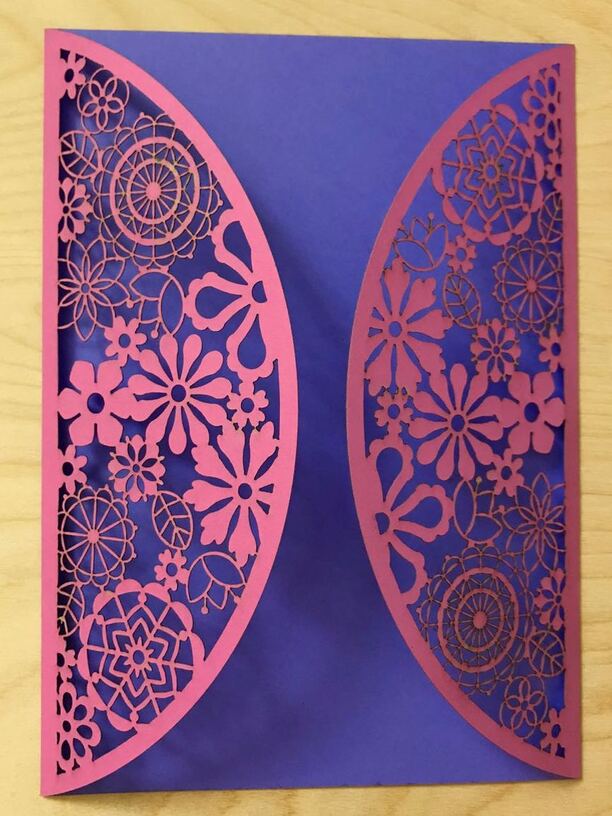
Beautiful!
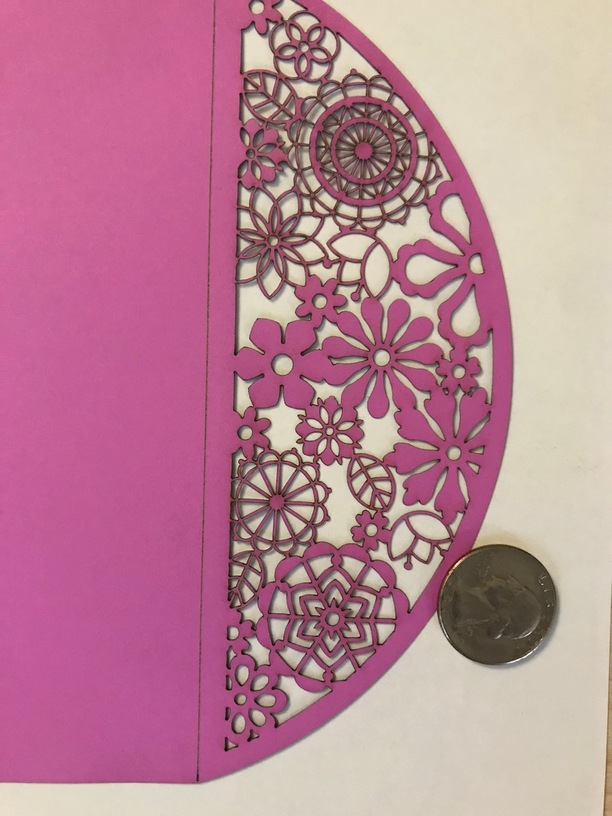
Such fine detail is possible. A coin or founder’s ruler in the pic would help give us scale. I bought a rainbow package of light card stock I am anxious to explore! Thanks for the settings you used.
They look great!
What was the weight of your cardstock?
I did sime invites for friends of mine on 110# plain cardstock withough a problem or much charing. I’ve gotten different weights and coatings, from 105# to 120#, and it won’t cut through without major charing. Trying to find a setting that work, especially for the 120# duplex color cardstock.
I threw away the packaging, so I don’t know! It’s 111 g for 10 sheets, 8.5x11", different colors on each side, 0.095" thick. I just spent a while digging into how paper weight is measured, and it is a crazy, crazy system. Converting to grams/sq. meter, I get 184 gsm. None of these numbers lines up perfectly with any stock cover weight, it comes closest to 65# by weight, but more like 90# by thickness. I got a rainbow pack, I think it’s from Michael’s.
Here’s another attempt this morning with a coin for scale, this time cut over sheet of waste cardstock to see if I could cut down on the backside discoloration. It didn’t, just doubled the amount of confetti.
Speaking of confetti, make sure you check under the front of the bed and in the front door hinge where it all likes to gather.
If you want to cut down on discoloration, you can mask it front and back with a medium tack paper masking tape. That stuff that I got from SignWarehouse works really well on paper, and removes without trouble after cutting. (Part of the reason I don’t like it for wood - it’s not sticky enough to stay attached on wood.)
It’s not nearly as tacky as the stuff that comes on the Proofgrade materials.
I’ll see if I can figure that out…All it says in the roll is “MainTape” and it’s been a while since I picked it up. I know they have different tack levels on the tape, but I’m not sure what the number is.
I found the link to the tape on SignWarehouse…I bought the 12 inch roll, the only thing they had at Amazon was the thinner widths at the time I was buying, and I wanted the wide roll.
Pretty sure MainTape is another top-tier brand (along with TransferRite and R.Tape), and I think Endura is made for signwarehouse by one of those companies.
Even the high-tack masking may have adshesion trouble on unfinished wood. Sometimes if it is being cranky, I lay down a sheet, pull it up*, and then lay a fresh sheet.
*this used sheet is great for removing pet hair from clothing, or picking up little piles scrap masking and wood off of a work surface
FWIW, this is a situation where you may want to convert to an engrave. It looks weird while it’s happening and may take longer, but cutting the paper with a raster engrave gets rid of the speed variation problems. (I’ve done vector scores trying to draw a picture, and same thing with the overburning.)