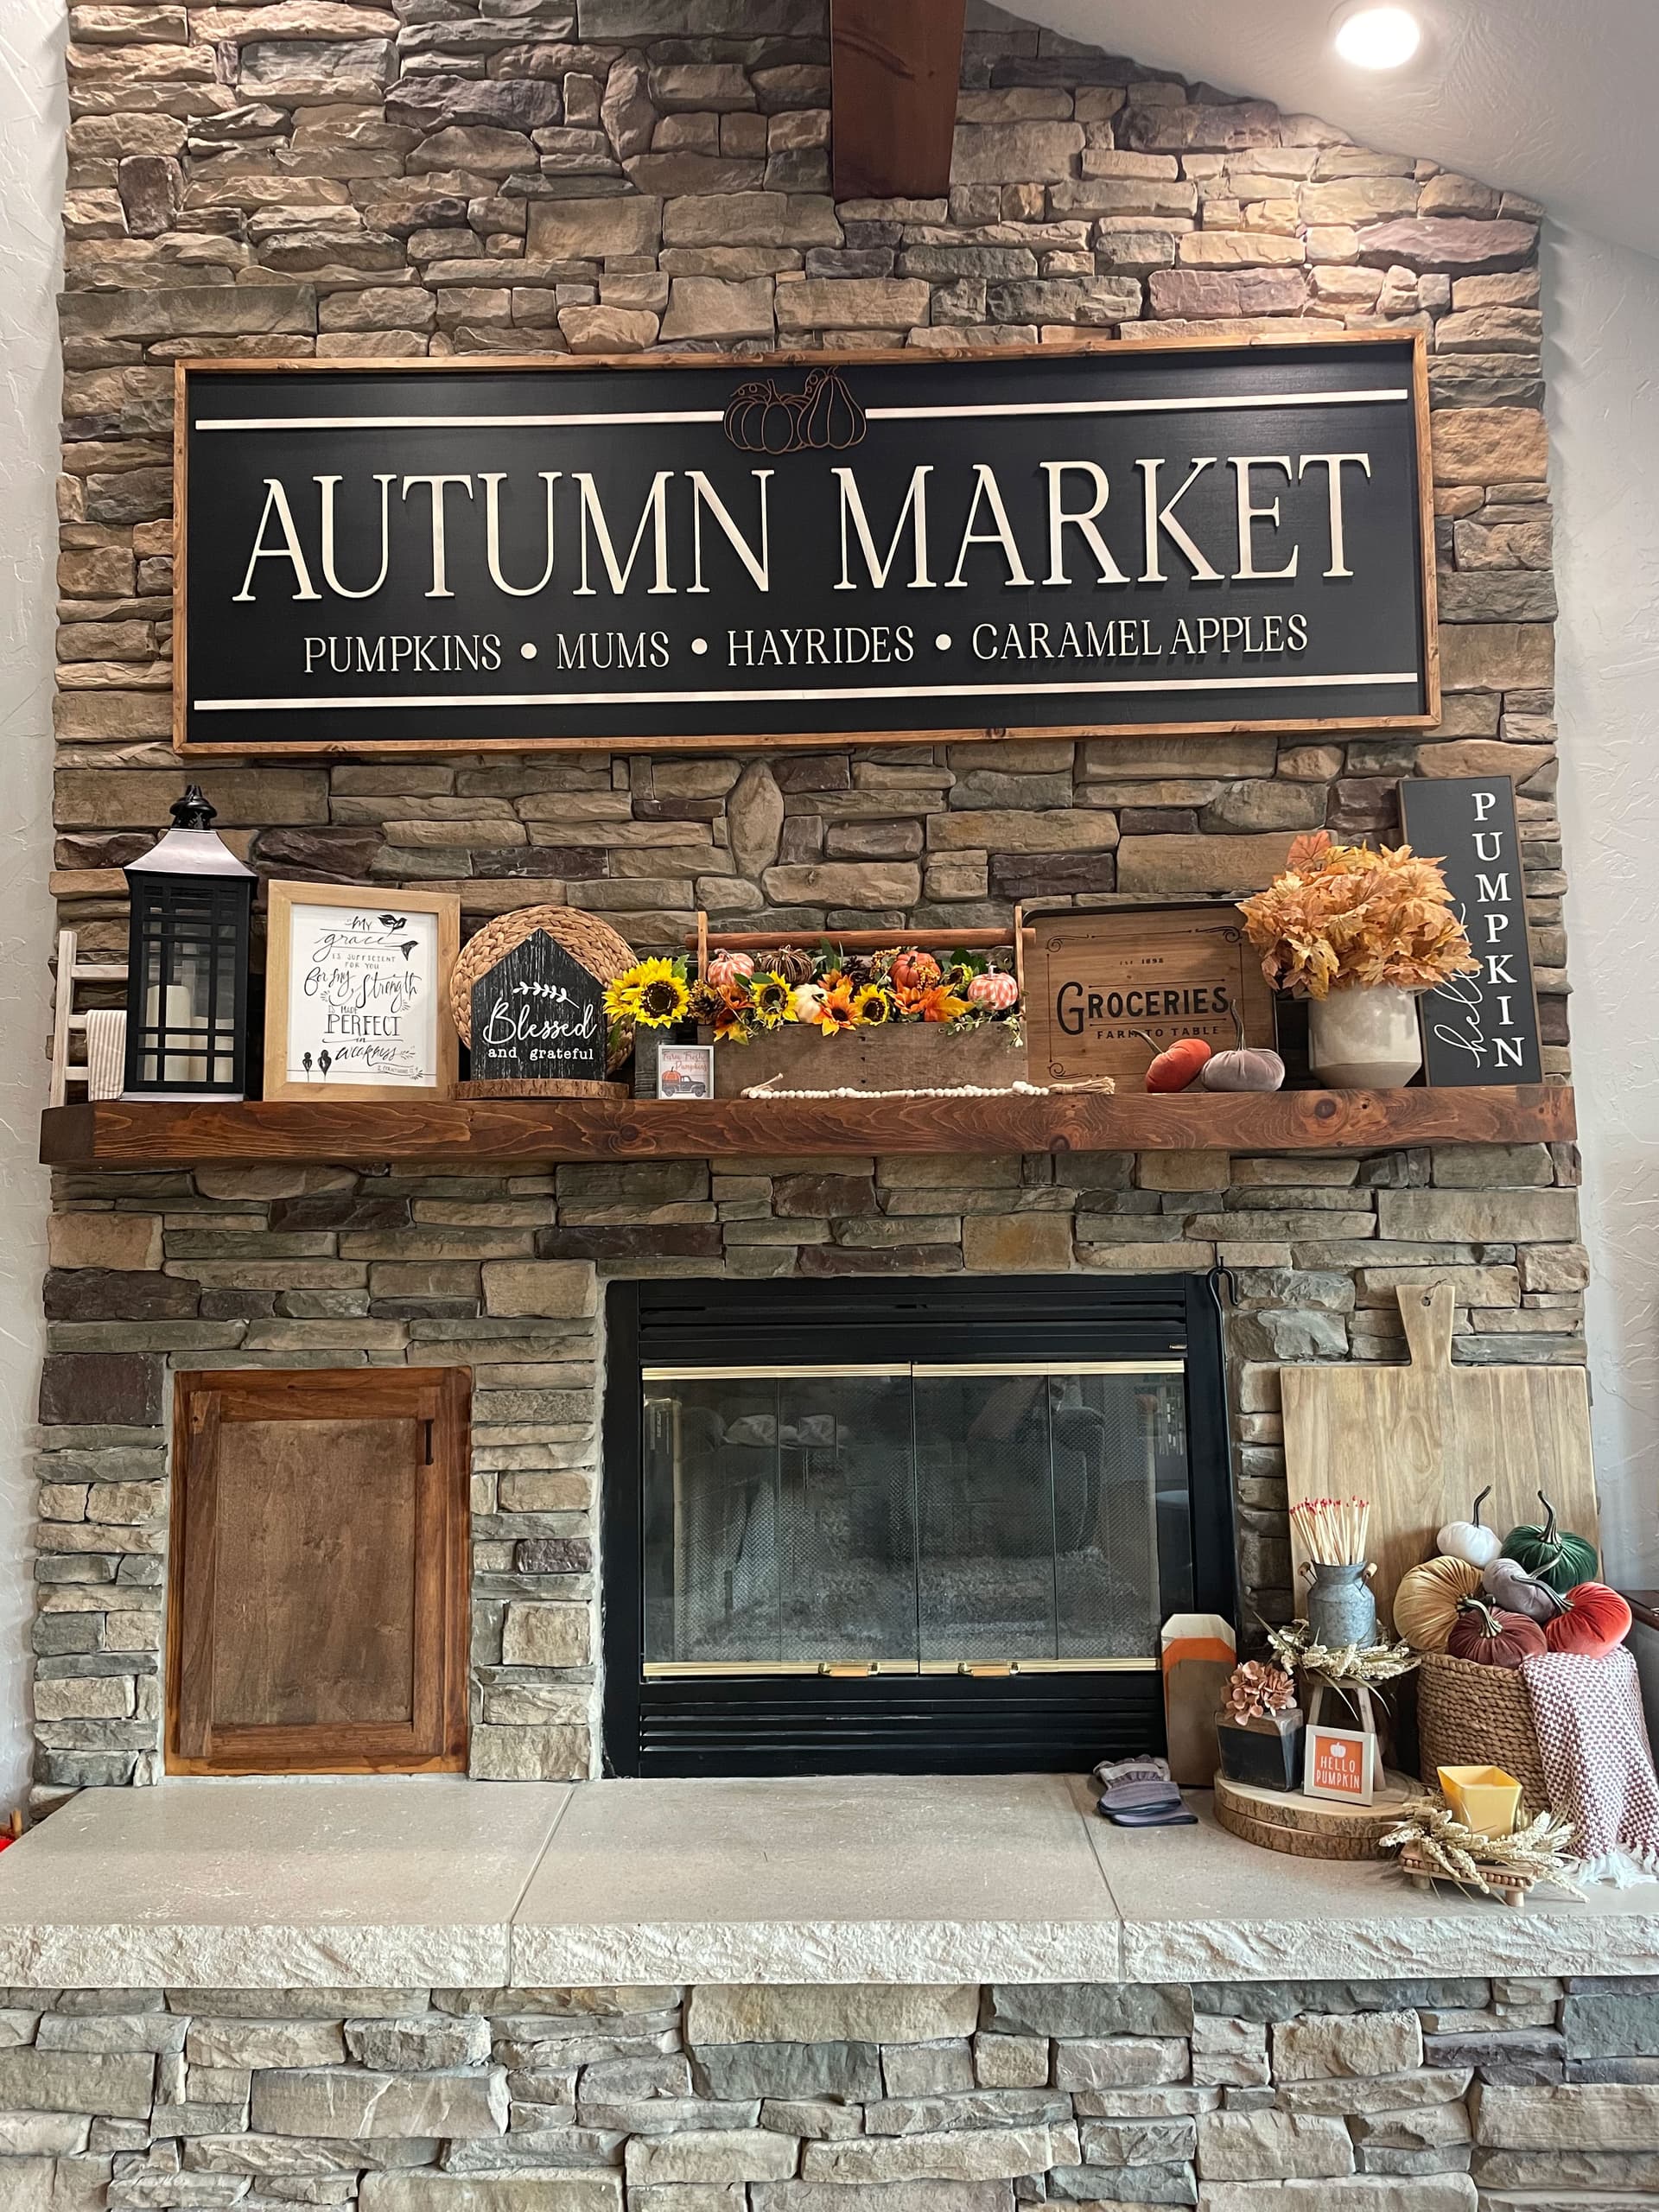
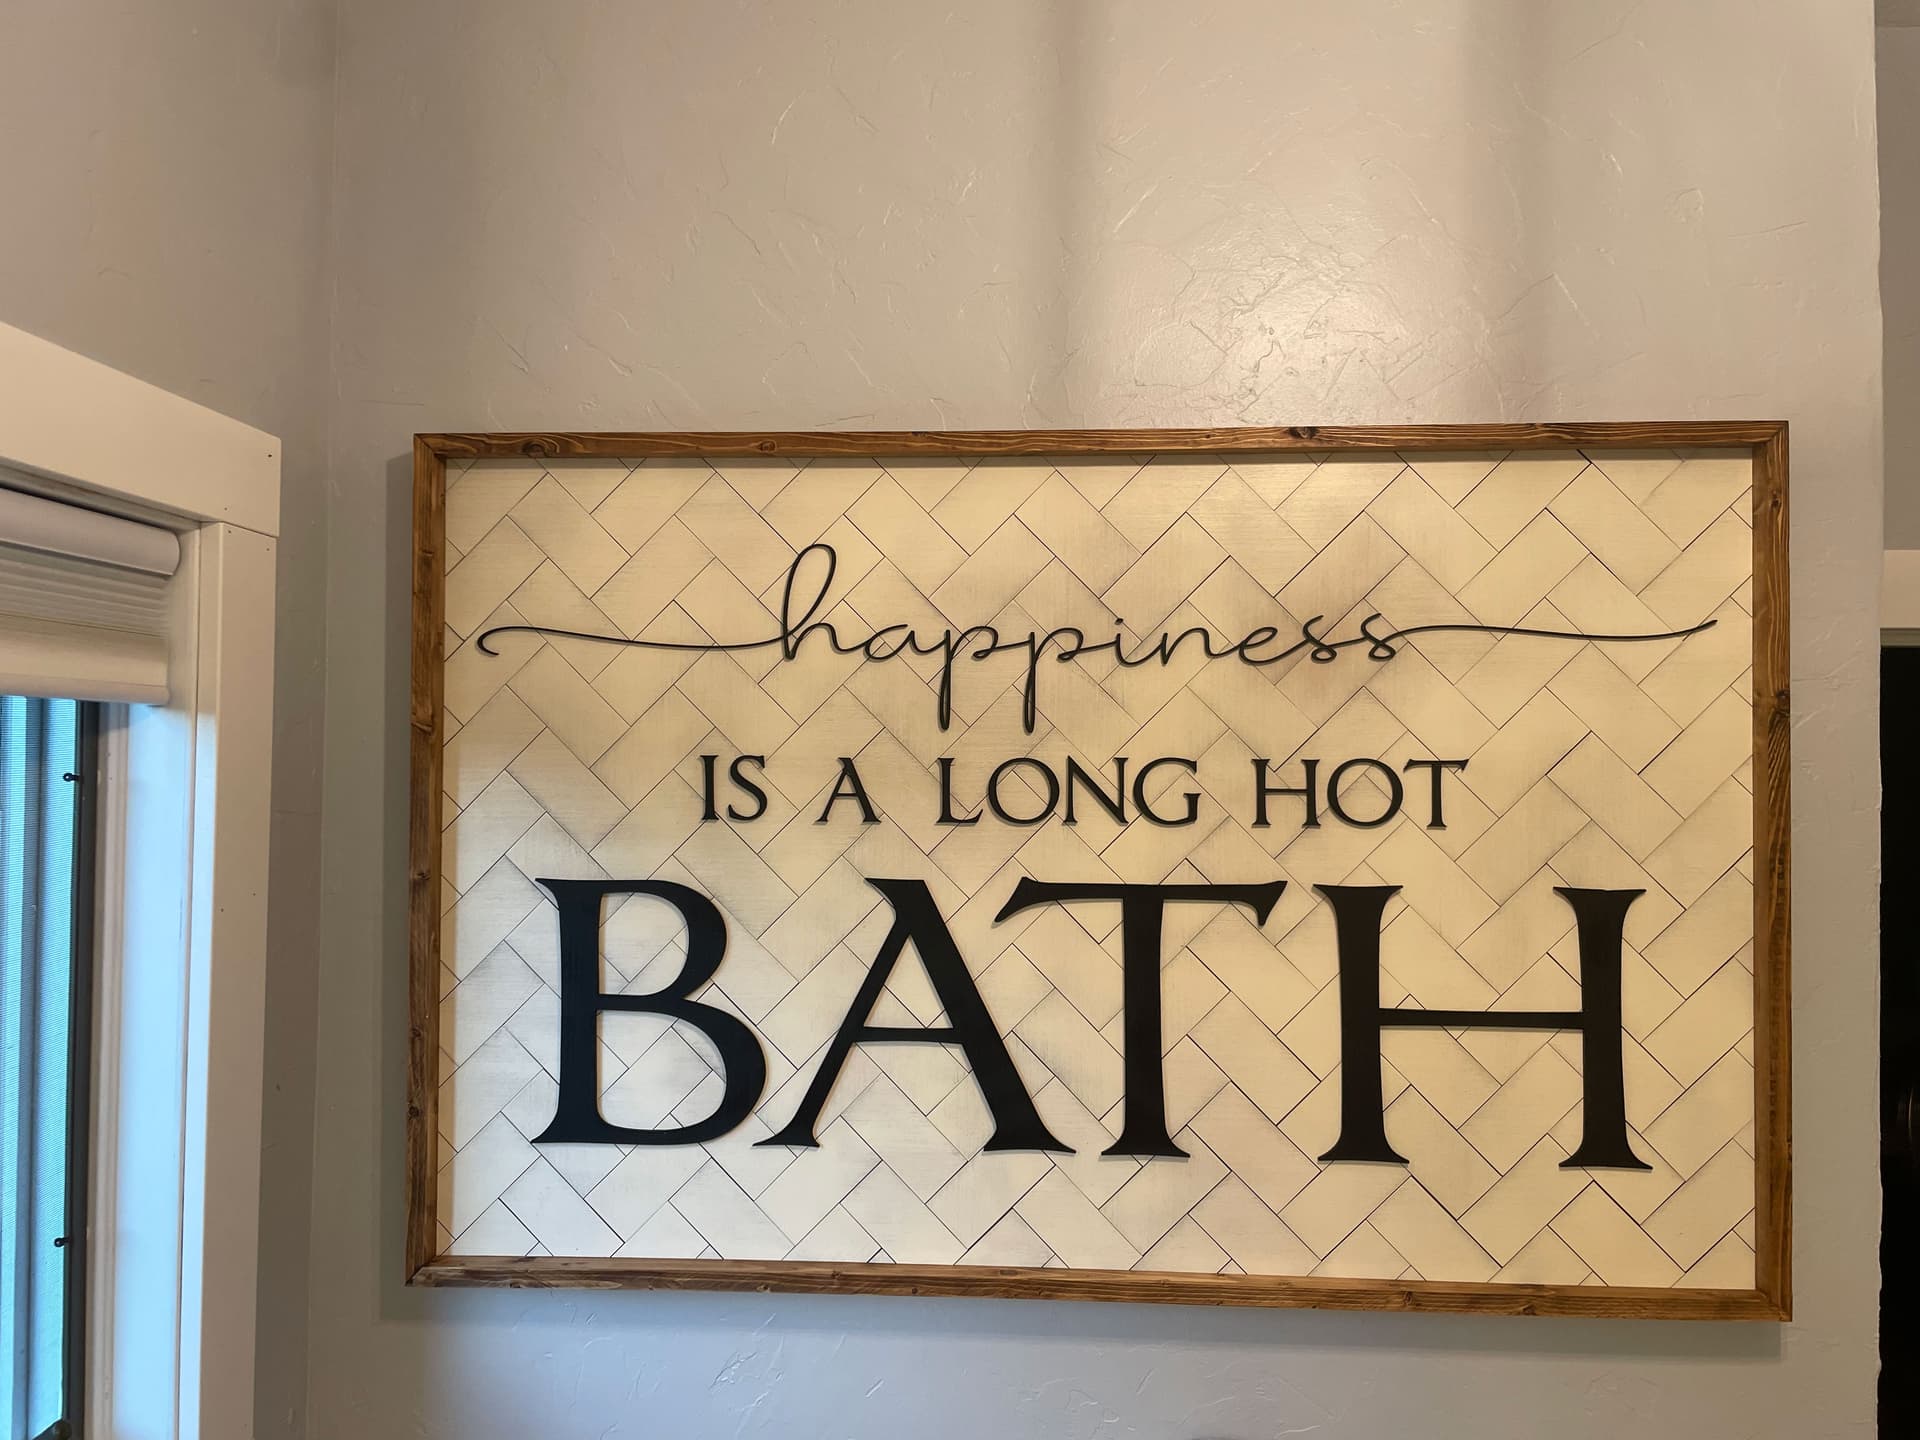
My wife has always had a love for making wooden signs. She had a business at one time making signs by cutting vinyl lettering and applying it to wood; cutting wooden lettering with the Glowforge is soooooo much better in my opinion. These are the two latest (and largest) signs we’ve made. She does the design and the painting, I do the custom frames and assembly, and we both pitch in on the cutting with the GF.
The autumn sign is 30"x96" and is reversible. I didn’t make the frame reversible, but the sign pops up and flips around to become a Christmas sign (that side has yet to be completed). Nothing on this sign required the passthrough (I cut the long lines on the table saw), but I arranged all the letters to fit as tightly as possible on a piece of 21"x48"ish piece and used the passthrough anyway to reduce waste.
The bathroom sign is 30"x48". We opted to cut each individual herringbone piece and assemble it back together on a piece of backing (rather than just scoring lines onto multiple sheets) and then just spray painted to the whole thing, which got us the finish we were looking for.
The only hiccup has been working out the adhesive. The bathroom sign backing didn’t lay 100% flat, so using E6000 meant we couldn’t get the letters to match the contour of the sign. We tried hot glue, which worked great, until really handling the sign, then letters started popping off like a poltergeist was present. The autumn sign did lay completely flat, so I used wood glue so that I could brush it on for quick and thorough application. The problem there wound up being that the backer is very-flexible 1/8" ply and wood glue dries very rigid and wouldn’t bond well to the painted surface. One again, our very own poltergeist showed up. In the end, I used super glue to reattach the necessary letters so it would cure quickly and not slow down getting it hung. Next time I will probably just stick with E6000 or use some sort of flexible epoxy.
TLDR: Here are two signs that we made with our Glowforge.
Welcome to the forum! Those signs look awesome! I really like the subway tile effect on the bathroom sign.
Other glues you might try are 3M tape (put it on the back of the wood before you cut it on the Glowforge) or Stick Fast, which is another superglue. I use Stickfast to put letters on my pine boards I use for porch leaners and it’s held up well.
Everything cut with the GF is out of 1/8” ply to keep the cost and weight down. When the signs get that big the weight can get out of control pretty quick, especially when doubling up like on the herringbone sign. Veneer is a good idea but would lose the “pop” that a thicker letter provides.