Laser Bed Tray(s) and Bed Depth

My assumption (and I mean complete assumption) would be that the depth of laser empty was measured, the honeycomb was measured, the rail the laser rides on was measured and then the height of the laser head itself was measured. The distance between base and railing-honeycomb-head height gave them 1.5. And the mounting of the laser head riding on the railing and the top of the head actually being above the railing and not the same height gives you the actual 2" range.

One again complete speculation. I just see that as being an easy mistake to make

2 Likes

Thank you so much for finding that video! I’m relieved that I’m probably reading Dan’s photo wrong, and DELIGHTED that we may have an extra 1/2" of bed space!

4 Likes

I believe Dan to be the type of person who welcomes rational discussion. Back when I taught engineering, I welcomed with open arms any discussion with students aimed at clarifying concepts and moving understanding forward, even if it meant derailing a planned lecture. I believe Dan shares those values.

5 Likes

That sounds totally plausible…

And again, Lord knows I’ve made tons of simple / obvious whoops in my day…

3 Likes

I agree 100%! We don’t want to upset something good.

2 Likes

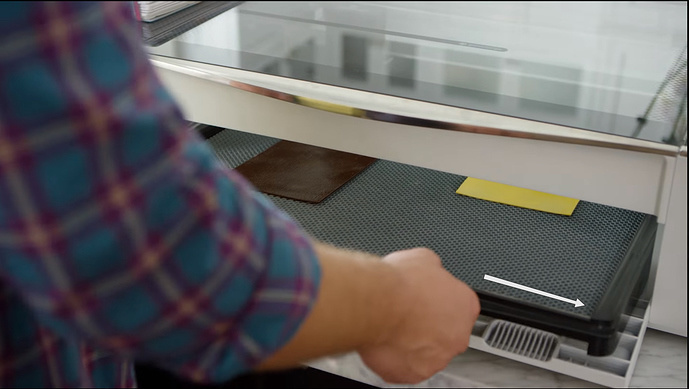
The confusion occurred because the prototype tray and the production trays are apparently different. The folks that went to MakerFaire might have seen the change but the rest of us had not.

8 Likes

Now I’m completely confused.
From the photo posted by Dan, the measurement looks like it’s taken from the bottom of the tray to the top of the right side lip.

If this is true then @fan-of-glowforge is correct in his drawing and the distance from the bottom of the tray to the top of the honeycomb is less than 1.5".

I hope I’m wrong on this as a 2" working space would be sweet.

1 Like

I think we figured out that there is no lip on the top. The old trays had a significant lip. There is a video posted above that seems to show a surface flat with the honeycomb for the newer non prototype trays.

1 Like

Great.
One less thing for my confused mind to think about.
Can’t wait for the GF to arrive.

1 Like

Are you suggesting Dan measured on old tray in his photo?

2 Likes

Just pointing out…Any size, any shape, large or small, and we can probably just lase the mask out of the paper adhesive masking material that they put on top of the specialty stuff they sell…grin! :smile:

https://www.amazon.com/Armour-Etch-15-0200-Cream-10-Ounce/dp/B001BE3UM4/ref=sr_1_1?ie=UTF8&qid=1469830409&sr=8-1&keywords=etching+cream

8 Likes

Got a bottle of that sitting waiting for good cut stencils.

3 Likes

Be alert to the warning label on that product as it Will Cause severe burns. Please wear gloves and eye protection and keep well out of reach of pets and children. I can’t see the ingredients, but hydrofluoric acid is the likely ingredient or one of its salts.

6 Likes

That’s the only acid that will attack glass that I know of.

4 Likes

You use disposable rubber gloves, eye goggles, and a disposable popsicle stick to apply it. (The eye goggles are not really necessary, unless somebody comes along and throws some into your face, but what the heck, better safe etc. etc. etc.)

I’ve been using it for years with never an issue, although I do remember treating it like it was radioactive the first time I did. (Chuckle!)

It’s like a thick-ish gritty almost-paste, not a really liquid cream…it doesn’t have a lot of splash potential. And the lid on that bottle is a child proof safety cap, which means adults have a hell of a time getting into it.

You stir it a bit, (if you can), then apply it evenly 1/2 inch thick over the exposed areas that you want to etch, wait five minutes, and rinse it off with water. (I usually rinse it off in the slop sink outside, but you probably don’t even need to do that.)

The secret to getting a good uniform etch is applying an evenly thick layer on all areas - most people try to be too delicate with it at first, and that does not yield good results. You want complete half inch thick coverage.

They sell smaller bottles at hobby stores, and you don’t need much unless you are doing it for business. (I had a two ounce bottle that lasted for years, so if you want to just test it, get a smaller bottle.)

It’s fun, and it’s something you can experiment with while we’re waiting. (Heck of a lot cheaper than a sandblast setup, if you just need to do a few items.):slight_smile:

9 Likes

What Jules said! I did several different kinds of glasses not too long ago. It was a blast!..and not a ‘sand blast’. :smile: I hand-cut a stencil for the olives on this martini glass. I used a popsicle stick, too…and washed it off under running water in the kitchen sink. Easy peasy and lots of fun!

15 Likes

Girl you have a creative twist that is just waiting…

3 Likes

If you are really interested in etching, look into getting an airbrush compressor and an “air eraser,” which is like a tiny sandblaster. It is MUCH easier to get good results with an abrasive blast than with that goop. I find that I have to stir the goop a few times to get an even etch. With a vinyl stencil and an abrasive blaster the etching job is done in minutes, with no worries about irregular finish.

No reason not to start with the goop if you are just trying one or two things, but if your ambitions are greater, look into different tools. You can even get photo-resist materials, so you can etch super detailed things like halftones. I can’t wait to see what kind of masking I can do with the laser…

6 Likes

The top of the caliper wasn’t on the foot, and the metal surface grid isn’t significantly recessed, although I see how it looks that way from the picture. I included the picture for flavor and it was not intended to be a clear illustration of the orientation and assembly of the crumb tray. Hard to explain without a CAD diagram or a lot more pictures, but if it helps: the bottom of the tray is on the photo’s right. (and probably doesn’t quite look like what you’d assume).

:slight_smile: I love to do it. Sometimes just takes me a while to catch up.

A final caveat: we’re experimenting with the autofocus mechanism to maximize range, speed, and accuracy; the final measurements may be a few mm less or more than 2". We’ll publish final #s before we ship.

15 Likes

That’s terrific news! Thanks, Dan, for clarifying the issue.

3 Likes