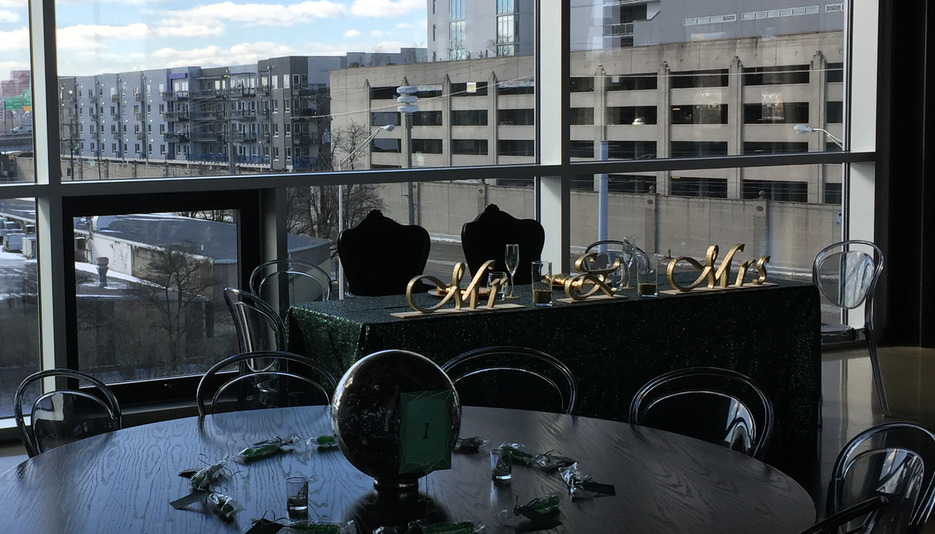
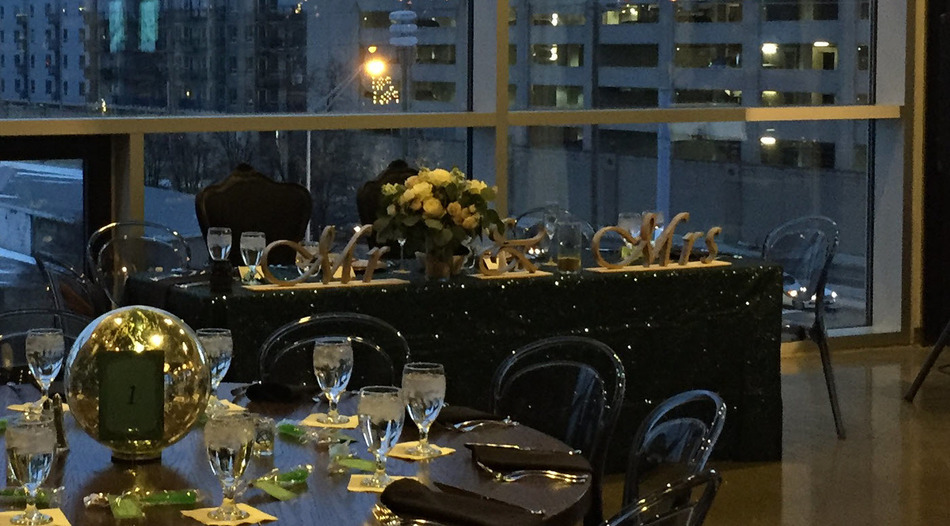
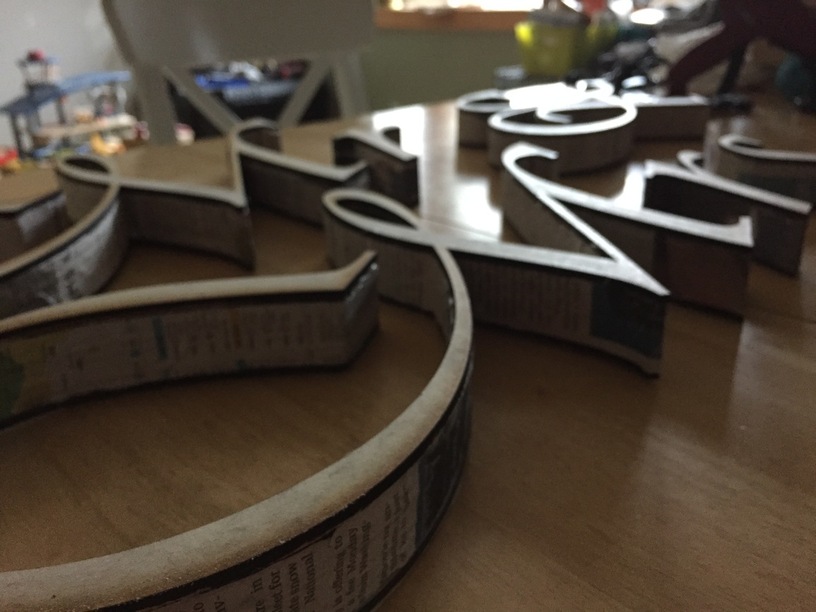
When you have a laser, your family tends to ask for things, especially if the brother in question is getting married. I was commissioned to build some lettering for the head table. Glamour shots first:
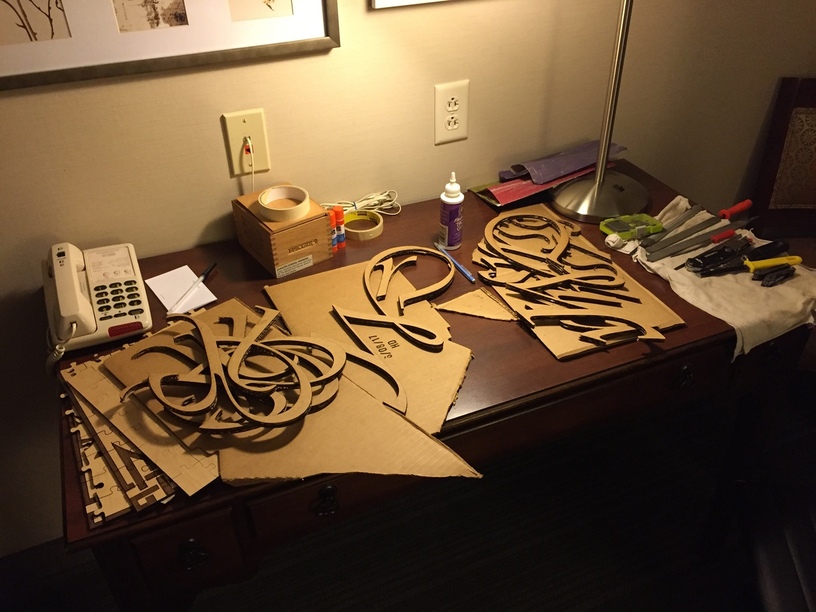
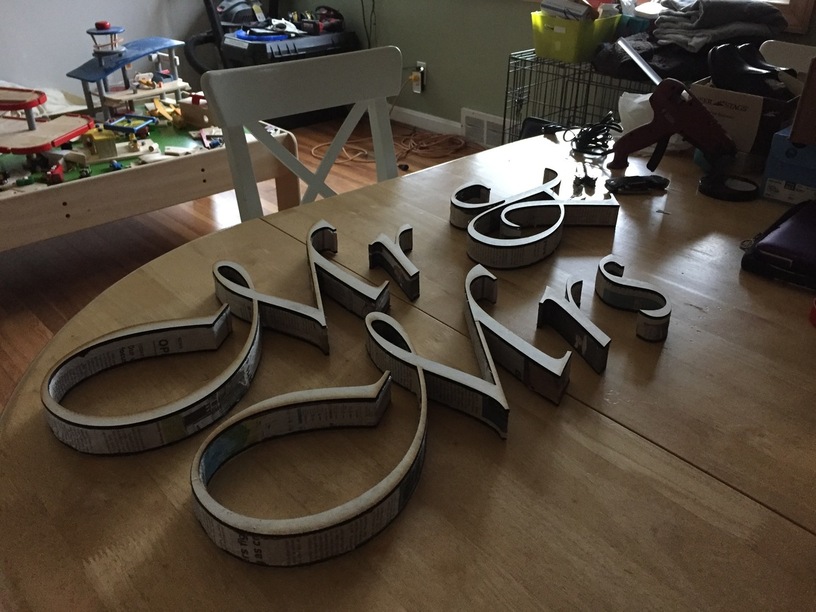
I wanted to make the letters more… 3 dimensional than a single layer of material. But when I calculated how many sheets of material I would have to buy (my brother’s design was not exactly optimized for a sheet of PG maple ply), I started thinking about what else I could put in the middle to make things a little less expensive. I am lucky enough to work at a place with ready access to cardboard, and thanks to the GF, I also can copy the same item without worrying about all the sanding that normally comes with woodwork. (yes, there is sandpaper in the picture, but it was for a different project, i promise)
I ended up with 6 layers of 1/4" cardboard, sandwiched between layers of PG medium draftboard (great stuff). The downfall of cardboard (at least in this project) are the voids around the edges. Since I was traveling for work, used the free hotel newspaper to wrap the outline to hide the voids after the glue up, then used a razor to trim the edges and layered on the draftboard.
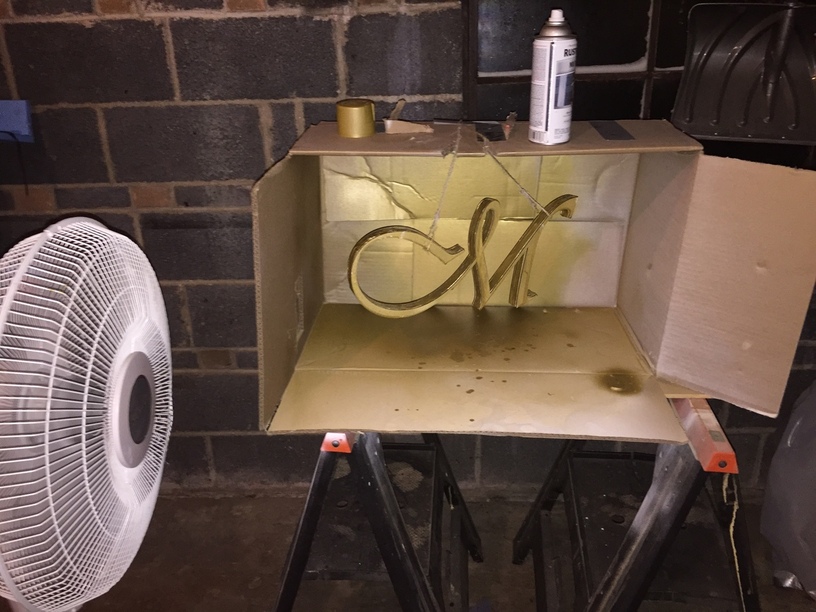
Running out of time before the wedding, I rigged up the letters to hang in front of a heater in the garage after I spray painted a couple coats of a white primer, then a sparkly gold
The newspaper was not the best choice, I would have gone with something a little thicker, maybe at least a second layer of newspaper. The spray paint was a little heavy in places and there was some bubbling. I take back what I said about sandpaper.
However, everything looked fantastic for the big day and the happy couple was exactly that!
That head table looks just stunning! Your layering idea really paid off and you did a great job on it. Now everybody having a wedding is going to want a set (maybe you could rent them out!).
They’re beautiful — and a great use of lightweight filler to bulk things up! In a build without time constraints, I think doing a couple of layers of newspaper papier mache would make the edges sturdier and avoid the bubbling.
I’m considering trying to remake them in a way that’s more conducive to travel. The letters are big and light and fragile, so they would be expensive to ship >_<
Agreed. I was worried about some of the sections that were thin and curvy, but the whole thing stiffened up when I glued the layers and added the edge band. I have to imagine even one good layer of real paper mache (as opposed to a glue stick and newspaper) would add to that even more