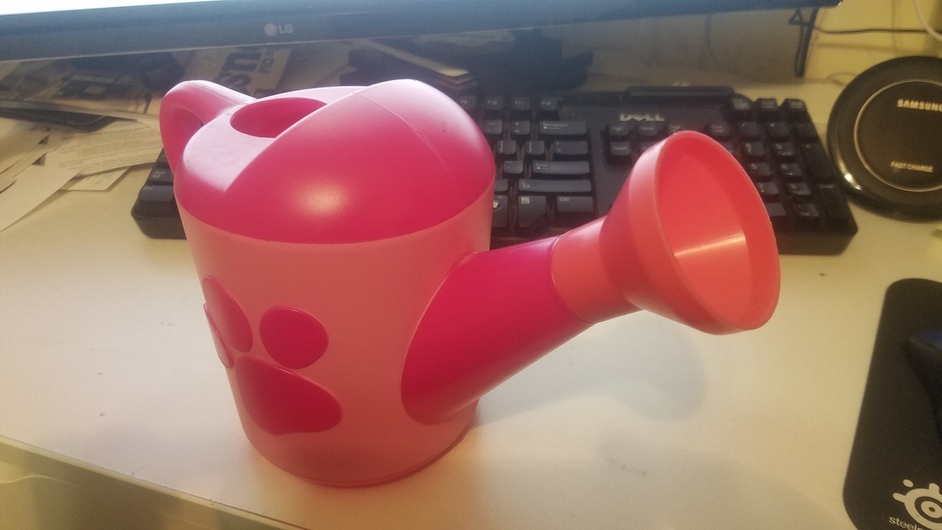
We took the O’Twins to the big box store today to get some flowers for the backyard. They sighted some Paw Patrol watering cans and, as they’re Paw Patrol nuts, we had to get them. Wasn’t until after we got home that we noticed a problem:
No problem, I thought. I’ll just whip one up on the Glowforge! Then I remembered that, sadly, I do not have my Glowforge yet. But, since it should be coming before the summer is through, I thought this was a good opportunity to learn Fusion 360.
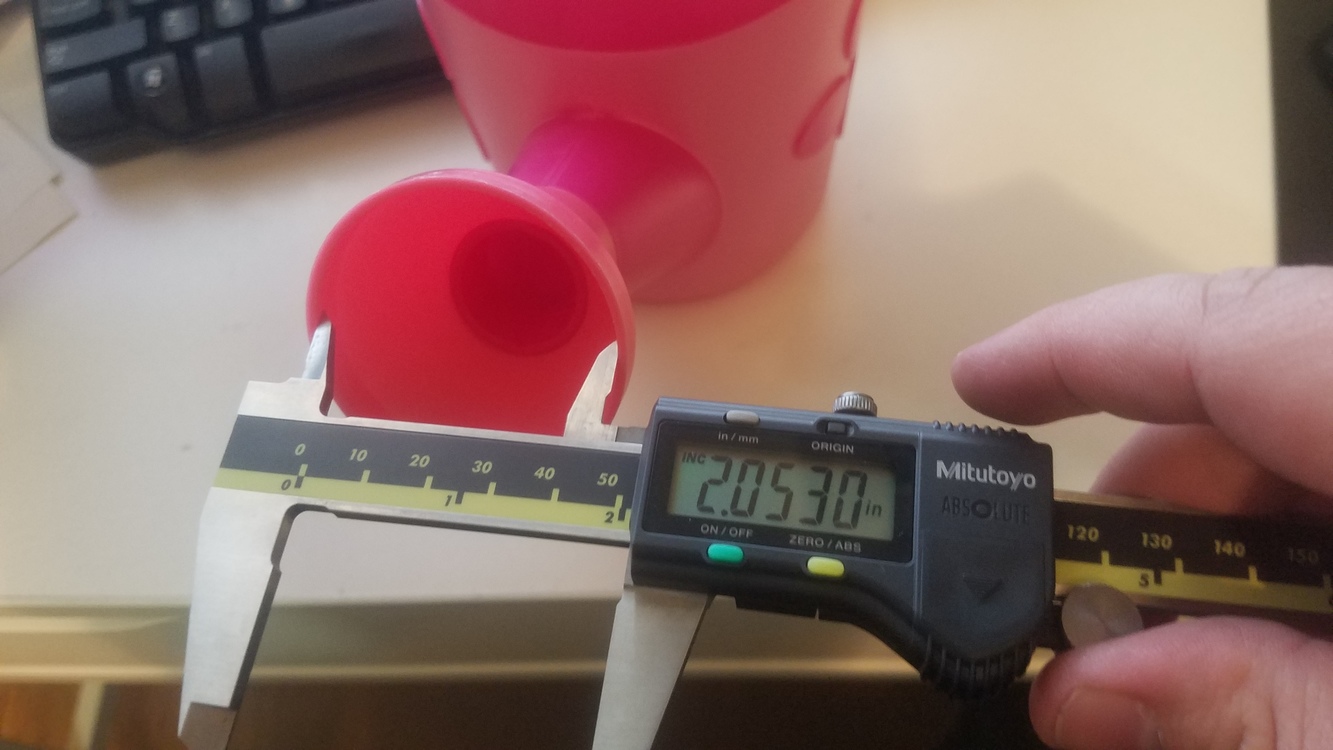
I took some measurements with my trusty digital calipers:
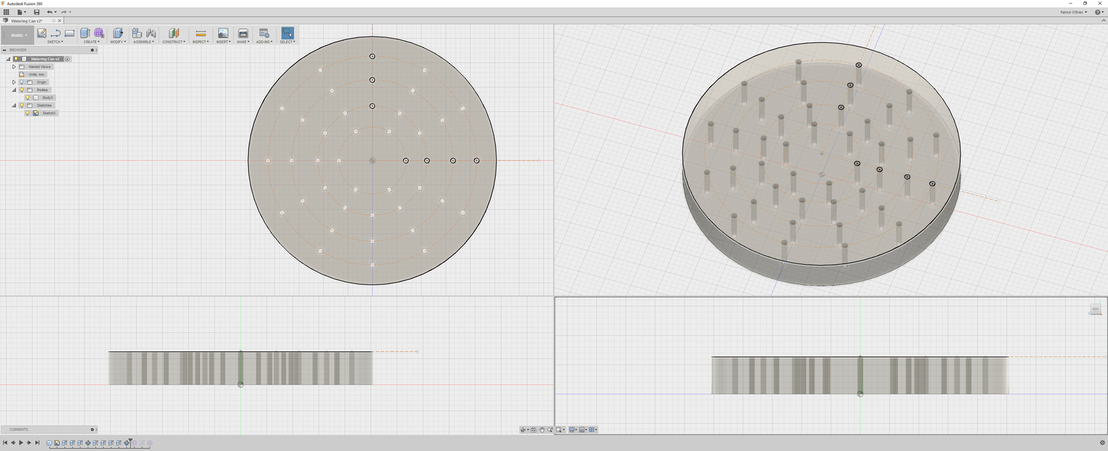
I’ve got some experience with Sketchup, so after less than an hour of poking around and following along with some Youtube videos, I was able to come up with a design:
I made it almost fully parametric (material thickness, overall diameter as well as the spacing of the holes) and even used the nifty circular pattern feature (the rectangular pattern feature will come in handy for the project I’m going to do next, a fully parametric version of the Storage Box With Drawers that was posted under Project Inspriation a little while ago.)
After a little more google-fu I was able to export it to a .dxf and then to an .svg:
I’ve posted the F360 file here, if anyone would like to check it out. I’d love feedback about better/faster ways to do it!
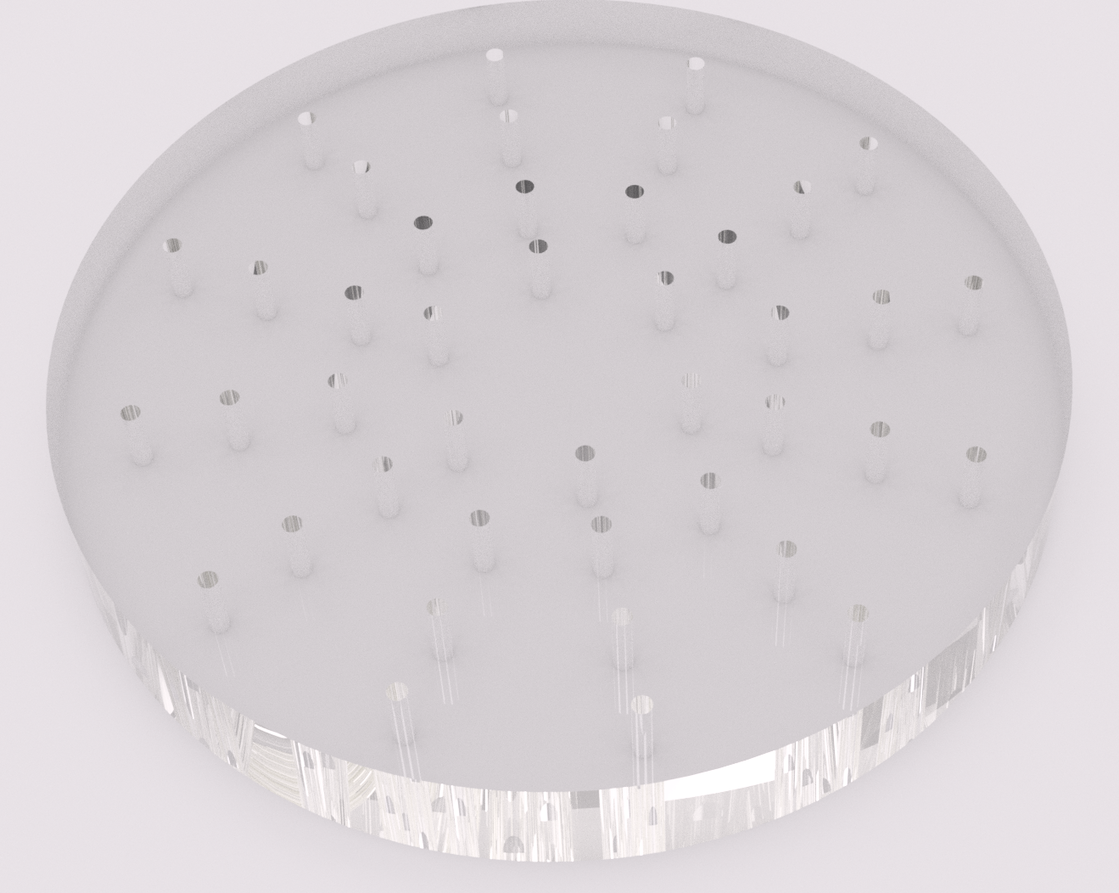
And that’s about as far as I can go for now, except to use F360’s render function to dream about what I’ll be able to make someday soon!
The file looks good. Technically it is perfect as far as I can tell. There is a “best practice” thing though. Create a component right off and put the body in it. This doesn’t really matter with this file but as things grow more complex, say that box with drawers, then it will be a life saver. It is mostly a thing of planning ahead to keep things neat and where you can find things in the outline tree.
I know Adobe Illustrator like the back of my hand and can spit out vector files without blinking… but I have yet to learn Fusion 360, so hopefully, it will not make me pull all of my hair out trying to learn a new program.
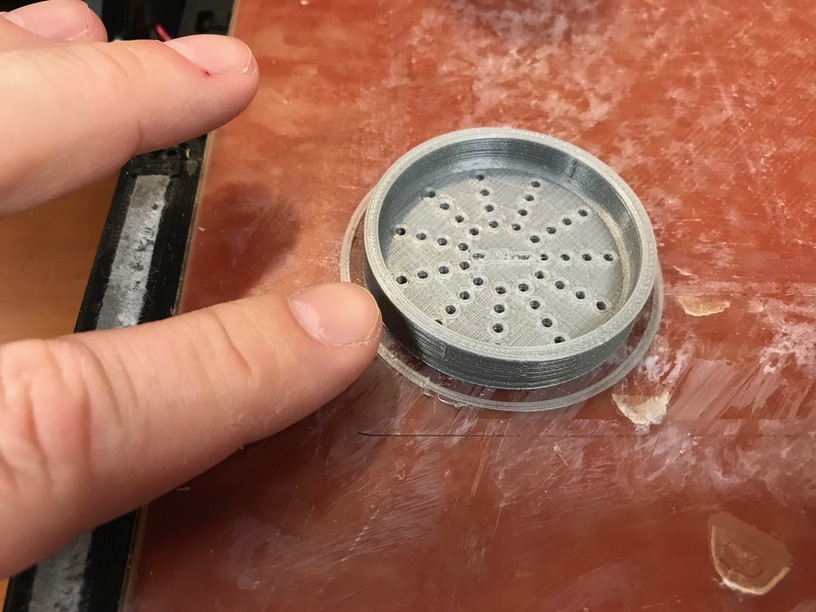
That thing has a lip. Is a 3D printer not better suited? I’m happy to print one for you (I’ve got red ABS). Only thing is sending it to you from my country would take a week or so and the postage doesn’t make sense. Perhaps there’s a kind GF soul with a 3D printer closer to DC than I am…
I guess one option for using the GF would be doing a 2mm disk a bit bigger and say a 6mm for the internal one and just glue them. You might get my 3d printed version faster though…
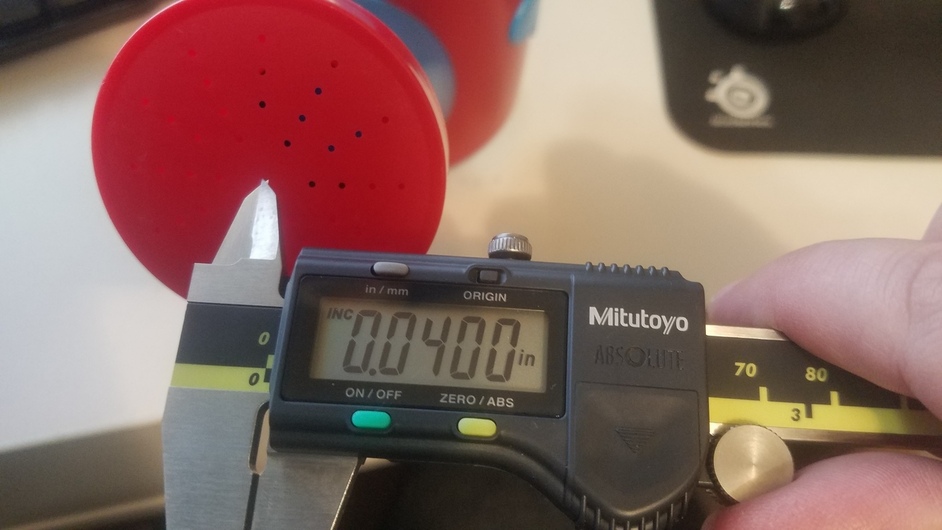
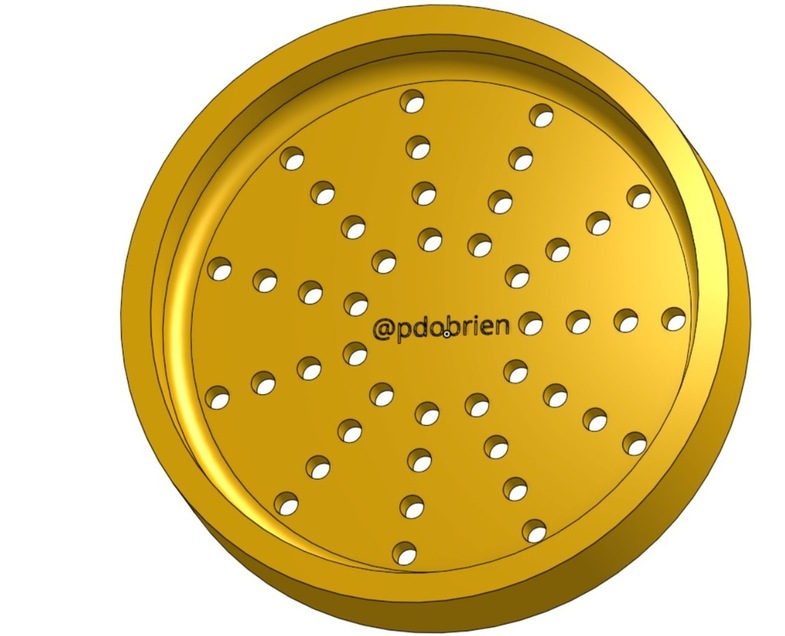
@pdobrien, what was the original diameter of the can? I ended up remaking it to have larger holes as they were pretty tiny (these are 2.5mm (plus figured I’d add your tag onto the inside)
Awesome! Yeah, it’s a small watering can meant for kids. ID of the spout is a hair over 2 inches, so I just made it 2" in F360. Plan was to cut it out of acrylic and stick it inside the opening rather than trying to either engrave a pocket or cut a separate ring to build up a flange. The size you printed looks roughly correct. My 3d printer is nonfunctional at the moment so I used this mainly as an excuse to dive into F360.
Measured diameter of the holes was only about 1mm (.04")
Yeah, I printed that at work between jobs, and the Taz6 has a 0.5mm nozzle so hard to get a 1mm hole. I’d bet my E3D BigBox can get there, especially with my PETg profile, which is pretty tight, but 1mm is often the limit of what a slicer will tolerate as a “real” hole…
Not to hijack the post, but I don’t understand what you’re saying here. I come from using SolidWorks and starting to use F360. I notice that things don’t organize themselves the way they do in SW it seems. Mind explaining a little bit more what you mean by this or possibly just pointing me to a video?
I wish I could think of a single video to point to but I’ve watched so many that they are starting to all blend together.
I could probably explain this better if I had some SolidWorks experience but I came to F360 from Sketchup.
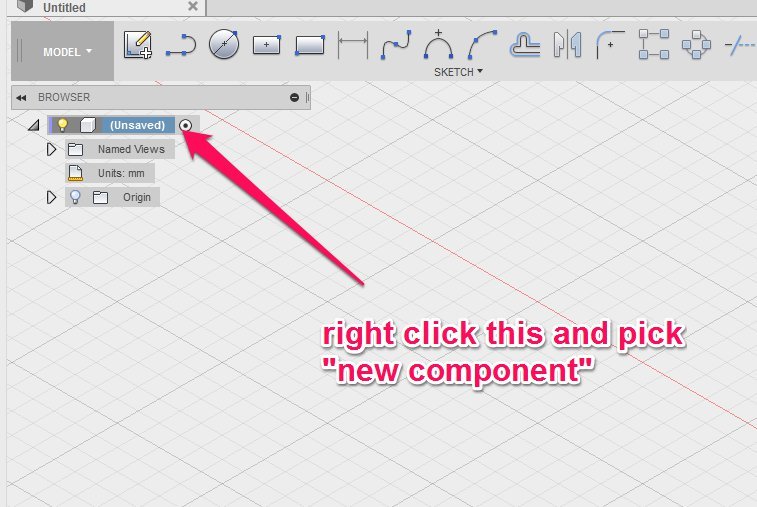
Anyway, here it is short and sweet: In F360 everything is in one file whether you are designing something with one body or a yacht. If you just start drawing and then extrude your sketch into 3d you will have a body. The only difference between a body and a component is organizational and thus what you can do with them later on. You can convert a body to a component later but everything works best if right off you will name and save your file, and then right-click your uppermost outline item and pick “new component”
The main advantage of doing this right off is in how your outline will be organized. It will keep sketches with their respective components and make life MUCH easier when you get 15-20 parts going in a design.


 ️ this forum!