Leather Embossing / Debossing - Skull Patch

Continuing my leather experiments.

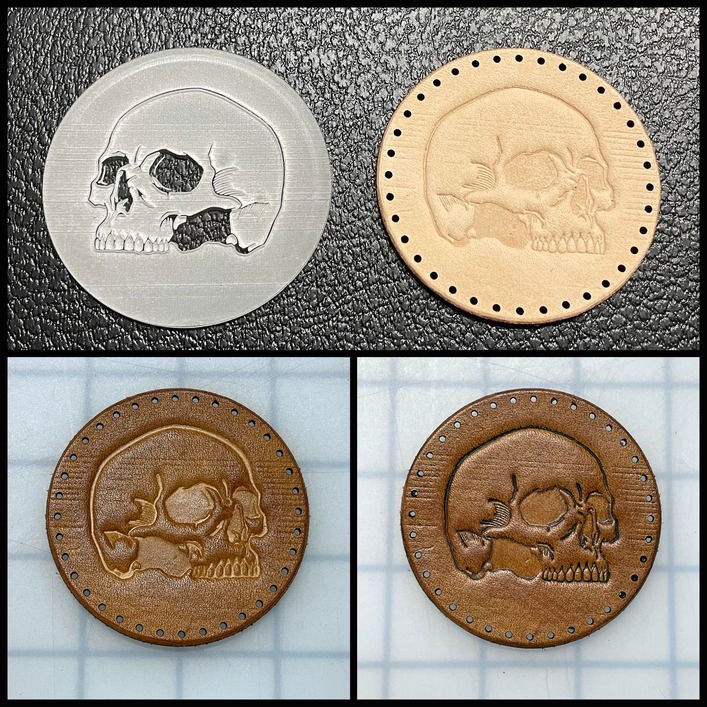
Created the debossing stamp from medium clear acrylic. I find running 2 passes of engraving gives a good depth. Will probably need to play around with focus to get background smoother.

Cut thick proofgrade leather patch. Dampened leather and clamped between two pieces of wood.

Next, I did a light wiping with Fiebing’s Light Brown Pro Dye. Again, an experiment as I’ve been trying out different color dyes and have found a lot of the browns to be too dark. This color is a nice addition. Plus, I like the way light wiping left the recessed areas contrasting. Of course, could go heavier with dye to get to these areas.

Finally, I tried Fiebing’s Medium Brown Antique Finish Paste. First time using this so still learning.

47 Likes

Thanks for sharing this write up. You are getting some good results.

5 Likes

Oh I like that. It turned out great!

3 Likes

Nice work! Thanks for sharing your experiments with us so we can all learn along the way!

3 Likes

Looks very nice. I was confused by, what looks like, the eyes cut out. Then it hit me - I can’t see clear acrylic. :crazy_face:

4 Likes

Yes, I always de-focus when engraving acrylic. It’s so much better I wonder why that’s not just the default.

5 Likes

You’re getting some pretty awesome results! I haven’t done that for a while and you’re giving me the itch to try again :thinking:

1 Like

Very nice!

I’m actually confused by that right now. :smiley:

1 Like

The eyes and “cheek” are not cut outs. You are seeing through clear un-lasered acrylic.

I did the same thing on another poster’s project. :joy:

1 Like

Ohhhh tricky! Ty for explaining!! I feel better now. Lol

1 Like

Nice results … enjoyed seeing the finishing of the leather.

Used the patch on a leather notebook cover.
Files are in my post under Free Laser Designs.

7 Likes

That’s a great technique. Mixing the patch & the embossed lettering takes the whole thing to a different level.

1 Like

I really like that!