Hi. I’m trying to cut a leather working template. When I load it in to the glowforge software it cuts the pattern into multiple parts which I don’t want. I want it to be one solid piece. How do I go about correcting this?

Hello and welcome to the community. Without seeing exactly what’s going on in person, it looks to me like a rather odd pattern to use. Normally, the parts would be separate and you would sew them together after cutting. There are no corresponding stitching holes in the upper half at all. I’m not sure what I’m looking at though…as so many things overlap others. Is this a pattern that you made?
3 Likes
Greetings-
Welcome. It would be helpful to show what is going on in the sidebar. To determine what pieces are connected to others, and how.
HL

3 Likes
You need to make the separate lines that you don’t want cut, different colors in your design software. That way they will be separate operations in the Glowforge and you can either score those lines or ignore them, your choice.
6 Likes
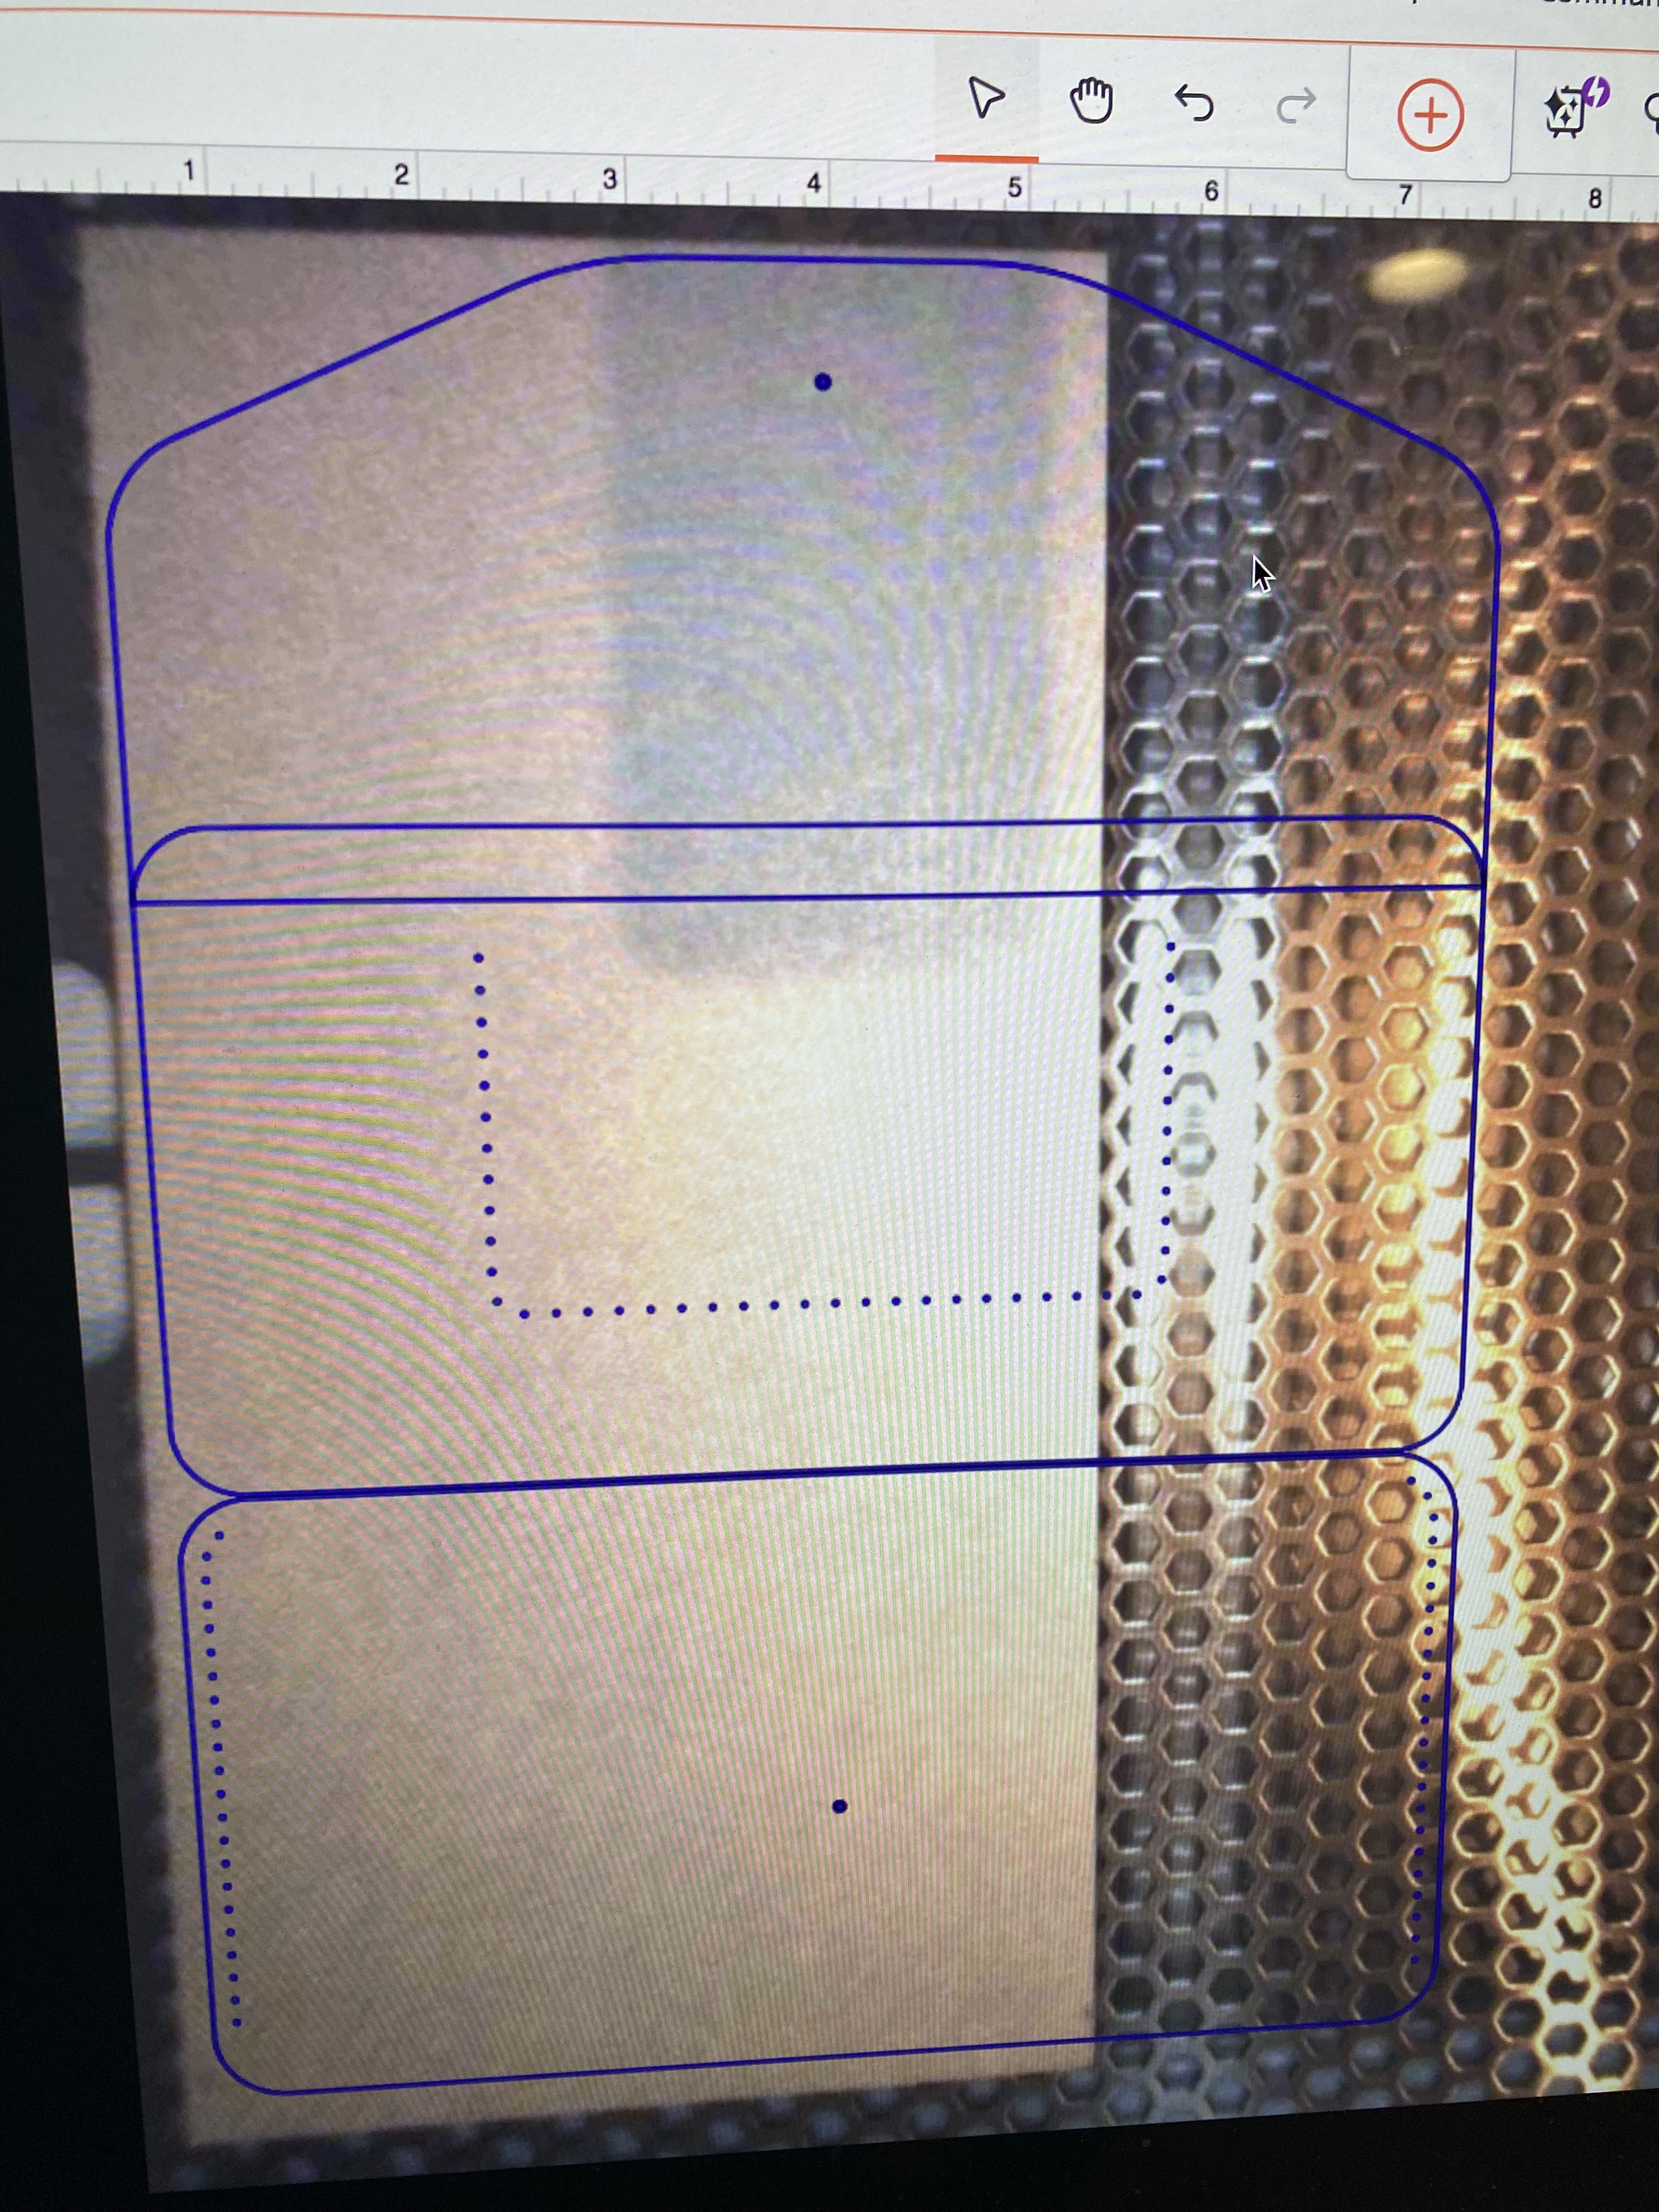
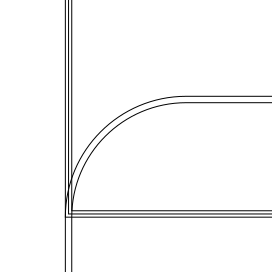
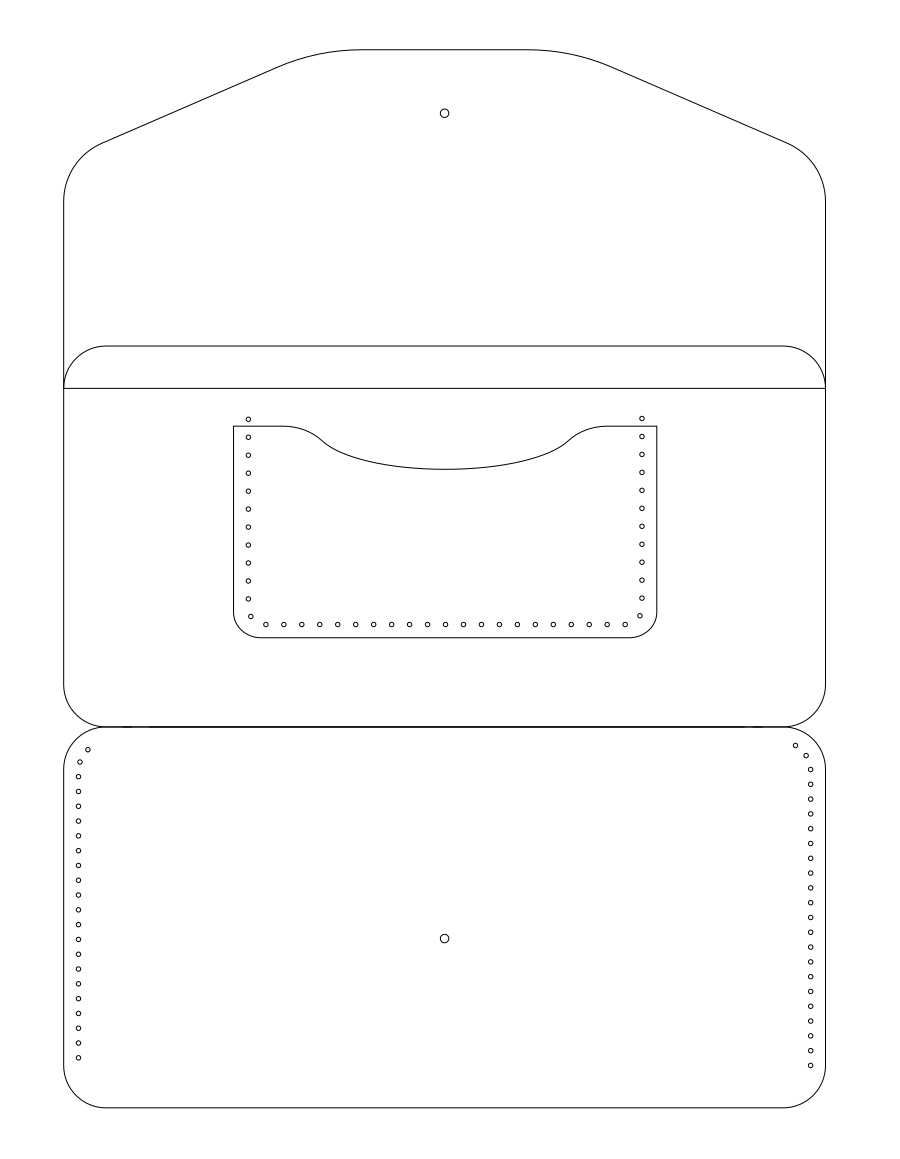
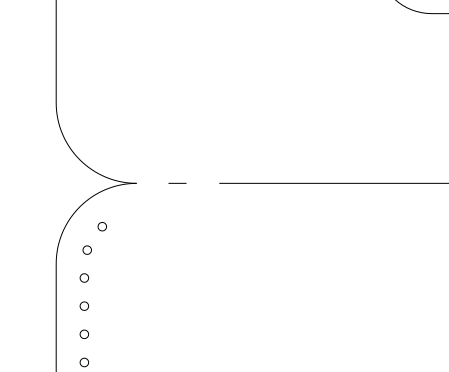
Ok. Let’s try this again. In my pattern it is one solid object see green circle. When I load it into glowforge it adds extra lines to cut where there are none in the pattern. See the black circle

Right. That pattern is not laser-ready. That’s what previous posters are saying.
Did you create this pattern or, did you find or purchase it somewhere? If you created it or it is freely available somewhere (i.e., not purchased) and, you post it here, someone will likely be able to fix it for you or provide detailed instructions.
What vector editing software are you using? (e.g., Inkscape, Affinity Designer, Adobe Illustrator, etc.)
The upper portion (where you have the lines circled) appears to be two separate vector objects. If you merge those (usually called a Boolean merge in vector software), that part should be the way you want.
The dashed line is just a styled vector and, will act like any other line in the Glowforge UI: it will cut. So, you either need to remove that line or, change it to another color if you want to score it separately or something.
You might also be able to get more interactive help on the new discord chat system.
4 Likes
Thank you for this explanation! When I load the file into Inkscape it still shows as one one piece. What do I need to click or push to get it to show up as multiple pieces?
What is the discord link?
Set the display mode to outline view, then you’ll see what the laser sees.
Is this in the glowforge software? I will look for it. Thank you!
1 Like
No, in Inkscape.
Ok thank you!
I would start by using cmd+a (ctrl+a on Windows) to select everything. Then, I would set the fill to nothing (by clicking on the X in the color palette) and, set all the lines to be the same color and style (right-click on black in the color palette, choose “Set stroke” from the context menu.
In the top menu, choose Object > Fill and Stroke, click stroke style in that window and, set the width to hairline and the dashes drop-down to a solid line (the top entry in the list).
That should get you to where you can see what the Glowforge UI (GFUI) will see.
Edit: Apparently, the Only Way to get to the Discord is to send a job from the GFUI and, follow the link from the pop-up chat window.
2 Likes
Ok. Thank you I will look at it and report back to what I find.
Sorry I’m still trying to figure out how to send the job to the gfui to get the chat pop up.
It should appear under the countdown timer while you are running a job. I would share a screen shot but, I blocked it after the first time it showed up.
I am told that you can also email support@glowforge.com for a link, if you are having difficulty.
1 Like
I believe this link will work - but you do have to create a login, and link your glowforge account before you can post in the help section.
2 Likes
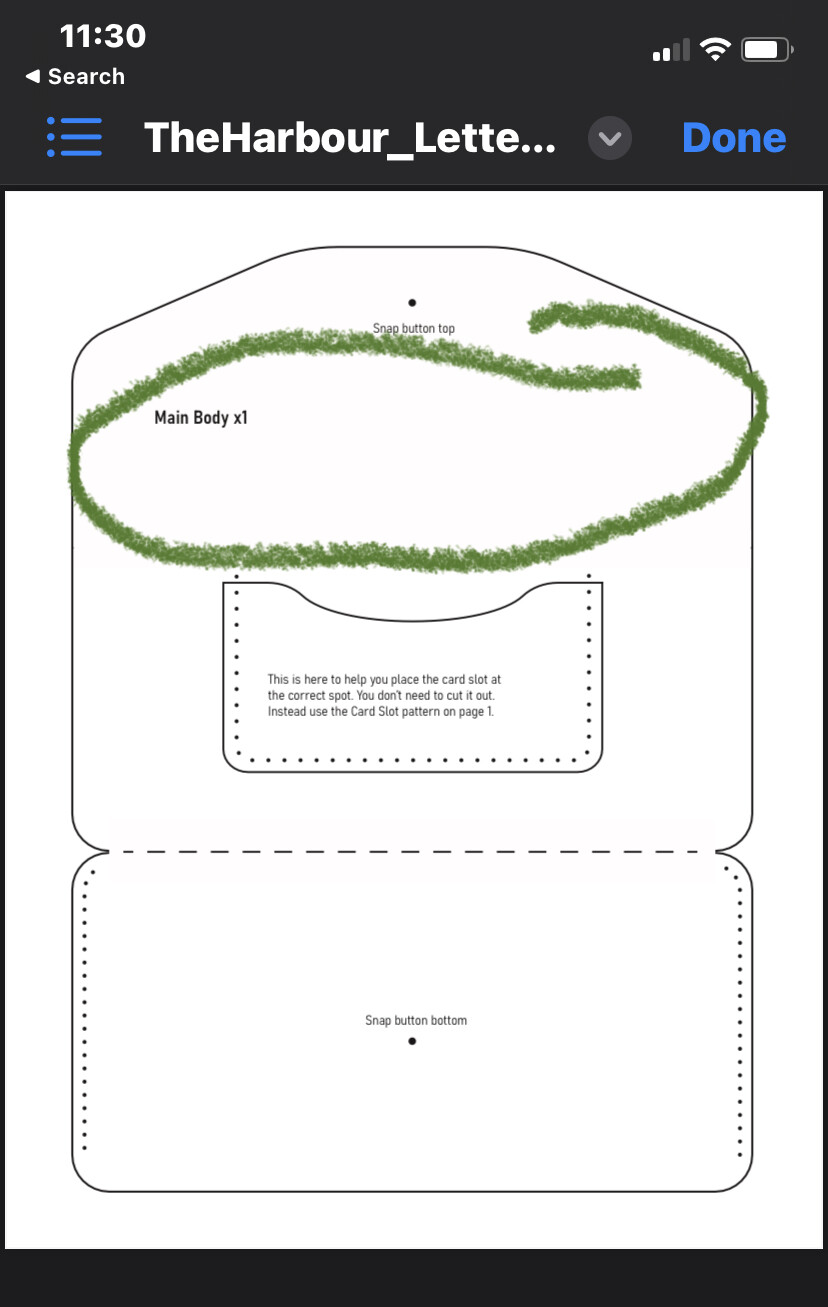
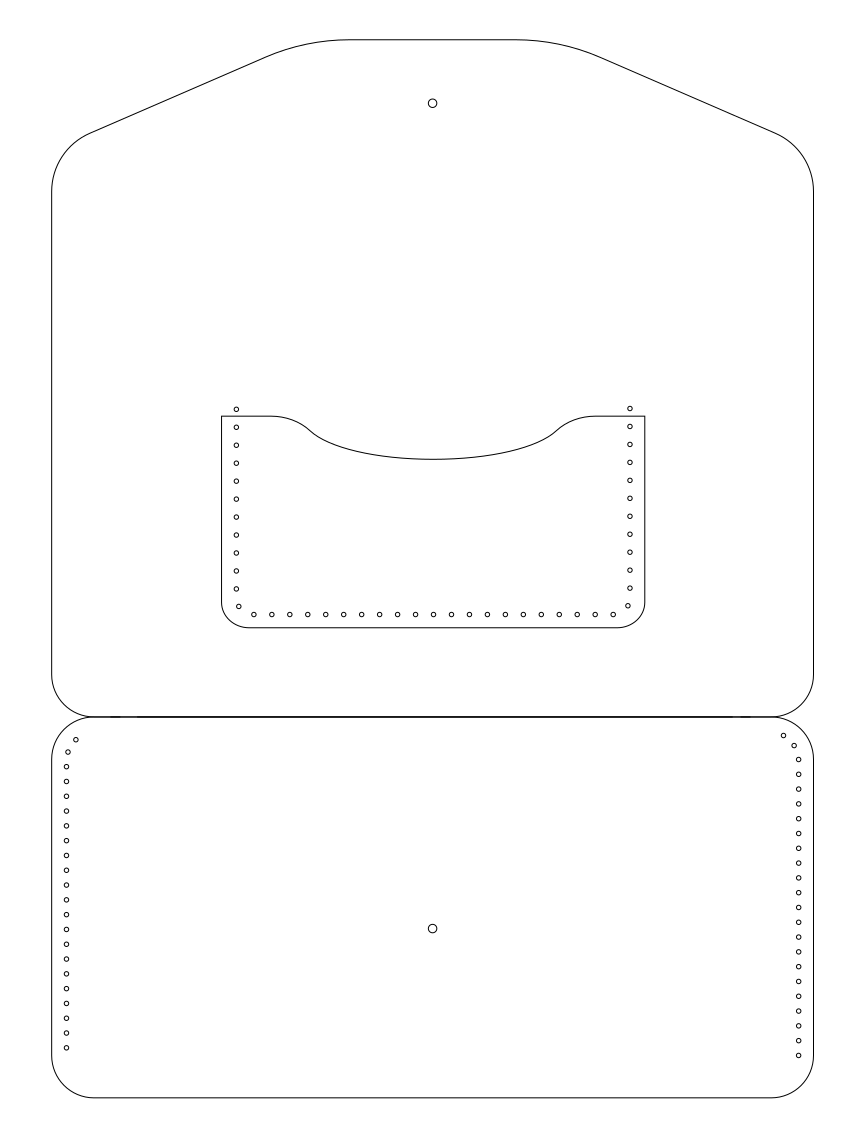
Here is a screen shot of it after doing what I suggested, select-all, no fill, set outlines to hairline.
Everything was in nested groups. So, I did a bunch of ungrouping to get to the actual objects. Inkscape tells you at the bottom whether you have an object or a group selected on the status line at the bottom. Ungrouping everything except the stitching holes and deleting the group of text objects, there are 17 objects.
Two of the objects are white squares pasted over lines to hide them and avoid having to edit the three main simple shapes. I just deleted those.
The creator did a stroke-to-path operation on each of the main shapes, except for the pocket. So, those are objects with two vector lines a tiny bit apart.
The top object was both duplicated and stroke-to-path’d. So, that one has three separate vectors of the same shape, all slightly different in size.
To clean those up, I used break-path-apart (cmd-shift-k), shift-click to remove the outer path from the selection and delete the inner path. I also deleted the extra copy of the top object, which involved some fancy dancing to get just it selected (by changing the colors of all the top objects, then changing back the colors of the objects I could select individually (the snap and outer vector), then using a select-same-stroke-color with a sacrificial object to get it).
The snaps were similar to the top object.

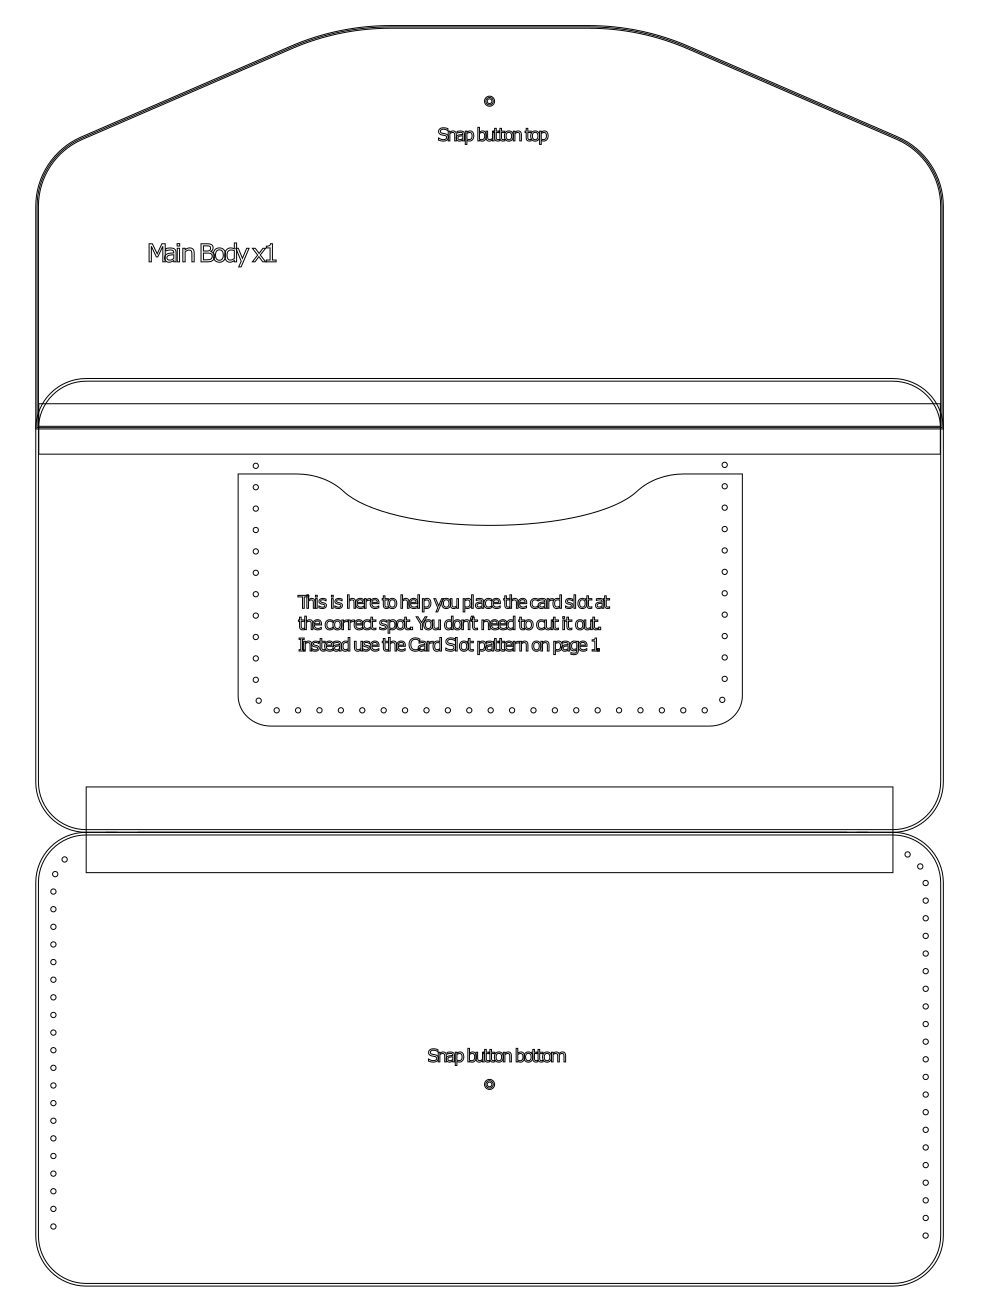
Now, we have simple objects but, the three big sections are still separate.
The top two pieces overlap in a way that makes it easy to just use a boolean to combine them. That’s Path > Union or cmd++.
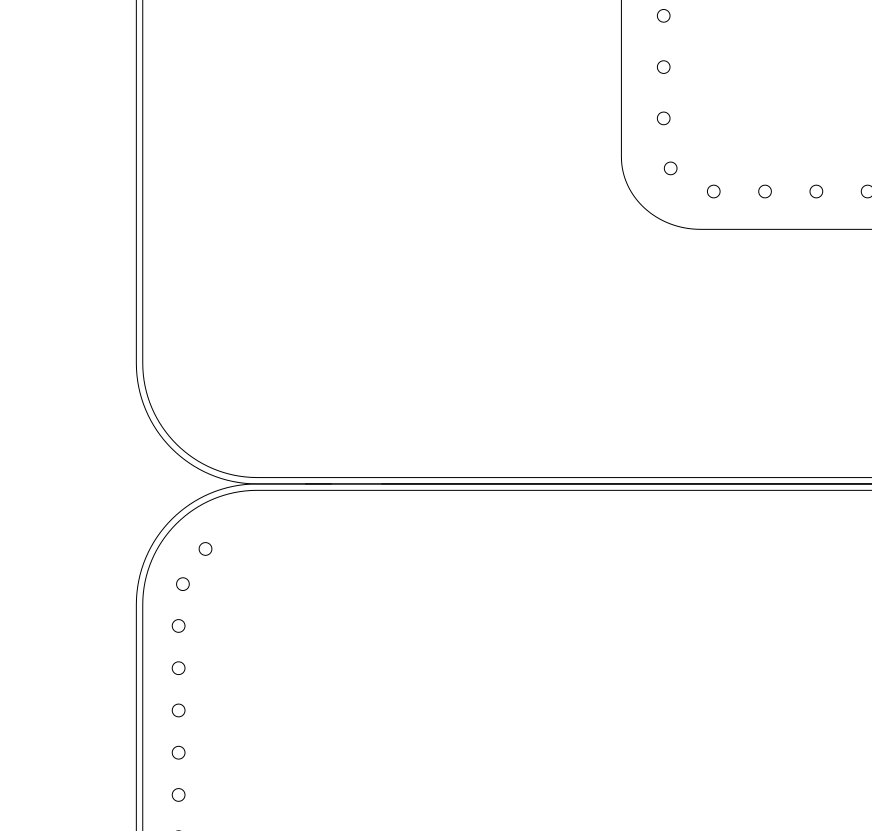
The bottom two pieces are a little trickier. I used the node edit tool on each of the objects and selected the nodes at each end of the line that we want to remove, then click the button to delete the segment between the selected nodes. ![]()
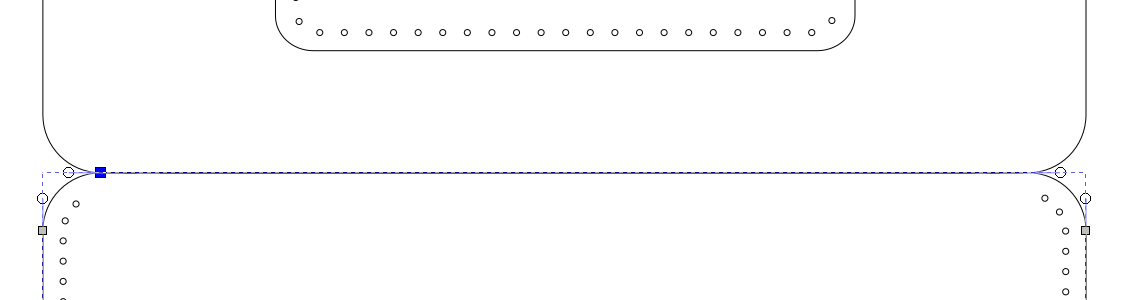
There were three more lines overlaying that area that I deleted.
Now it looks like what we want and, you could probably just leave it that way. To insure continuity of the cut lines, though, I combined the upper an lower objects (cmd+k), then used the node edit tool to combine the overlapping nodes where the pieces connect. ![]()
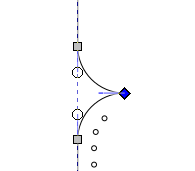
The stitching holes are in a clipping group, which the GFUI won’t like. I broke those apart and grouped them.
I assigned different colors to what I would expect to be different operations, using this color palette I have added to Inkscape.

I hope you will come back and share your finished project! I would love see it.
5 Likes
This topic was automatically closed 30 days after the last reply. New replies are no longer allowed.