So despite @dan’s marketing the Glowforge is not of course a “3D printer”, but for those of us who own a lot of 3D printers (and I own a marriage threatening number), you probably own a “big” 3D printer (a print volume > 300mm cubed) because this is 'murica! And if you own a big printer, you probably need to use large spools (since a 1KG spool is useless unless all you print are thin vases) and most printer’s built in spool holders cannot accommodate a 5lb spool or larger. For that many of us use a rod on a wall bracket (mine consists of 2 3D printed brackets with a pair of 608 bearings in them to make the 1" (25mm) dowel turn freely. These 5Lb spools (a smidge over 2KG) are MatterHackers Pro PLA, and I used a coke can for scale since we were out of bananas. I first attempted to make this as a solid model and print it, but the parts are so tall the only choice was printing with the layers in the axis of tension causing the PLA part to break (yeah I could have printed it in PETG, PC or Nylon, but honestly DraftBoard works perfectly and is like 20x faster)
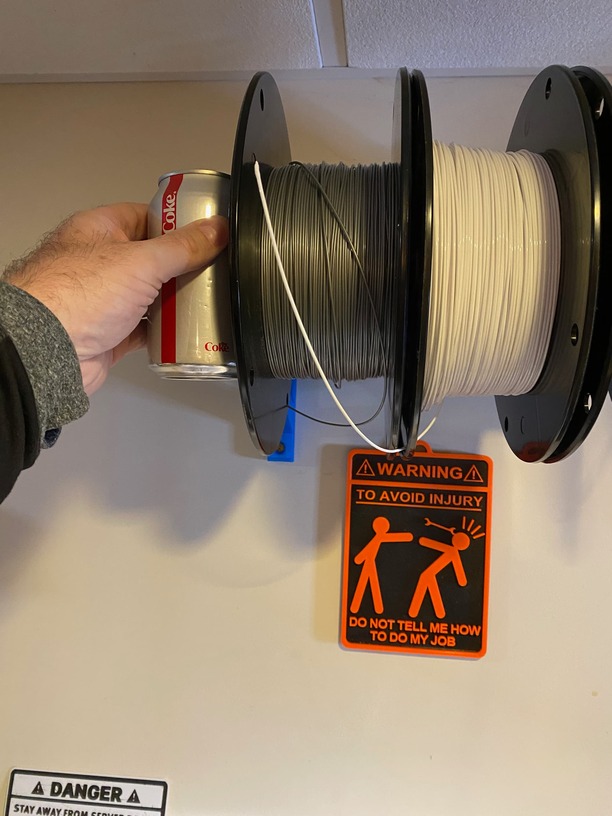
But if you have done this you of course have experienced the pain of the filament getting yanked over the side of the spool and knotting around the rod (yay, I put that up there with other rights of passage such as lasering a stamp and forgetting to reverse it on the Glowforge). So I created a spool guide with a filament guide in the middle. This guide uses a small piece of “Unicorn” (blue PTFE tubing) which reduces friction. In addition since the arms are super long I added a pair of glue up temporary corner squares which have a cutout so they don’t get glued in.
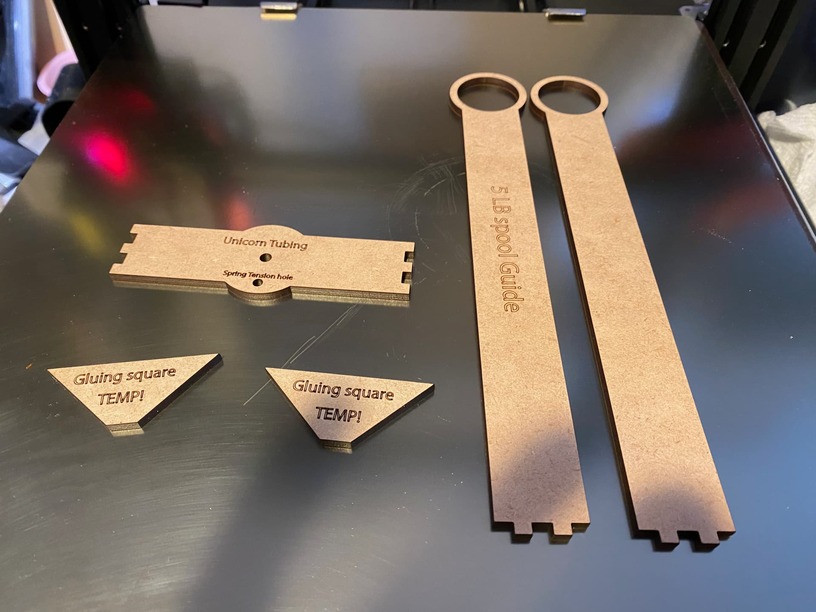
If your unicorn tubing doesn’t stay fixed (it should as there is almost no force here) then you can take a tiny chunk of scrap and glue it up against the tubing to provide friction (don’t try to glue the tubing in place nothing sticks well to PTFE). Also don’t press the friction block into place with enough force to distort the PTFE tubing. filament should glide through this.
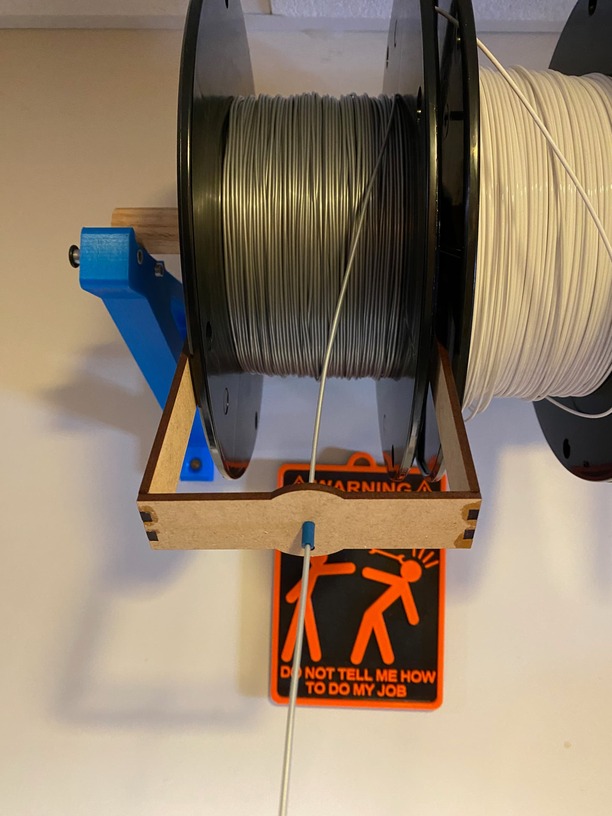
action shot. Note the tiny hole in the back of the plate is for providing spring tension if your guide keeps yanking out straight and you want to provide some gentle tension on your filament (to handle the slack of retractions). A huge advantage of this setup is if you just let the filament go it won’t snap back and cause the spool to unwind and knot, but most importantly keeps the force straight out on the spool.
Now because I am an awesome guy (and this is hardly rocket science here) I have included both the SVG and STEP file (in case you want to make your own). In this case it was all medium DraftBoard using standard proof grade settings. Note I included the text on the SVG (I scored it so you get labeled parts), of course you can engrave but that’s too slow for this small a project. I used starboard medium CA glue and accelerant to glue it up.
large spool filament guide.svg.zip (6.3 KB)
large spool Guide.step.zip (17.6 KB)