Just for fun I decided to make a “line climber.” That’s a device that uses a small sail to ride up the line (string) of a kite, pushed along by the wind. It goes up the line until it hits a small dowel tied in the line. When it bumps into the dowel, the sail’s configuration is changed so that it no longer catches the wind, and the line climber slides back down the line. Reset the sail and repeat.
Here’s what it looks like:
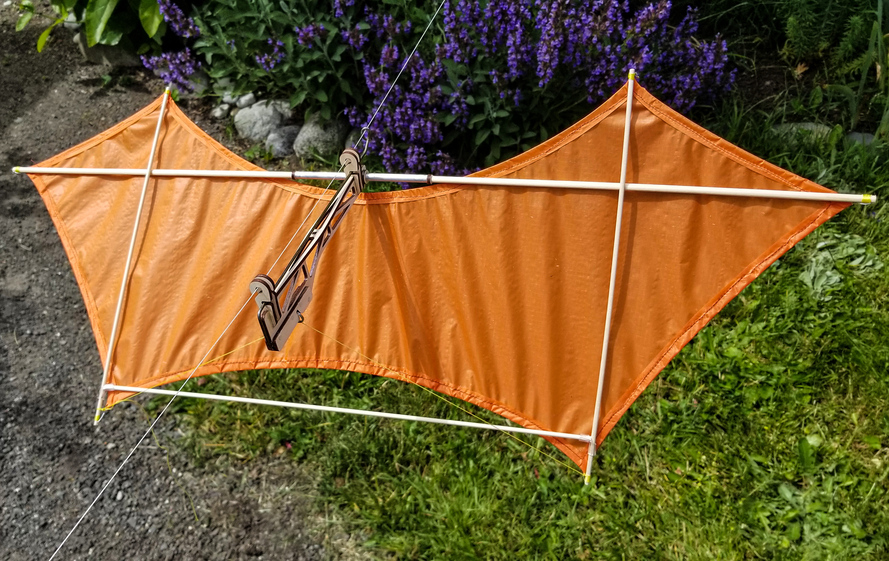
Naturally, I used my GF to cut out (most of) the parts using 3mm BB. I also used it to cut the sail from lightweight nylon ripstop, using the new pass-through beta for the first time. In addition to the wooden parts and the sail, the climber also needs a 10cm (4") piece of aluminum tubing, some pieces of wooden dowel, a small key ring, a few centimeters of vinyl tubing, a wire coat-hanger, and some string. Oh, and glue.
The sail is about 75cm wide and 13.5cm tall. The horizontal spar goes through the aluminum tube near the front of the climber and can rotate in it. A length of kite line is attached to the bottom points of the sail, and the keyring is inserted in its center.
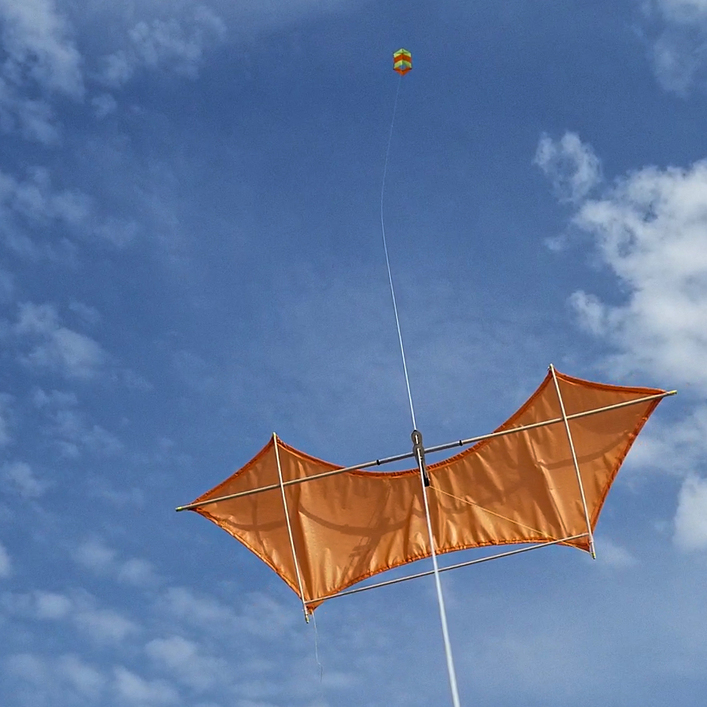
To make the device ready to climb, insert the key ring into a latch in the body, and close the latch. This positions the sail so that it catches the wind. Release the device, and up it goes! When the climber gets up to where the dowel is tied into the kite line, its forward motion opens the latch, releasing the ring. That lets the sail rotate so that it no longer is pushed much by the wind. With nothing to hold it up, the climber slides back down the string to where it started. Here’s a picture of it on its way up the kite line.
Here’s a drawing of how it’s all put together.
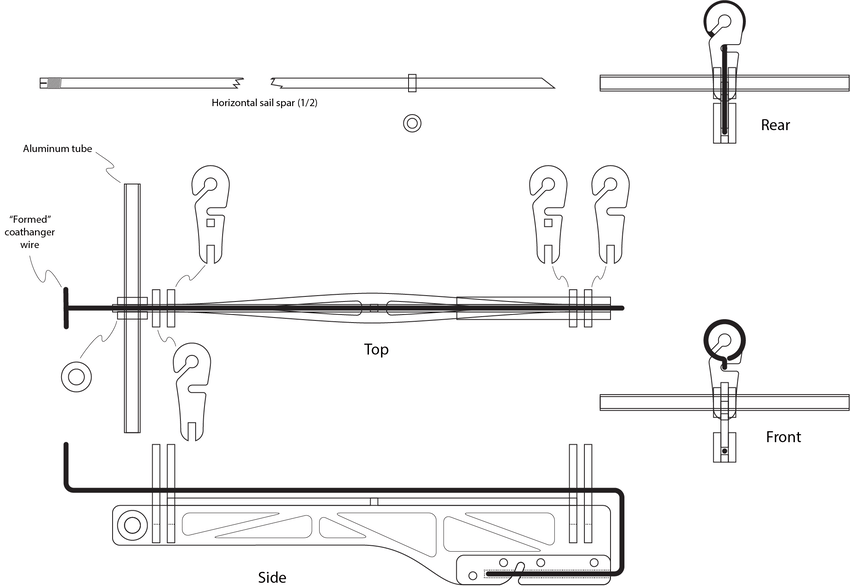
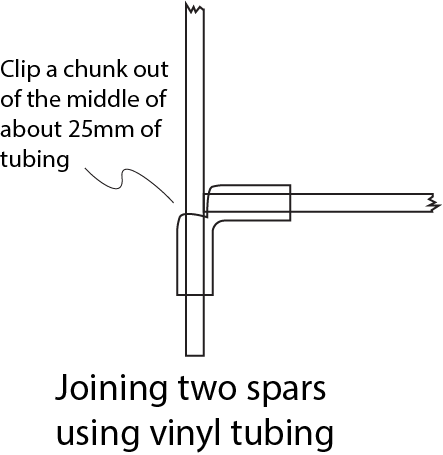
For the sail spars, I used 5mm (3/16") dowels for the main horizontal one and 3mm (1/8) for the others. I made the main horizontal spar in two pieces, so that they can be removed from the aluminum tube, but that’s not strictly necessary. The bottom horizontal spar is joined to the two vertical spars using short (~25mm) bits of 3mm ID vinyl tubing that have chunks taken out of their centers to turn them into right-angle connectors. Like this:
One last detail. The only tricky part of assembling the climber is getting the formed coat hanger wire into its position. The easiest way to do it is to assemble the whole climber body except for one of the side cheek blocks that form the sides of the latch. The coat hanger wire part can be inserted by placing the rear vertical portion of the wire between the first two line hangers, then rotating it so that it slides through the second one, then rotating it again to let it pass through the third, and finally doing it one last time to get it to slide through the rear-most hanger. At that point you can rotate the wire into place and install the second cheek block holding the whole thing together.
Here are the .svg files: LineClimber.zip (27.8 KB)
Hope you have as much fun with this one as I did.

