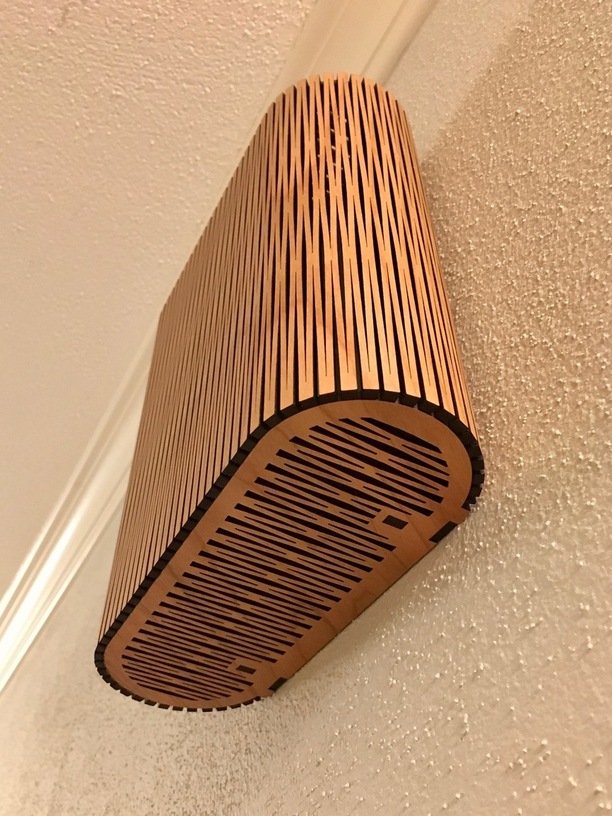
My first real Glowforge project: a mid-century modern doorbell cover in Proofgrade cherry (hardwood for the top and bottom, plywood for the wrap-around front and sides).
Background: about 15 years ago, we did a complete renovation of our 1920s house. At the time, we replaced a particularly tacky plastic doorbell chime with an old-school door bell: the kind that keeps ringing as long as you press the button. Instead of ding-dong, it just goes rrrrriiiiiiinnnngggg. We love it, but the bell itself isn’t particularly attractive (and didn’t come with a decorative cover). One of the carpenters working on our project spent half an hour whipping together a cover. Painted the same color as the wall, it blended right in (and looked like something a 1920s carpenter would have whipped together, too), but I always wanted something a little nicer.
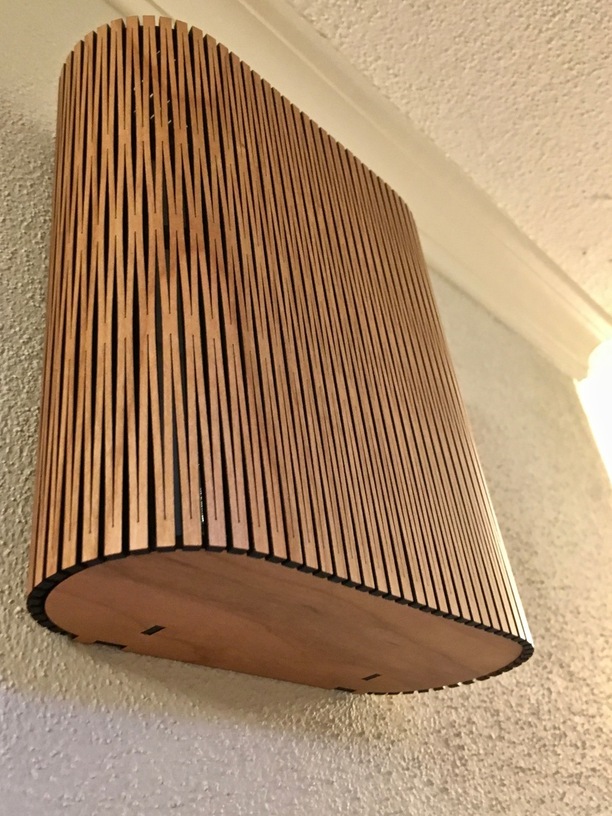
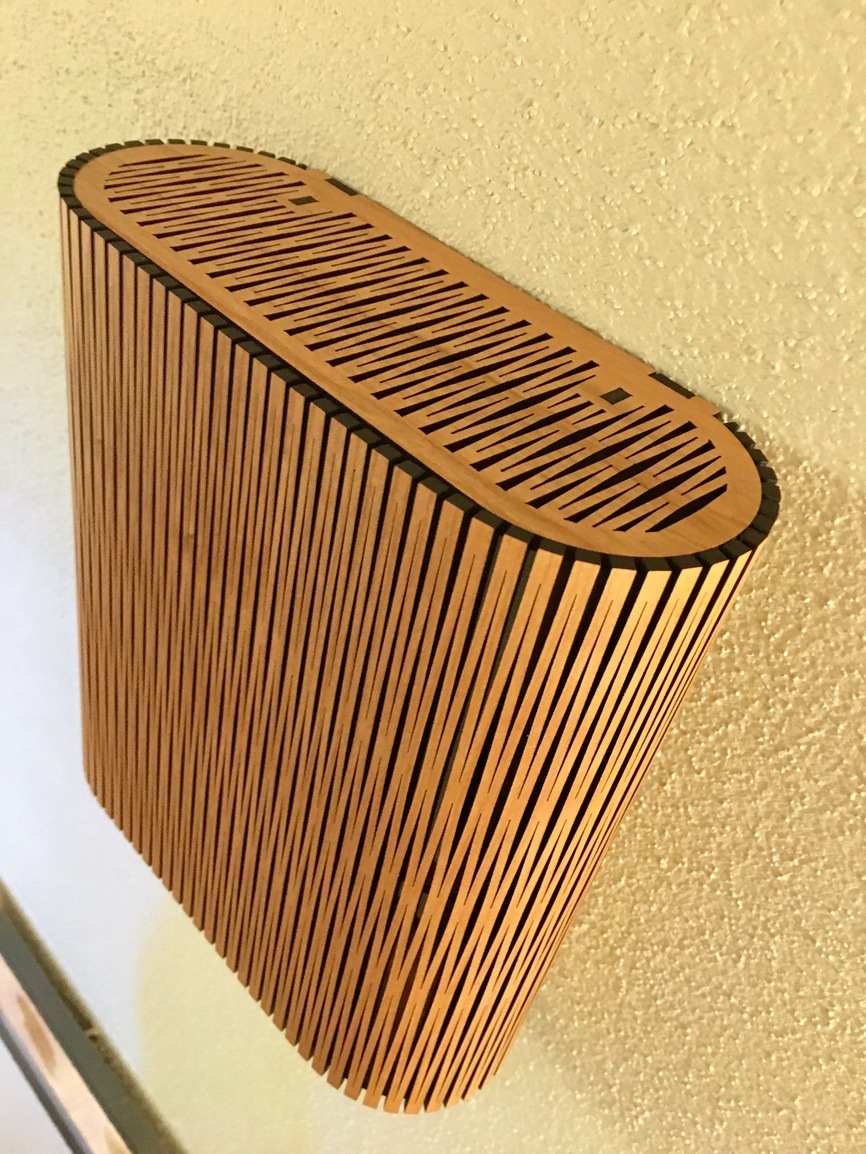
Hello Glowforge! From the start, I wanted curved “living hinge” sides. The front was originally going to be solid with some sort of design cut out, but I had a hard time coming up with one I liked. When I saw the living hinge on my first prototype, I decided to make it wrap all the way around. I replicated a stretched living hinge look on the top (the design of the bell mount meant the bottom needed to be solid). I’m sure any 8-foot tall guest we have will really appreciate it. Inside, there’s a frame that friction-fits onto the bell mount.
I designed the whole thing in Affinity Designer and prototyped using Draftboard (for the top, bottom, and frame) and cheap Baltic birch (for the living hinge). It’s currently assembled with no glue or fasteners. I plan to disassemble it and re-assemble with a little bit of glue.
Very cool. It’s a shame that no one will see the top because I agree it really makes it. Perhaps it could be done as a painted engrave on the bottom? Either way, it looks fantastic!
Great project. I also love the top of the enclosure. Because of that, a suggestion before you glue it up? Is there a way that you could cut the solid bottom mounting plate without the tabs, then glue it to another layer with tabs that has the pattern on the bottom. I think you’d hardly notice the inside layer of solid wood and us more vertically challenged folks would be able to enjoy the great work you did in replicating the hinge pattern on the top.
Anyway, it looks great as is. I’m looking at my white plastic box in the hallway right now and may have to tackle a coverup/upgrade of my own!
That’s a great idea. I’ll give it a try. And if it doesn’t work, I think @likeablejerk’s idea of engraving the pattern on the bottom will be better than the plain wood that’s there now.
After considering a number of possible workarounds, I redesigned the inner frame so the whole box sits a little lower than before. The bottom is no longer flush against the mounting plate, so the open design works fine.
In hindsight, I should have just made a new mounting plate out of a scrap of 1x4. That wouldn’t have involved further laser cutting, though, so it’s not really a valid solution.
 Great Idea!