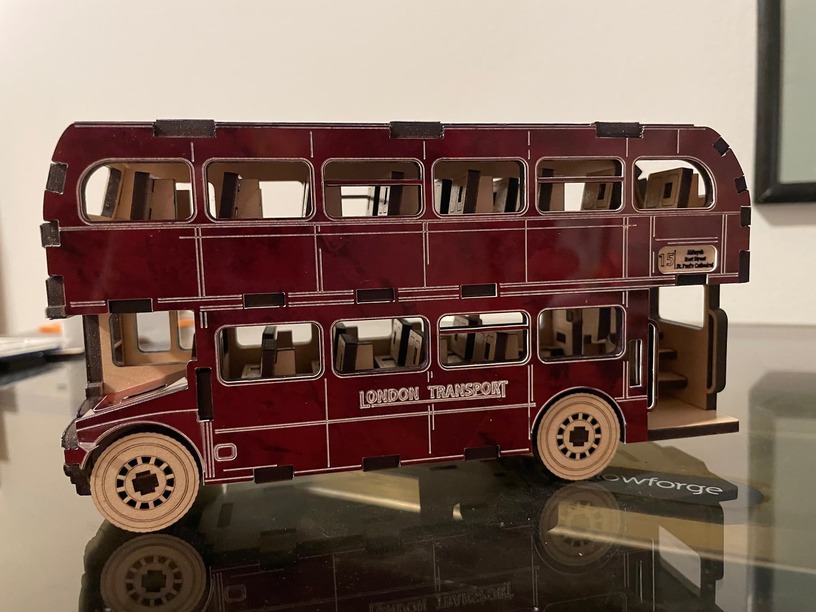
I liked the intricacy of this design so I decided to try it. The most difficult part was the back of the bus with the steps to the second level. It’s not perfect, but was fun to do.
40 Likes
Wow! I love the way you brought out the linework! is that two coats of paint? Getting clean white scores on such a richly colored surface is amazing!
5 Likes
Oh, wow! That’s awesome! Very neat!
6 Likes
Looks Great! The design is on my dashboard but, I’ve been shying away from trying it. Your awesome result may just have given me the courage to try.
7 Likes
That’s lovely work; now I want to go to London and ride a double decker bus.
6 Likes
Looks great
2 Likes
that turned out amazing! Love the color you chose!
3 Likes
Ooh! I’ve cut mine out but haven’t started assembly yet because WOW is that intimidating. You’ve definitely confirmed for me that I want to paint it before I put it together though ![]()
4 Likes
Looks great!!! Nice job!
2 Likes
Oh wow, that turned out great. Love the paint job!
4 Likes
It’s not painted except for tiny spots. two or three years ago I found some thin two sided plastic in the clearance bin online. I bought some just to see how to laser it. I lost interest. This year I got it out and decided to use it on the bus. So the “paint” job is actually a shell of plastic. It covers many small glitches and the details were forged. I was pleased with its appearance.
5 Likes
That’s a creative idea! Painting is difficult, but I can usually do it if I slow down. It’s CA glue that gets me every time. I have never glued anything- even just a pair of earring posts-without gluing my fingers together. Any tips there?
I don’t use CA glue and had to look it up in order to reply to you. For this project I used a spray contact adhesive to attach the plastic to the wood. Sometimes I use super glue, wood glue and E6000. My fingers have also been stuck together.
1 Like
Well that turned out great!