Do the thicker varieties of the acrylic solvent work as well as the weldon 4? I have always wondered how they compare (my skills are definitely lacking, it’s not nearly as easy as they make it look in the videos).
1 Like
Can’t say, I’ve never used anything besides #4.
I’ve used various viscosities of epoxy and CA and there are differences, but this is an industrial solvent that fuses the material itself.
1 Like
After a little research, I think I am going to try “Goop”.
I think I will try the 1/4" clear acrylic for the back, and attach it to the wall with the 3/4"x3/4" stand-offs. I will probably use three stand-offs on the top and three on the bottom.
Have you thought about Testors Model cement? It’s easy to use has a decent work time and you can buy it at any hobby/craft store. I use it all the time.
1 Like
How does that hold up with acrylic?
I’m very familiar with it for styrene models, it works the same as how Weldon works on acrylic - it’s a solvent, and the parts fuse to become one.
I guess a look at the ingredients could help…
1 Like
I’ve not any problems. They have several formulations, be sure to use the one for plastic.
1 Like
Solvents aren’t adhesives. Thicker formulations just limit how much the liquid runs once applied. It won’t cure out to a fillet to fill a gap because it works by melting the plastic surfaces to quite literally weld them together, and then the solvent evaporates (where adhesives leave cured glue behind after they volatile elements have cooked off).
CAs will often leave white hazing on the surface of plastics, it’s not a good choice for gluing Acrylic, especially clear.
For Acrylic, solvents are the best method to glue, provided the mating surfaces are nice and uniform and they mate with no major gaps. It won’t marr the surface of the plastic with a vapor haze. And the solvent joint will usually be as strong as if the plastic had been molded that way. The parts I’ve glued with solvent almost always break in areas adjacent to the bond site, and not at the seam of the bond.
If you have to fill gaps, plastic model cement is the next best option since it will cure clear, but it takes time to cure, 24 hours typically. If you really want to stick stuff together and the seam isn’t going to be visible, I recommend 5 minute epoxy.
3 Likes
Maybe you’re an artist who can perfectly place letters by eye, but I am not so I’ll add my suggestion of mounting the letters to the backing piece of acrylic with a jig.
The sign I made had the house numbers inside a box so I needed a jig with inserts. You’ll just need one big one. Note that for letters like A and R you only need the outside of the letter - you can toss the islands. Here are two pictures. They explain it far better than I can using words.
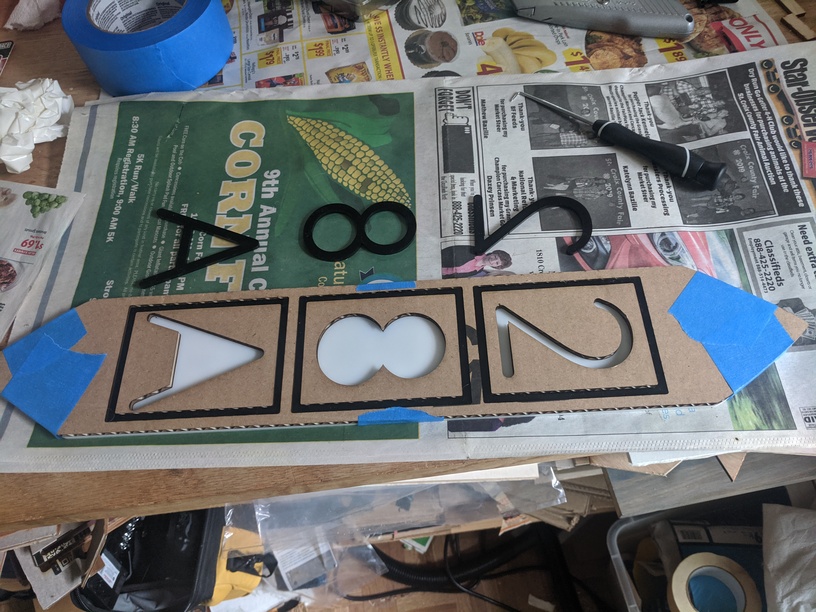
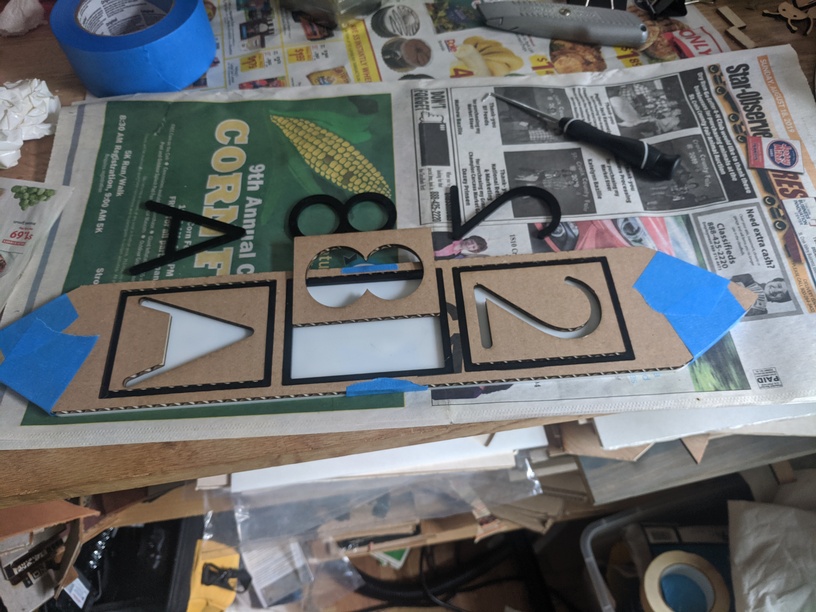
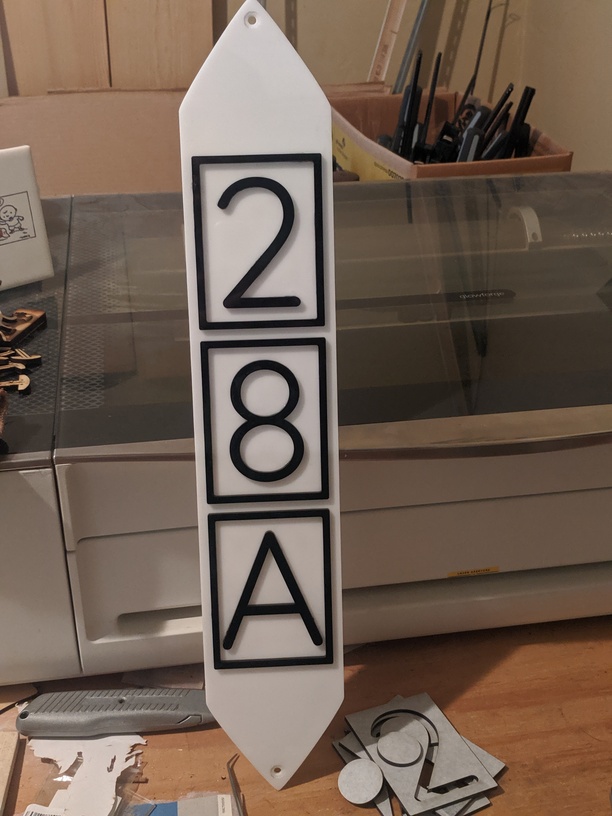
And the finished sign for reference.
I used Weldon, I only have one can and don’t know if it is #3 or #4. I will note that the welding process will incorporate the cardboard. Nothing I couldn’t fix, but don’t go crazy with it if you use it.
4 Likes
That is a great idea, but this sign is way to large for that… I plan on projecting the image onto the sheet to place the letters. I will tape them for placement and only start gluing once I think everything is perfect!
We are going to drill the mounting holes before we glue too, just in case…
3 Likes
If you have the means to project a stencil then I suggest you may want to practice a letter or two at small scale. Doing it by hand means you run the risk of a letter slipping while you are holding it waiting for it to set. A slip will spread the adhesive/solvent outside of the letter possibly marring the backing material where you can see it. If you purposefully mar a small practice letter and backing you’ll learn if this is a real concern or not.
I forgot to point out in my post that for this application you could break the jig/stencil into pieces and then tape them together on your backer. A 30x60 inch sign would mean 12 sections.
3 Likes
you could use standoffs for the base FROM the wall.
and other standoffs for the various words.
1 Like
That was a concern of mine also, that is why I plan to use removable markers of some kind. And only glue while laying down so gravity shouldn’t cause any shifting while it sets. I thought about projecting straight down on it, but I could not come up with a solution that I liked to do it…
1 Like
Here’s what I’d do…
Break up the design across multiple 8.5x11 sheets of paper. Cut out the letters, tape the sheets together.
You could “outset” the letters first to make the holes slightly larger, but you don’t need to glue to the edges so that shouldn’t matter.
1 Like
After playing with it just a little, I think @caribis2 and @eflyguy are right. I am not sure how to easily break it up to make the cuts, but I think the stencil route is the way to go.
I can easily cut the smaller words on paper, but the larger words are proving difficult.
1 Like
In Inkscape - with the words as paths, draw a sheet to scale, and duplicate to lay out over the them - with edges snapped together. Combine the sheets, select the text, then the combined sheets, and use “cut path”. That basically “cuts” them across the sheet boundaries.
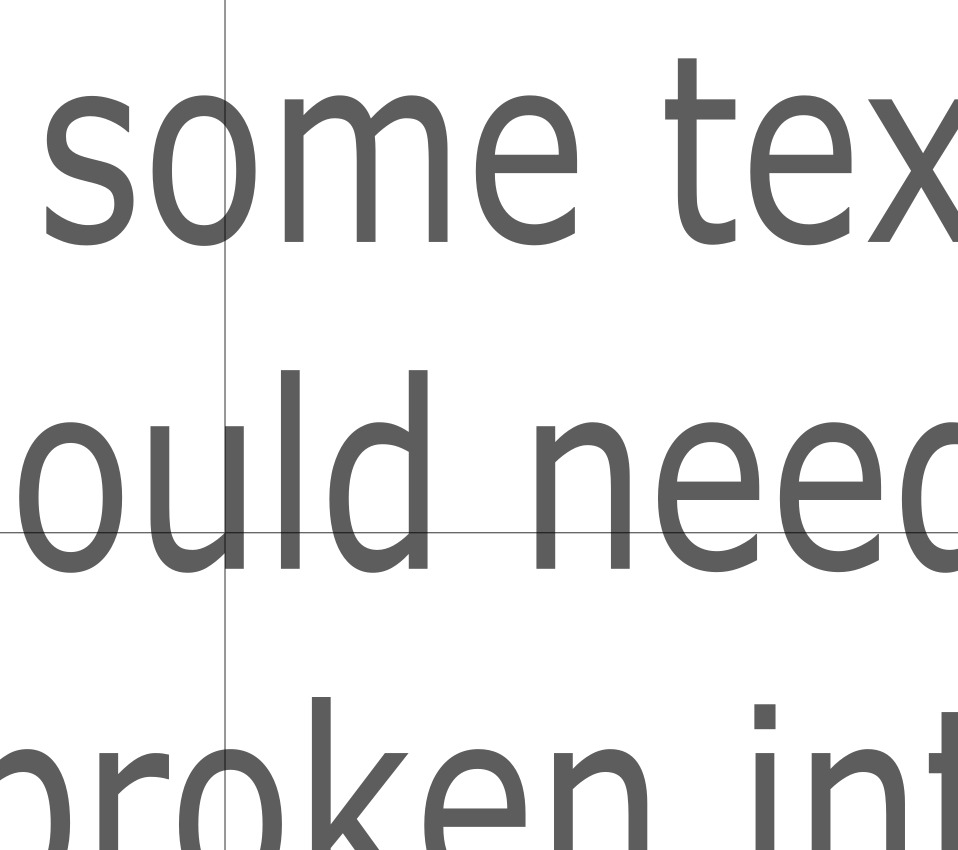
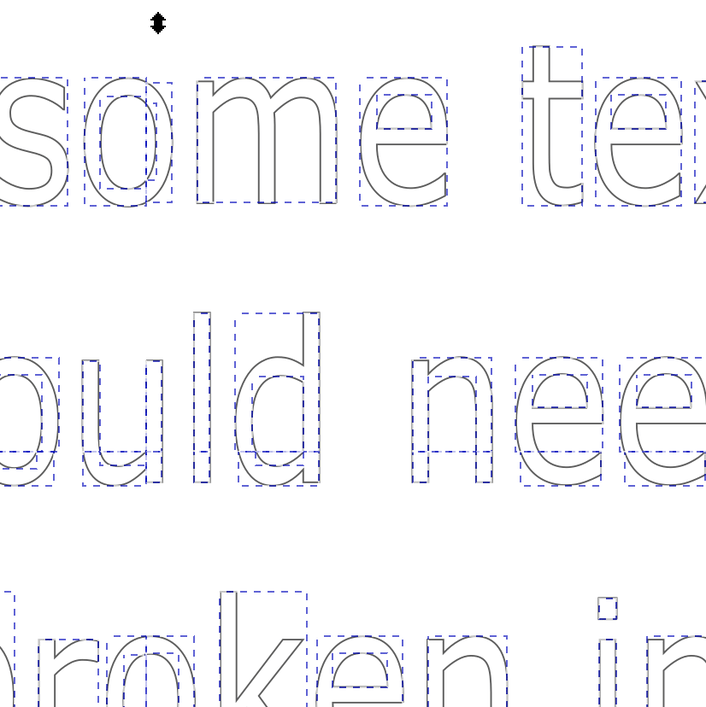
You can see how the letters that crossed a boundary are now broken along those paths.
3 Likes
That is cool stuff! This is going to make this so much easier. Thank you both for this suggestion! (And the help with how to do it.)
Edit: As I cut each piece of paper (well, cardstock) the cut seems to get weaker and weaker until I bump up the power again. Is that normal? I just gave my optics a quick cleaning with a Zeiss wipe. Hopefully that will help. I didn’t think this thick paper would make that big a mess, but maybe?
It shouldn’t… It doesn’t produce much smoke/debris.
1 Like
No. I use 96-pound (I don’t recall, maybe 80?) cardstock without issue.
1 Like
@caribis2, what settings do you use? This is 80.
And cleaning the optics did help quite a bit, but that surprises me. Like @eflyguy said, it doesn’t produce much smoke or debris. So, I don’t know why my laser was losing power that quickly.
Last fall I used six different colors of cardstock, same weight, same manufacturer obtained from Blick and used 200/22 or 200/24. I was worried about overburn/smoke damage, something you don’t need to worry about, so that is why I varied power by the color of the cardstock. Here is an example of one of my cuts.
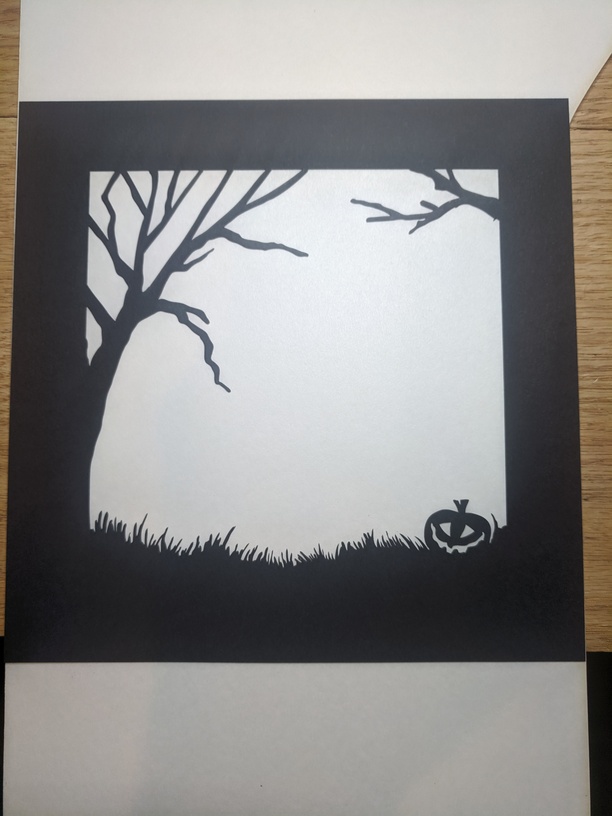
I had no problems with the details. Are you securing your cardstock with a tacky board or just taping down the corners? If your cardstock is acting like a sail when tacking, you would be effectively changing the focus, and I would expect what you are seeing.
3 Likes