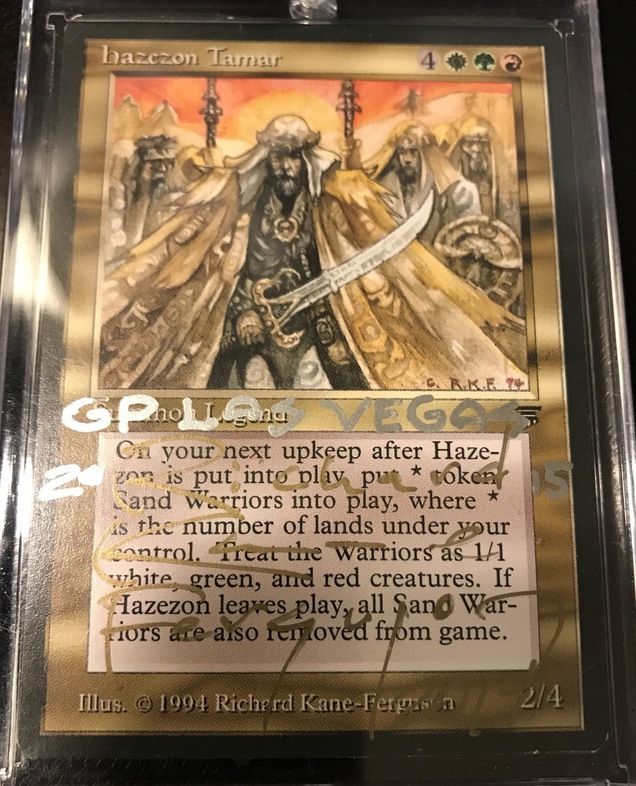
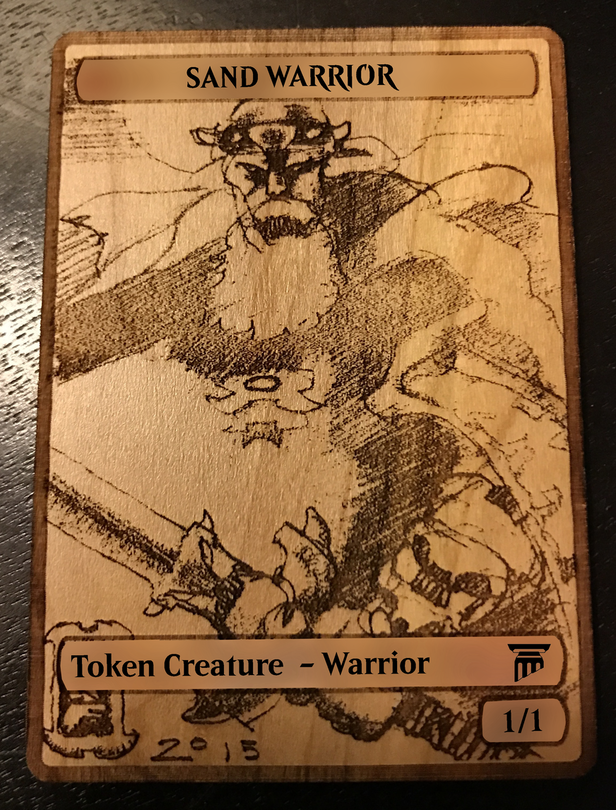
One of my favorite Magic artists is Richard Kane-Ferguson. One of my favorite cards of his is Hazezon Tamar, a creature that makes “Sand Warrior” tokens.
One problem though is that the card is old enough that Wizards of the Coast never printed these tokens. I attended a giant tournament for the game in Las Vegas a few of years ago, Grand Prix Las Vegas, and Richard Kane-Ferguson would be there as one of the guest artists! This was my chance! I waited for him to show up (he was a little late) and was first in line. I negotiated with him to draw a sketch of a sand warrior on the back of an artist proof of Hazezon Tamar! An artist proof is a one-sided card that just has the card front on one side and is blank white on the other. Artists are sent proofs of every card that they create the artwork for and are allowed to do whatever they like. Many sell them at events like this Grand Prix. Given that Legends (the set that Hazezon Tamar was printed in) was released in 1994 (I was in high school!) I feel very lucky that RKF even still had a proof of the card, and it was a relatively reasonable price. He drew the sketch on the spot in about 30 minutes! Here is the sketch that he did for me.
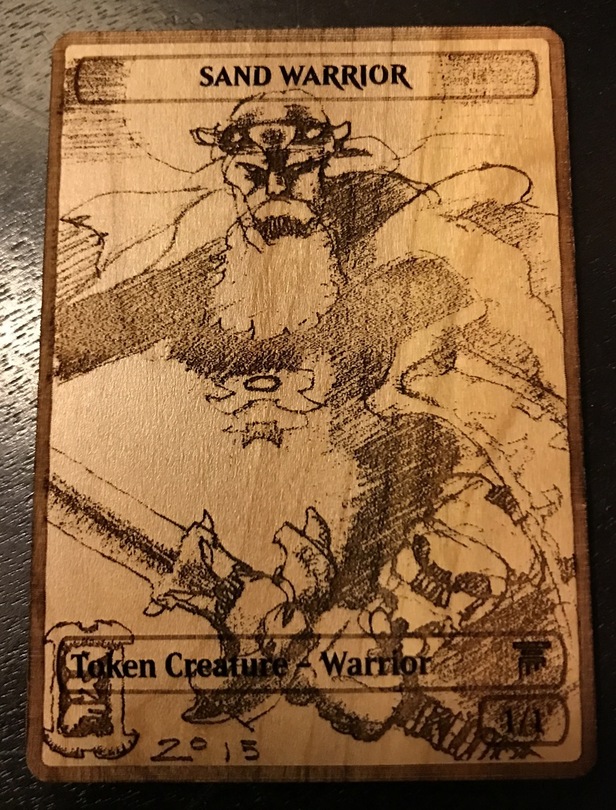
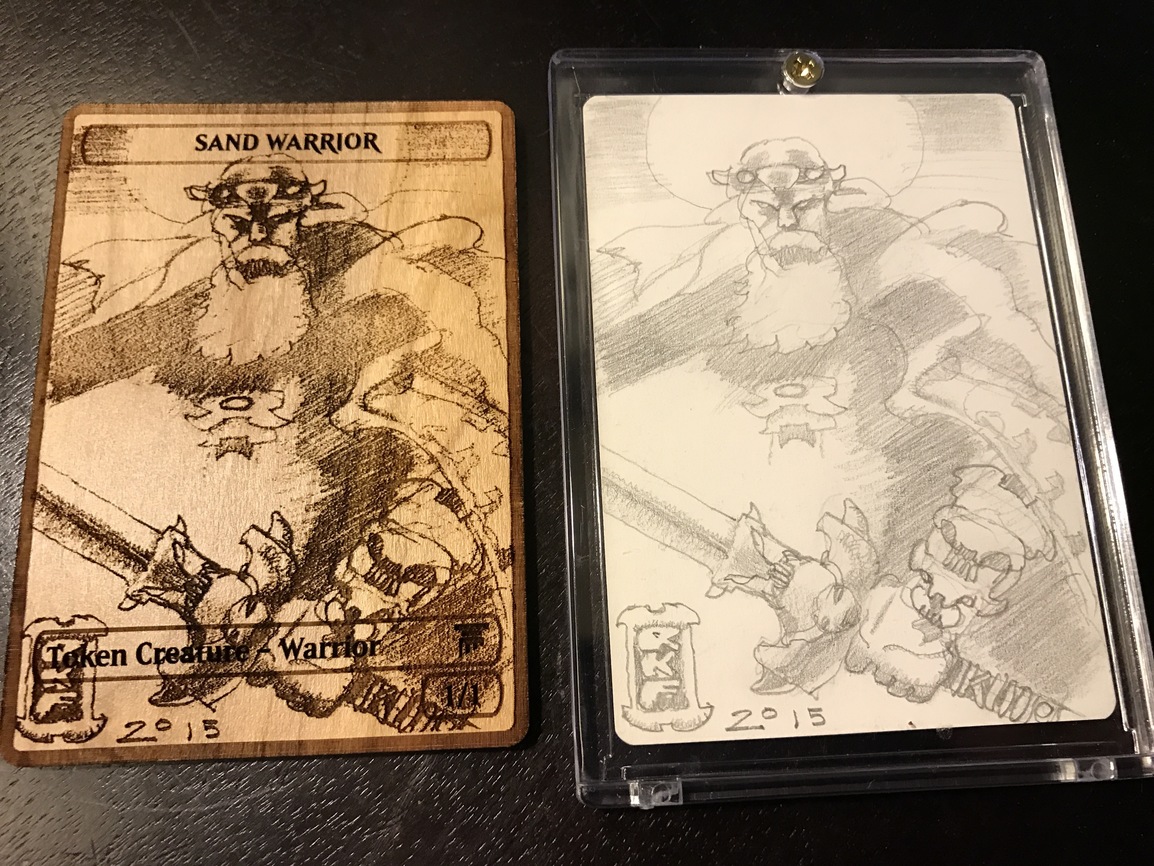
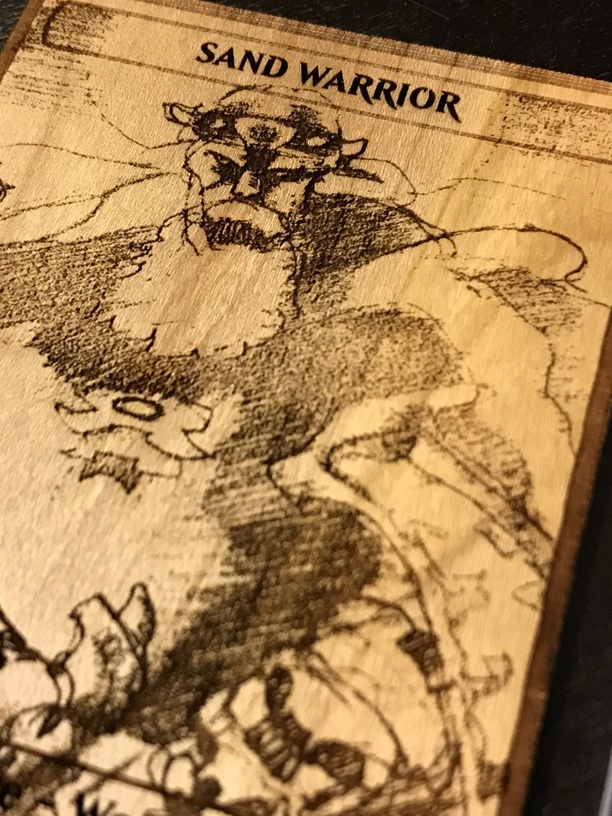
So it’s been a few years since I got the sketch, and I had intended on making tokens using the art, but I never got around to it. Then, at another Magic Grand Prix a couple weeks ago, this time in Vancouver, Canada, a different artist was selling laser-etched wood tokens! I said “I can do that!!!” So I did! I made the text and borders in Inkscape and attached the image after some manipulation to make the jpg darker.
I love the way the wood adds a real natural feel to the sketch. The sketch has much more life in it (that may also be that the actual depth added makes shading more “real” somehow). That style of sketching just lends itself to the beauty of wood so well. It would be neat to do the one above (the Hazezon Tamar) which is much more of a tricky technique (is that watercolor? dilute acrylic paints?) which would look lovely I imagine on some woods, especially that cloak.
There’s a reason those Avon Forests sell for so much! I think I have one Avon Plains from back in the day… but I have a hard time paying that much for basic land these days!
Really nice work.
I have a few Avalon Hill bookcase games that i want to give the GF treatment.
Back then the cards were printed on cheap cardstock, i want to make them out of decent wood plaques
I had the same thought. Not sure how to get that lined up properly aside from trial and error between Gimp or Photoshop and Inkscape… or if I can do something in Inkscape to mask and alter the image.
i’m still learning illustrator but assuming you do a light engrave of the image, it should be pretty easy to just mask out a section in photoshop, then maybe add a border in your vector editor of choice.
You can do this in any one of the programs, no need to bounce around between them if you don’t want to.
I recall something about using masking in illustrator being a no-go for glowforging as is (ie for vector output directly to the GFUI). You could certainly place a rounded rectangle filled white and stroked in black onto a scan of the image file, drop text on top of that, save a copy as a bitmap, and use that in the GFUI for an engrave. Easy enough in illustrator or photoshop.
Or (in AI) place a rounded rectangle filled white and no stroke onto a scan of the image file, save a copy as a bitmap, place that bitmap into a new layer on the same artboard AI, turn off the layer with the original artwork, remove the white fill from your rounded vector rectangle, add a black stroke and text. Run the bitmap layer as an engrave and the vector layer as a score. Seems to me this would be a better operation, to maintain the clean vector score lines for the structure of the card.
This is a good technique question. I would import the bitmap image into Inkscape since I am much more familiar with the rectangle and text features, put a whole filled box around the text and then export the whole thing back out as a bitmap.
…or instead of a fully opaque bar, try a partially transparent white one to lighten up the artwork in the text area. Probably would need to test it so see, I suppose.
yes, exactly, i blurred it in this image just to show a quick and dirty example. i suggest a fully opaque bar simply to avoid wasting laser time just to engrave some blurry details; besides, the natural grain of the wood will probably provide some interesting detail to take up the “white” space, i think.
This is awesome. I’m planning on making a deck of cards out of wood, and possibly some D&D spell cards as well! (http://hardcodex.ru/)
A few questions for you:
What is the thickness of the wood you are using? Are you making it out of veneer? Do you think you will need to coat it afterward to protect the engraving or sleeve the cards?