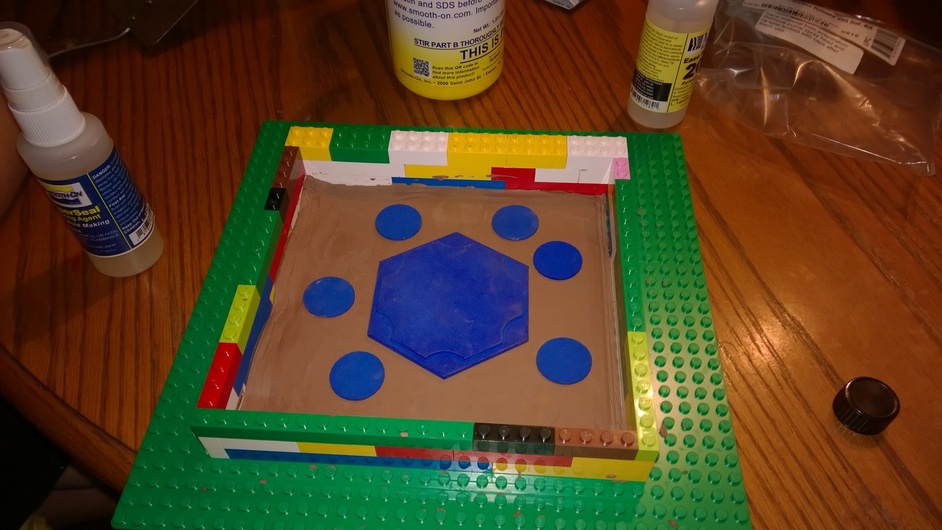
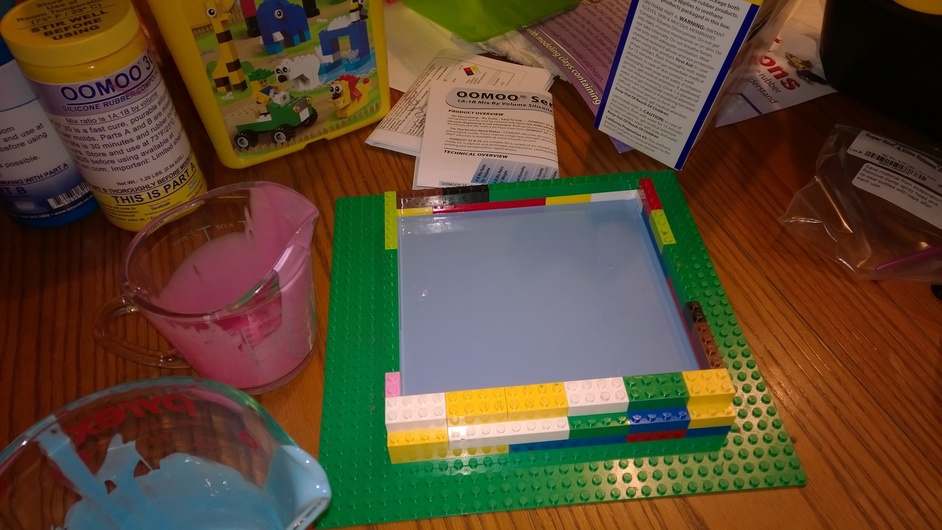
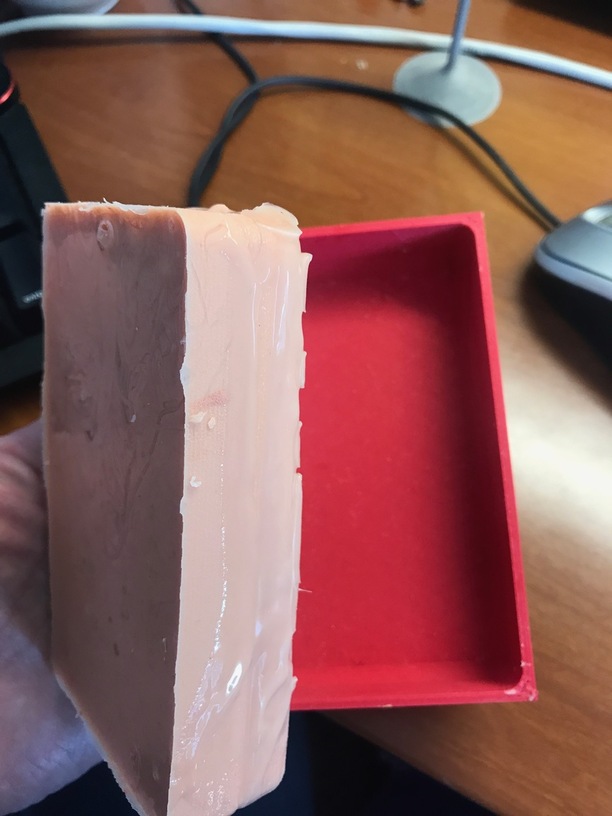
So today I was making a new ultrasound phantom (a phantom emulates an organ or block of tissue for radiology devices to image - in this case it is a block of soft tissue that matches the ultrasonic properties of muscle with some 3D printed paraffin (Moldilay) blood vessels I will fire out of the block. I 3D printed the outer mold, which took a while (that’s red Proto-Pasta matte HTPLA) and one of my lab folks asked why I didn’t simply cut a mold box with the GF out of acrylic. For those of you planning to use laser cut boxes for molding, It actually does not work well (which is a shame since lasering the box would shave a few hours off the process, and some of my molds are huge (like the pelvis model I have), and I figured for those planning to do this let me save some failures for you.
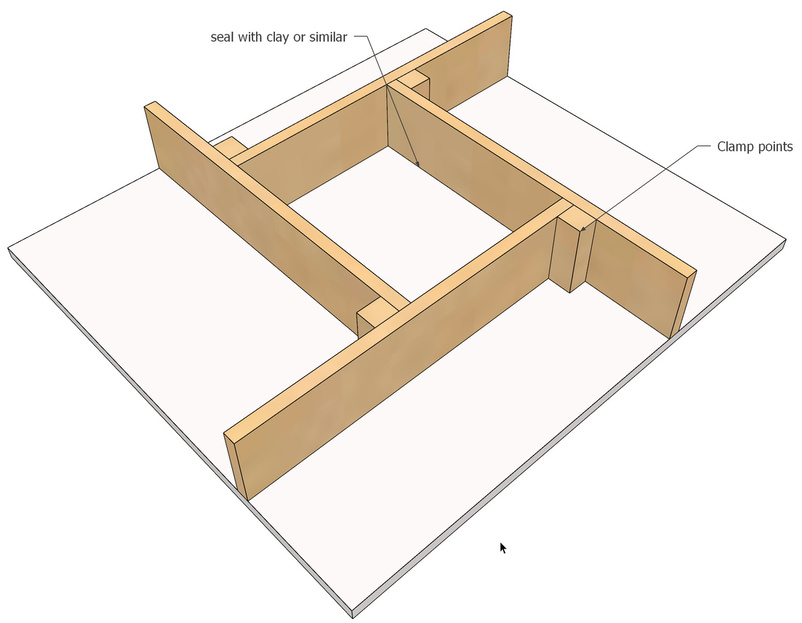
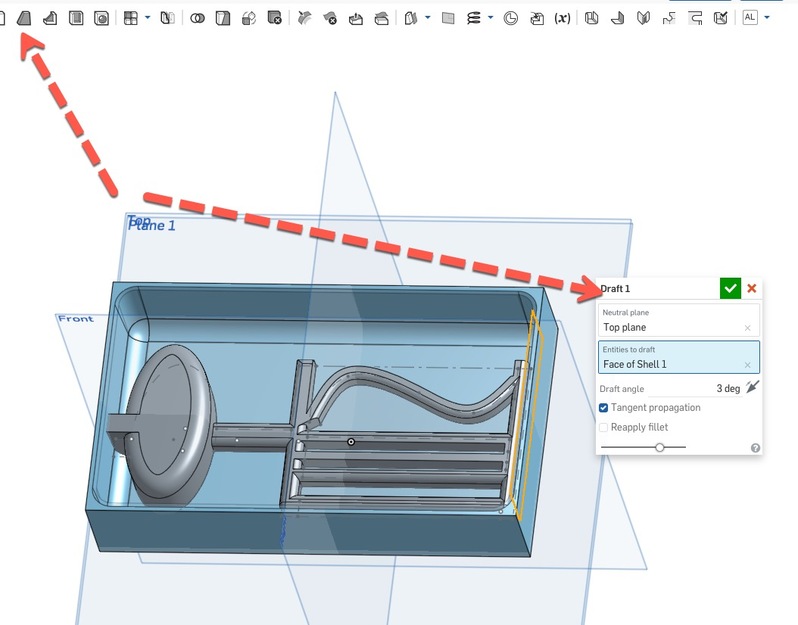
When you use a liquid cast (such as silicone) the liquid flows to match the shape of the container, and is quite held in via sanction (even if you slather on mold release like I do) so you need to add “draft” to your mold (ice-cube trays are the perfect example they don’t have straight sides for this reason or you’d never get the cubes out). I fillet all corners and add draft which onshape knows how to do via a single click.
I know some folks have done some chamfered edges on the GF with wedges, but for the liquid tight edges you need in a mold, that’s going to be super hard to do with that level of precision:
I do wish GF made a castable compound (like Proofgrade paraffin sheets). One other thing to know if you are investment casting via 3D printed Moldilay, since 3D printed objects normally use infill, the parts float in the silicone, which can cause all sorts of hilarity. I’ve taken to using museum gel to hold it down. and it provides a seal to the outside of the mold wall, which is useful when you go to fire the mold for the wax to drip out.
I wonder if one could assemble a notched box with the top edge exploded out some, thus revealing the notch teeth and adding draft. Then finger smoothing some caulk (or something similar that will release) into all 8 mating surfaces to seal the corners and cover up the notches.
Caulk is silicone, which adheres to silicone really awesomely (note if it’s the other catalyst (tin instead of platinum, your silicone pour won’t cure…)
That is why I added the catch-all about something that would release I have yet to pour silicone, but cured caulk works fine for cement. I did learn that I couldn’t spray it with WD-40 silicone formula though! I had made a mold out of oogru, and ended up using Vaseline as a release instead.
Now that tin and platinum info is quite interesting!
The corners are clamped and the interior edges use caulk the bottom is melamine, but some other smooth surface would work. I like this because no draft just undo the clamps and pull apart and its adjustable. I haven’t had the chance to do much of anything lately and the design is not mine its from others doing casting. I did do the cad so I can cut it out with the forge later. I really like what your doing with the forge very inspirational. Keep of the good work! Oh and thanks for posting I like to see these kinds of things this forum is full of such great things…
Edit: the base could be glass that would be really smooth.
For small molds draft on the mold box isn’t much concern, just roll/pull the silicone away from the box, use a popsicle or craft stick. That’s the beauty of silicone versus hard tooling.
Once a mold gets big enough that draft is a concern, it’s then time to use brush on materials to make a thin silicone wall, and a hard reinforced mold shell for support. It just saves oodles of money and time too, and makes draft a non-issue again. I have a solid silicone pour mold here that’s 12"x12"x5" and it just pained me to burn all that material, plus it’s heavy to handle and needs to stay with a wood board to maintain its shape.
You can do an acrylic mold wall with draft built in by cutting trapezoids. Hot glue will fill any gaps… But no sense bothering with it really. The silicone is forgiving enough, and mold walls made of hot glued cardboard, clamped melamine or even just flat plastic sheeting that’s hot glued to keep it re-usable is more than sufficient.
You could always do layers of say a rectangle with a smaller curved corner rectangle cut out in the middle…stack them as high as you need the mold to be deep…probably still quicker than 3D printing…


 I have yet to pour silicone, but cured caulk works fine for cement. I did learn that I couldn’t spray it with WD-40 silicone formula though! I had made a mold out of oogru, and ended up using Vaseline as a release instead.