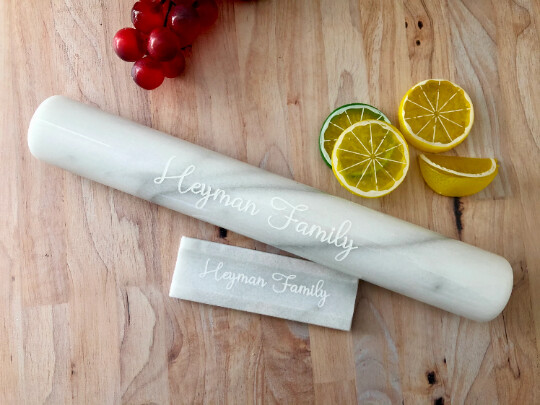
Here is a writeup on how I print on the handles of this rolling pin:
https://www.amazon.com/Fox-Run-Marble-Rolling-White/dp/B0000VLPAS
Without removing the handles.
First off, the marble center of this pin is 2.5" thick. The print head itself can pass over this thickness (but can’t print on it…don’t try) but the assist fan absolutely can not make it. If the assist fan hits it then the marble might win that battle…
So to do this, basically think Squid Games and the game is to not let the assist fan pass over the marble. I always keep my printing on the left side of the marble center. Yes you could optimize and have it do both sides with one print because the print head can pass over it but I just play it safer…remember…Squid Games…
Step 1) Make your grid on the bed of the glowforge for where you will line up the handle to print on. If you are not familiar with this grid then look at this post:
https://community.glowforge.com/t/grid-on-the-bed-of-the-glowforge/103370
Here is the photos of how I do this step:
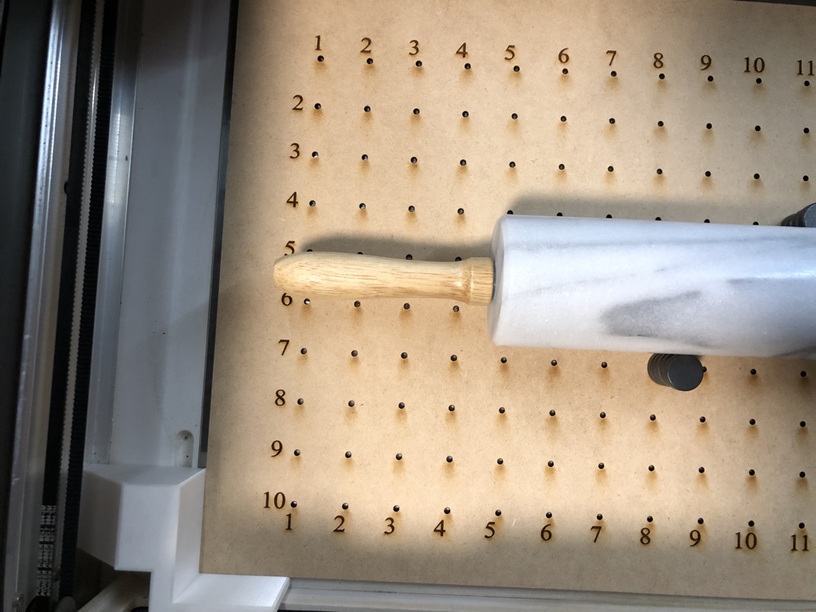
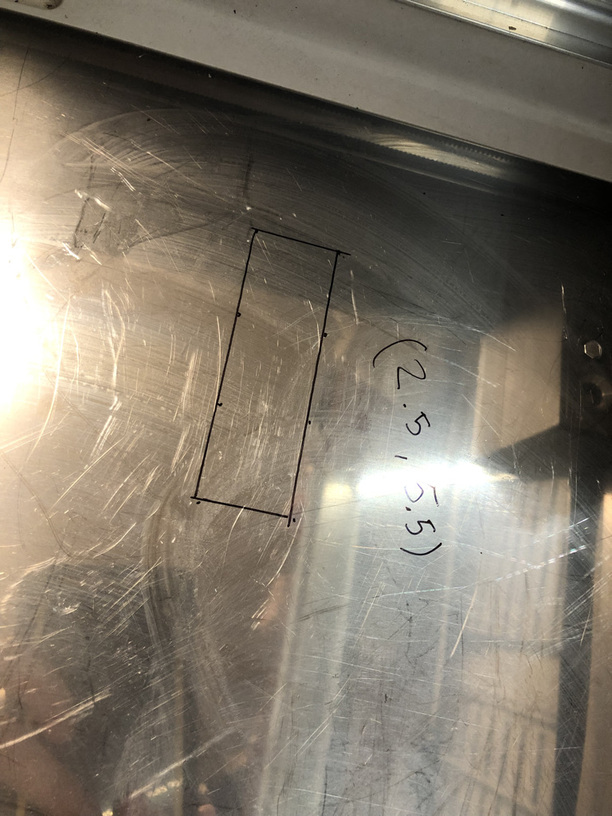
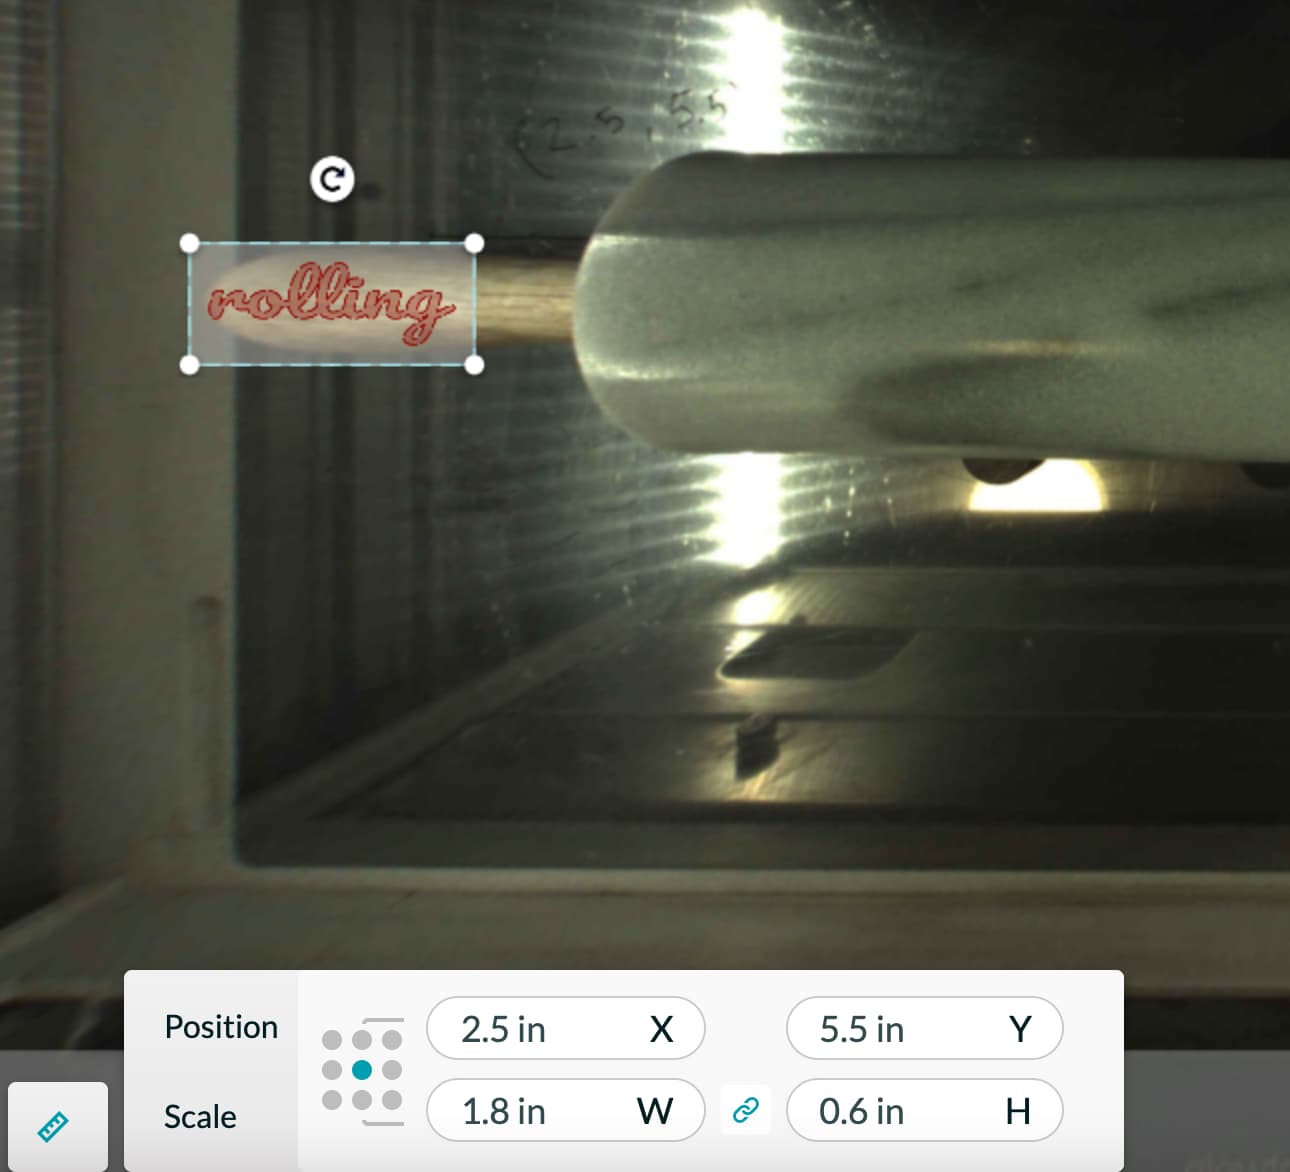
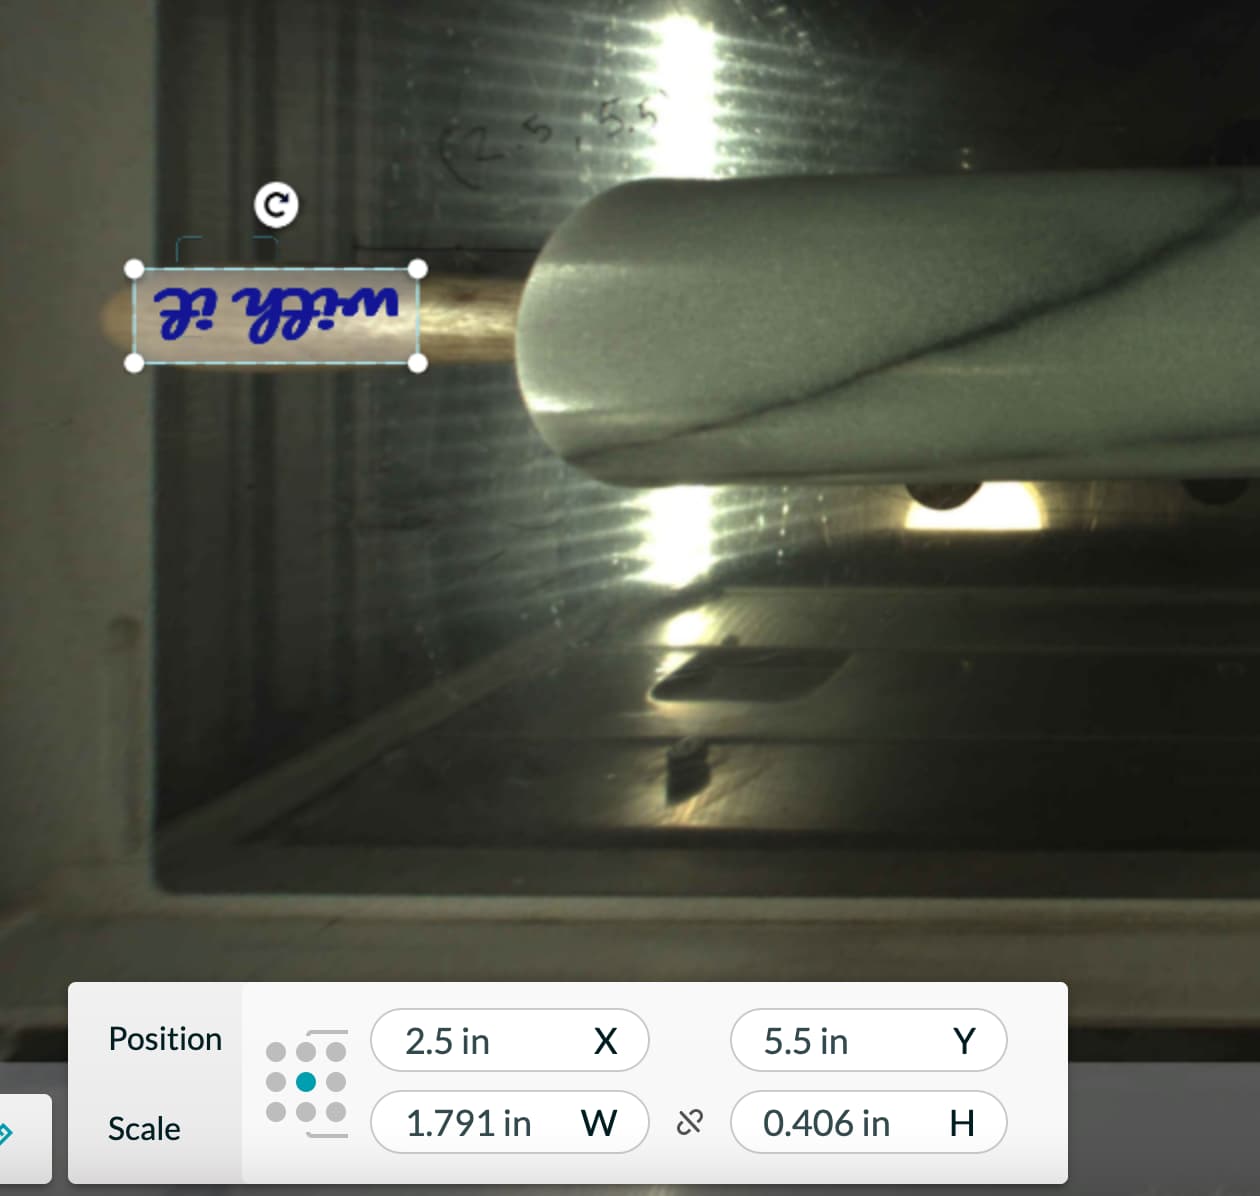
In this example, the box I drew had corner points (1, 5); (4, 5); (1, 6); (4, 6). This means the center of the box is (2.5, 5.5)
Step 2) Place your pin in the bed of the GF and line up the handle with the box you made:
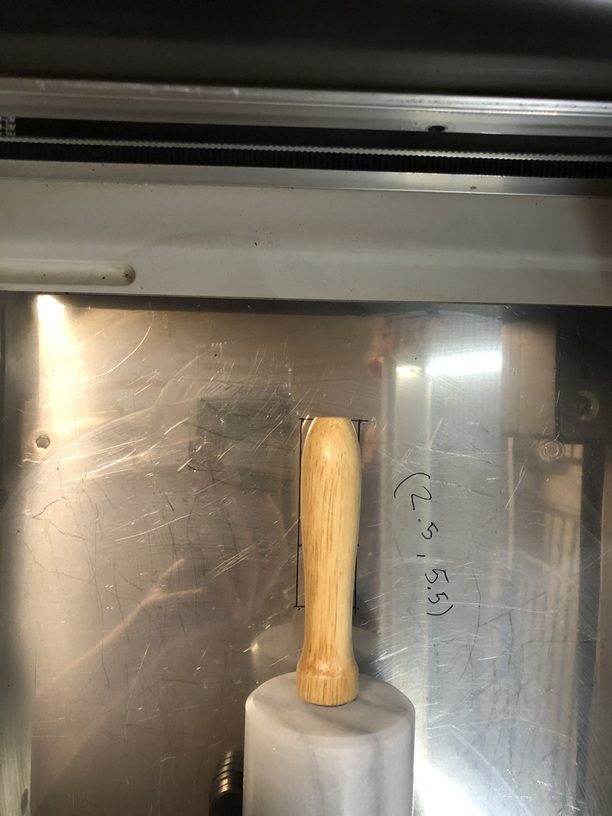
Step 3) On your glowforge app, use uncertified material and set it to .4
Then put your design in the app and set the design center coordinates to (2.5, 5.5)
Step 4) Print
Step 5) Flip your rolling pin and repeat steps 2 and 3 but turn your design upside down:
Step 6) Print
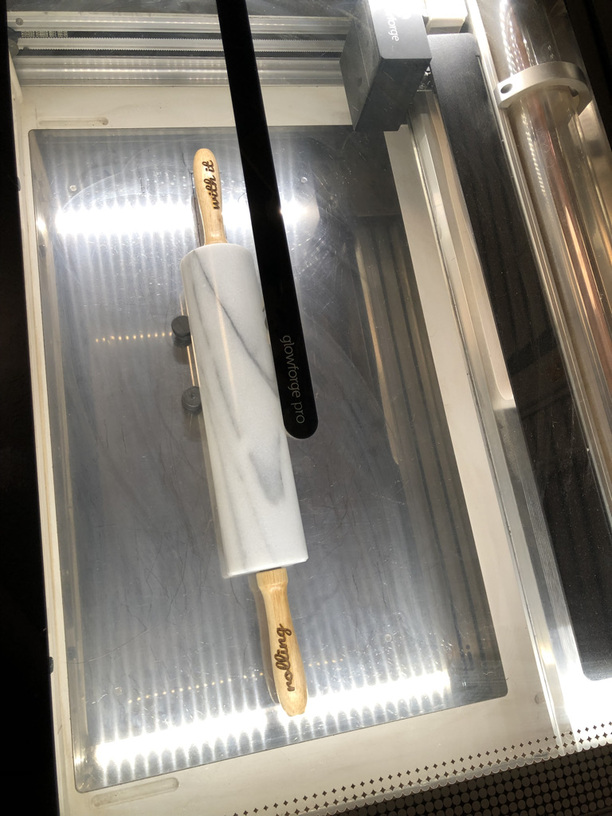
All done! Did you pass the game? In this demo I technically did. Yes, I never hit the center but a more challenging version of the game would be to have both sides line up perfectly. I accidentally turned the wooden handle just a little when setting up for the second side and so these do not line up perfectly. You could also draw the box for the right side and do it all with one print so they line up perfectly but just keep in mind where the assist fan is at all times.