Hey folks,
I spent some time this evening designing a 2" x 2" material chip template that I can use to store settings for my Glowforge. I use lots of different materials and it’s nice to have some physical chips with the settings engraved directly on them.
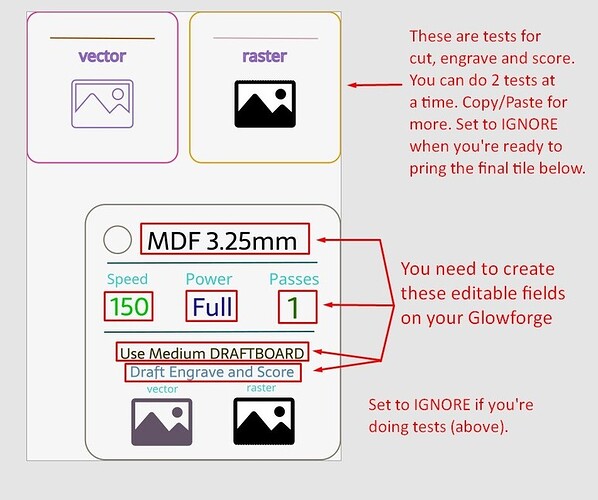
I tried to optimize the best I could just the stuff you may want to see. You’ll need to add some of your own fields using the Glowforge App, but most of the layers are set up for you.
There are both vector and raster images. I typically set these to Draft for the chips, that way I know if I need to increase the resolution. And, there is a notes area just above those images. Most of them take less than 5 min to print.
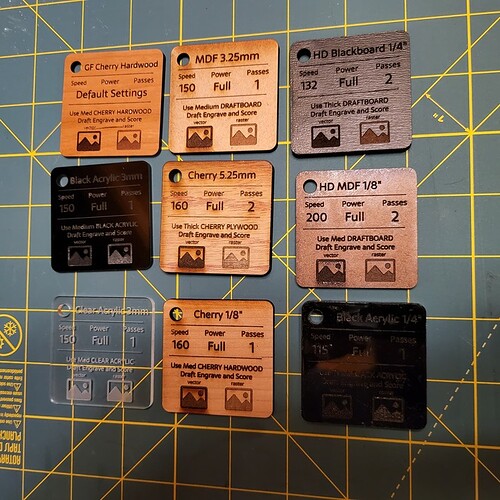
Here’s a picture of some of the ones I’ve already printed.
To use:
- Load your material and the enclosed SVG
- Add the text fields as shown above to the chip
- Sort the layers with the test layers on the bottom. Remember to have the CUT layer the bottom most for each object
- If you already know what settings you use, then IGNORE the test layers else IGNORE the chip layers.
- Use the test layers to test various settings, by setting the CUT, ENGRAVE and SCORE for each layer you want to test.
- Once satisfied, IGNORE the test layers and ENABLE the chip layers and edit the fields and set the CUT, ENGRAVE and SCORE properties respectively to the new settings.
- Print your chip!
You can download the SVG template at:

