That is amazing! I love seeing the different takes on Settlers boards. So much inspiration, so little time…
3 Likes
Just curious since I was planning on recessing the roads on my personal game, why’d you decide against it?
A couple things lead me to the decision to not recess the road areas.
-
I had very little of the natural maple finish showing, and wanted more, but with those areas burned out it was just a lot less wood visible.
-
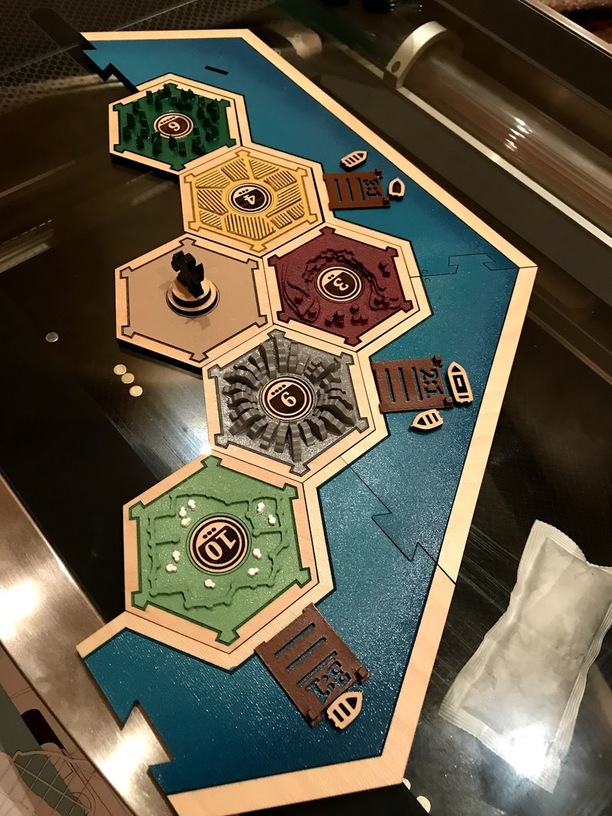
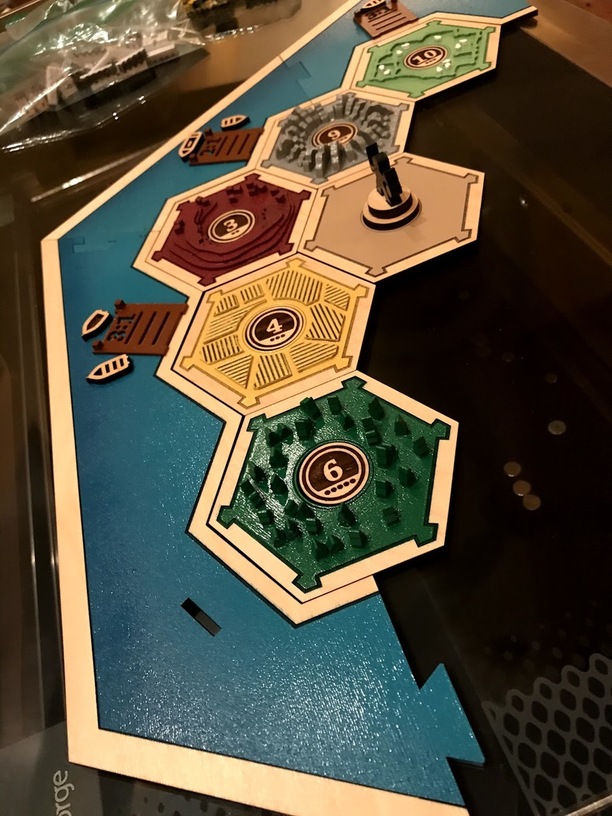
When I was looking at the board, it seemed really visually busy, even with no players… at a glance it looks like there are roads even when there aren’t players in that area. So, I’m hoping that more of the bare wood border expanses will make them look less cluttered. In theory?
-
I didn’t care much for having a recess in the same area as the cut between the tiles, but that’s a really minor thing. Wasn’t positive how tight the fit would be, haha.
Really it was mostly trying to fight clutter though. If it was the same color as the rest of the borders, I’d probably go for it… but since I wanted the tile borders to be wood, and anything recessed would be burned out and darker, that was my issue.
2 Likes
Awesome, thanks for the insight 
That makes a lot of sense, especially thinking about the couple trial pieces I’ve cut haha.
2 Likes
Wow, impressive!
1 Like
This is a really fantastic take on Catan. Very nicely done! Two questions:
1 - Will you post pics when it’s painted and “complete”, please?
2 - Have you considered selling or open-sourcing your designs?
1 Like
Thanks much! Will definitely post more pics!
I’m on the fence about the design thing, I was somewhat thinking if I put it up for sale online I might recoop some of the material expenses, but, then again I kinda just want to post it somewhere and walk away so that others who love the game might take advantage of it. Gamers for gamers and all that, haha.
Maybe I’ll post it somewhere in some sort of “pay what you want” type thing, so if people want to donate they can, but it’s not a big deal if not. Need to tidy up the files some though, I think someone probably needs a working knowledge of how to edit the source to make it all work for them. I’ll definitely post here if I put them up!
6 Likes
I just have to say “holy cow that’s amazing.”
Beautiful design and execution. Can’t wait to see it painted.
1 Like
And so the question was answered, what is more painful than stepping on a Lego?
And wow.
2 Likes
OK, got some paint on there today! Holy crap does it look different, much much more clean and readable. Haven’t gotten the player pieces like roads, towns, and cities done yet, but I got a coat on for pretty much everything else.
[Technical note… I discovered that trying to spray paint the darkened lasered edges is a challenge. I spray paint on them and the paint visibly just soaks in and disappears like a bad magic trick. If I had to try this again, the first thing I’d do is spray sealer of some sort on the wood prior to spray paint. Keep that in mind if you plan on spraying lasered wood sometime ![]() One benefit of this though, is that my laser etched detail lines still pop visibly, even after painted.]
One benefit of this though, is that my laser etched detail lines still pop visibly, even after painted.]
I was paranoid about unmasking things before it was dried thoroughly overnight, so I only “unwrapped” a little sample section of 1 of each tile.
My plan is increasingly certain that I want to lightly drybrush all the tiles, so it subtly picks up and highlights the edge geometry more. The brick and forest tiles will definitely benefit from that. I’ll probably slightly darker the sheep fences too.
I also am still going to etch that cracked clay pattern into the desert tile, but I wanted to wait until it was painted.
I’m not completely sold on the docks yet, the numbers aren’t visible… but I’m not sure they really need to be that bold anyway. The 2:1 docks will have small piles of the correct materials on them to identify them anyway, so, making those numbers more visible might just be adding clutter for no reason.
26 Likes
OMG! That looks phenomenal! I’ve been itching to make a GOT themed Settlers of Catan board and this is definitely great motivation! Love it so much!
I’ve found that spraying the darkened edges of the wood with primer really helps before spraying on the final color.
2 Likes
Yep… I think I’ve definitely got a can of primer in my future tomorrow. Especially since the roads, houses and castle bits are mostly that burned out side grain area. Thanks for the tip!
This just keeps getting better! Keep up the good work!
Awesome design, great execution, perfect use of the laser and materials, also well thought out! Love the whole project - amazing. 
1 Like
I’ve commented before that a charred edge won’t hold paint. My two solutions, neither of which I have tried yet, were sanding off the char or using a primer. I’m glad to hear the primer will work.
And even more WOW.
1 Like
Amazing! Was the 3d model in Modo simply used for visualizing/planning? Or was there a way to export a vector file from that 3D design and import into illustrator/inkscape? EXCELLENT WORK! Love the game pieces, especially the cities/settlements.
Thanks all!
I haven’t found a good path of actual data between Modo and Inkscape. Inkscape claims to import a DXF file, but either it doesn’t like what Modo calls a DXF, or it’s just broken on one end.
There wasn’t a ton of high detail stuff to transfer anyway though, so mostly I recreated it in Inkscape so I could use all the precise dimension tools and know it’s clean linework.
A couple things though, I took high resolution screenshots of the 3D work, then brought the screenshots into Inkscape and did a “convert to path” type thing… It actually was surprisingly clean! The little trees and houses and stuff required very little cleanup after that import process. Mostly I just subtracted a straight line from the bottom of them so I knew they were flat.
Yeah, I thought about sanding off the charred areas, but holy crap that sounds like a lot of work for something like this. So, what I’m trying now is to spray seal the pieces prior to painting… will report back on how that goes, haha.
1 Like
Color update time!
(I don’t think these pics convey the colors well, I think the iPhone is pumping up the saturation… it’s more muted than this, and the bricks don’t look nearly that brown/chocolate)
5 player inaugural game, so full expansion sized board…
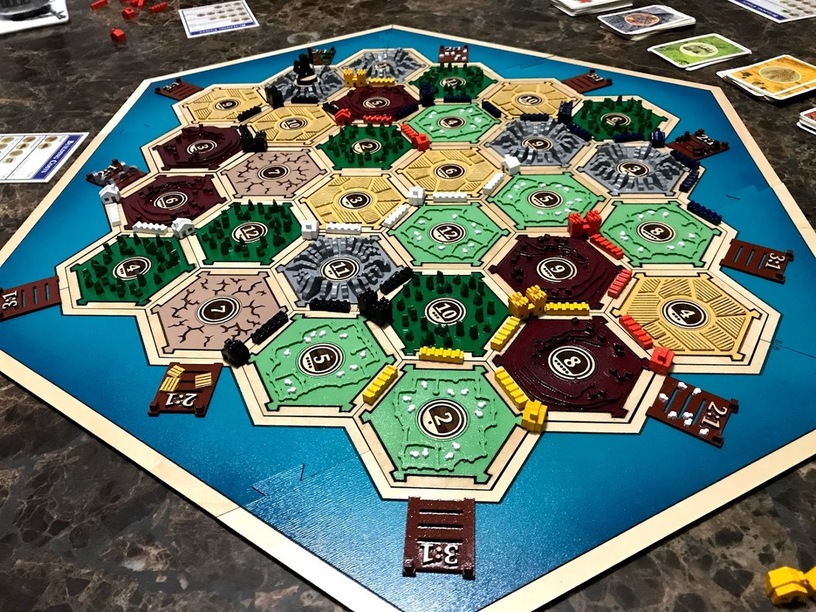

Only realized at the last second I didn’t have something to put on the “wheat port”, so sliced up a test version of the wheat field layer, and went with that. Annoying thing is I didn’t have more of that wheat paint, lol, so, that’s a spray paint mix of the orange, yellow, and white team colors ![]()
I also cut out the numbers for the docks and set them into the gaps I had carved earlier. They read way better now.
Random notes to anyone doing similar projects:
If you are going to do something like this… holy cow… PAINTING IS A PAIN IN THE BUTT!
Be very thoughtful about when you decide to peel off the masking from the laser cutter, try and use that in your design to mask paint areas.
Dark charred laser areas are simply a nightmare to paint.
I truly suggest something drastic to prepare your surfaces for paint. I don’t just mean primer or sealer (my roads, houses, and castles here have, no exaggeration, 5-8 coats of primer/sealer on them in different combinations. I never found an effective combo). You spray on the paint, and like a magic troll the color just disappears in front of your eye as it wicks into the wood through the laser charred areas.
My suggestion is something like modge-podge (sp?) or something you literally brush on that creates a new surface, then prime that… then paint it… then seal the heck out of it. Then pray.
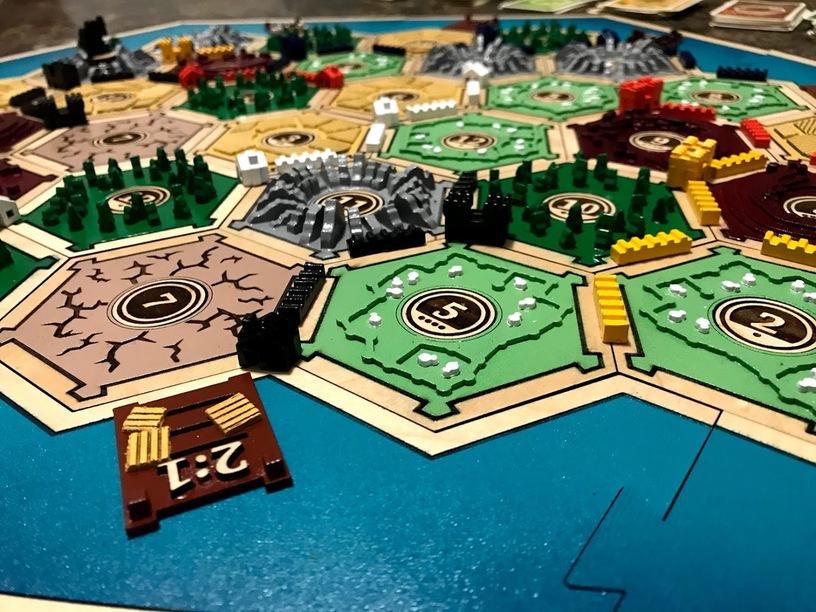
Also note that paint wicking into the wood means that you might have an area masked off, but paint becomes visible around the edges. For example in that 2nd image, the brick tile with the “8” on it… at the bottom edge you can see how the paint seeps in and becomes visible, even though the border was masked off.
I put the tiles BACK into the Glowforge (in a very precise little jig) and re-engraved the dark line around each tile. Which MOSTLY worked great.
Cautionary tale though… a fully assembled tile like these mountains, they’re taller than you think. After engraving about 20 tiles successfully, I got to the mountains, and apparently they were just tall enough that the Glowforge carriage bumped the whole setup, and it started slashing an engraving laser over my meticulously painted mountain tiles. Was crazy frustrating…
Random thoughts about this specific project:
I’m definitely going to track down some lighter versions of most colors and hand drybrush the tiles so it’s a little more organic and the geometry can be defined a bit more. Also want to get the brickyards looking better.
I want to track down some matte finish sealer now, it’s super glossy right now, and I’m not sure I dig that, it really shows off imperfections. But, it’s well sealed at least.
OK, I’ll stop rambling now. Thanks all!
28 Likes
This thread is a real gift. Thanks for taking the time, it’s a great project.
3 Likes