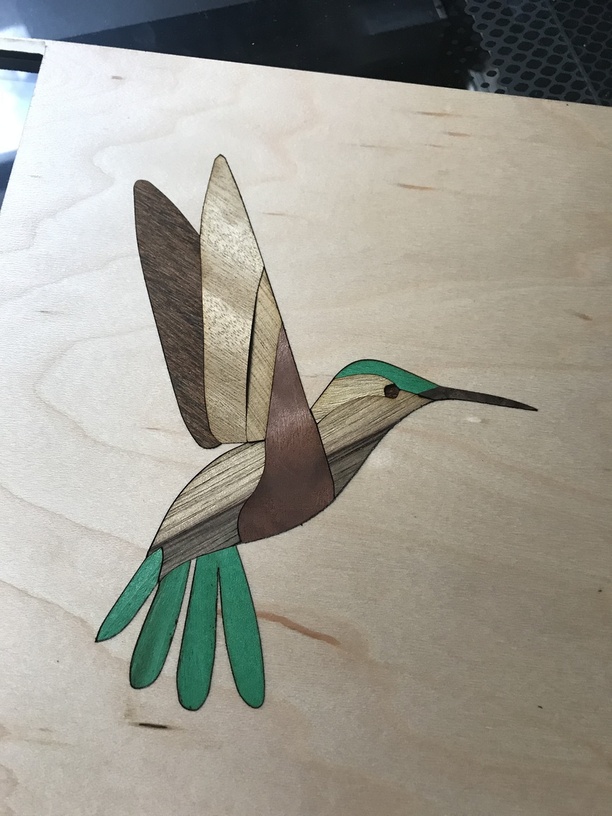
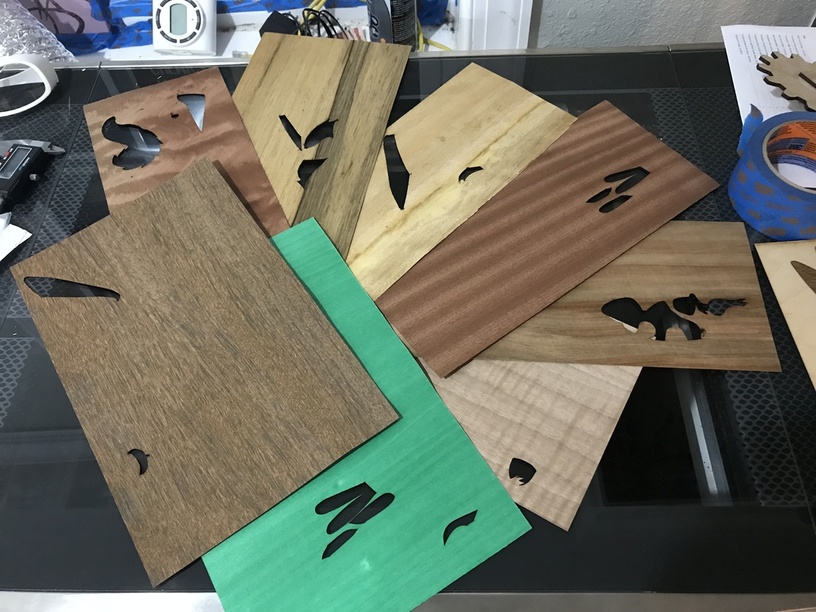
I wanted to try some wood marquetry with my glowforge so as a test piece I started with this humming bird. I bought a sample pack of veneers on amazon which actually had a great variety for around $25 or $30. I etched the whole humming bird image into some medium maple proofgrade and cut the individual pieces from my veneer pack. I’m really pleased with how it turned out. In this image you can see a ripple in one of the front wing pieces that’s because the pieces aren’t glued yet. I just press fit them into the recess etched into the maple. The fit is perfect!!
The glowforge made cutting and placing the pieces trivial. The hardest part was designing the cut file. Whenever I take a line drawn bitmap image and convert it to a vector in inkscape I get a gap between my cut pieces that is the thickness of the original hand drawn line.
Take for example this image of a clown fish I got from googling coloring fish.
This one has very thick lines to help illustrate my point. When I convert bitmap image to a path in inkscape then break that path apart I get separate paths that I then colored as seen in the image below.
Even with images that have very thin lines my process still leaves me a gap the thickness of that line and for marquetry I need there to be no gap. Anybody have some tips for quickly getting the result I’m looking for without meticulously tracing the image with the vector tool? I also have access to adobe illustrator if there is an easier way to do it in that program.
In Adobe, you can increase the shape of a selection by pixel increments, so if the gap were 4 pixels wide, you could increase the vector by 2 pixels on all sides and the pieces would theoretically have no gap.
I think I’m going crazy. I was reading a reply explaining how to make the line in the middle with stroke instead of fill with an illustration . The it vanished as I was reading it. Where is it?
BTW: If you aren’t relying on kerf to produce a tight fit, cut the full pattern on each material and you can mix and match up multiple copies of the (fantastic) design!
I hoped the camera would make the process, if not easy, at least possible. I have a few marquetry/intarsia ideas that I so want to make a reality. You’ve just made my day.