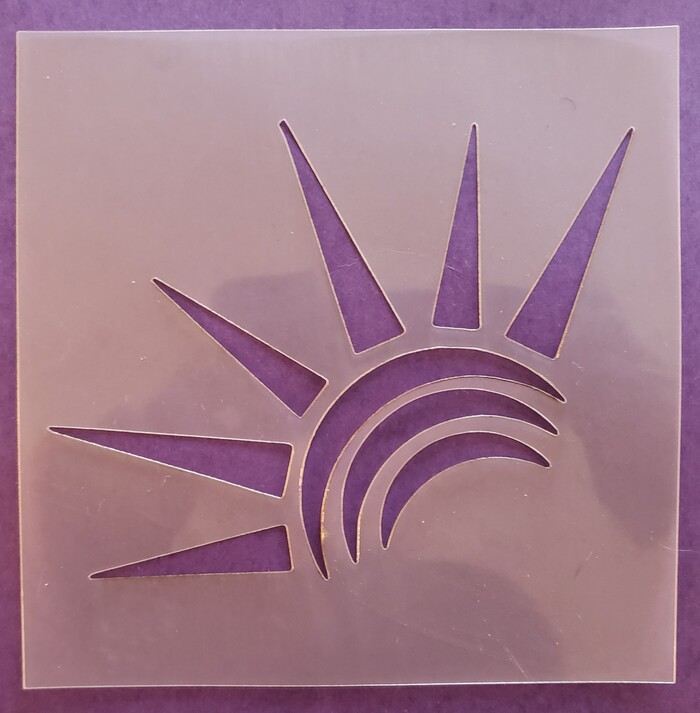
Cut my first mylar stencil today. Used 4 mil mylar from Amazon (Amazon.com).
Speed: 225
Power: 15
Focus Height: 0.01
Used a piece of cardboard under the mylar and magnets to hold it to the bed so it didn’t blow around. It cut the mylar and only scored the cardboard (which didn’t matter because it was just used as protection).
Yes, I’ve done a lot of mylar stencils and that’s something that really works great in the Glowforge. Especially since they made the improvements to corner overburning.
I saw your posts. They actually helped me a lot. I believe your posts were using 7 mil and 10 mil mylar, so I stepped back the numbers just a little bit since my mylar was thinner. Thanks for all of your information on it!
If you used cardboard under it your height is wrong.
Ergo, your settings are wrong too, you’d be out of focus by the thickness of your cardboard, which is probably close to the .115 range. That much out of focus will make your kerf much wider than necessary and require that you apply more power to it to make the cuts.
I’d recommend re-testing and updating your post, these settings [225/15] are probably not quite right.
As for “nice and crisp”, you definitely have some variation in the points of your rays, is that in the art? If not, then I think getting the height correct will help you get more consistency. I’d inspect the art for rogue nodes, I assume you purchased or otherwise downloaded this?
Thanks, but I used my digital caliper to measure and my measurements are correct. My settings {225/15} work perfectly for me. The “nice and crisp” I describe is exactly right. The points of the rays have variations in them on purpose. It’s part of the artwork – on purpose…
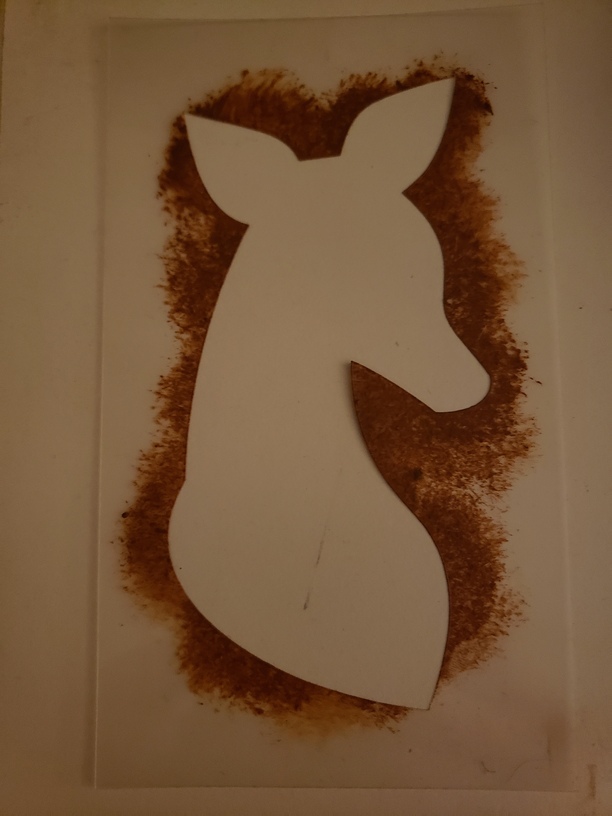
Here’s a deer cut with the same settings. Turned out wonderfully, as did the image when I used the stencil with paint as intended. No need to make any changes to my original post.
I don’t have the box that the magnets came in anymore, so I can’t tell you the name. However, if you do a search on the forum there are posts that will tell you the magnets to get. That’s how I found out which ones to purchase. I do know I got them from Amazon.
I use magnets because when I first got my GF and was scouring the forums folks were using magnets, so that’s what I bought. So I use them. I’m sure masking tape would work too. The magnets are a one-time purchase though (and not expensive) whereas the masking tape would have to be replenished eventually. Just my thoughts…
Sometimes you need to press the center of the material down.
My guess is the top of the magnets were fairly close to the laser head? IIRC the power of the magnetic field decreases by the square of the distance, so not stacking them that high would help. You can also buy, or salvage yourself, hard drive magnets. They are shielded on the top, so basically they only “stick” downwards.