Awesome work (both in the cards and your forging).
Side note, what are your playing cards made of? I’ve been using the same 2 boring decks of Kem cards forever.
Awesome work (both in the cards and your forging).
Side note, what are your playing cards made of? I’ve been using the same 2 boring decks of Kem cards forever.
My cards are printed by either the US Playing Card Company (that makes Bicycle and Bee cards that you’ve probably seen) or the Expert Playing Card Company overseas. In both cases the cards are a premium laminated paper with a black core that prevents light bleeding through, with special coatings that allow the cards to glide over each other.
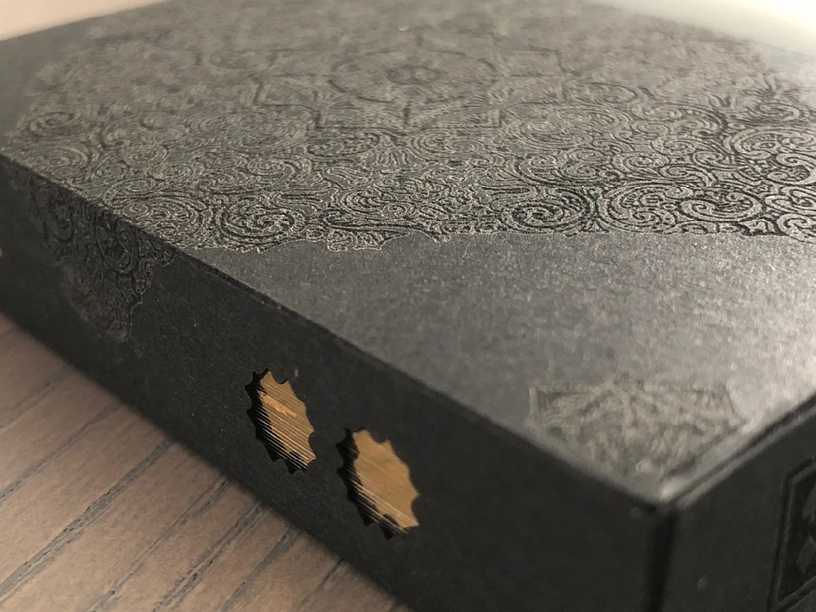
Updated experiments. I tried some black paper today and while the engrave didn’t change color as much as I thought it would (but which gives a totally different effect, almost like fabric or something lacey), the settings for the bitmap cut on the back were just spot on perfect. The detail there is intense and so clean, that entire medallion is only the size of a silver dollar.
Frickin’ awesome.
That looks like a classic, old, historical something. Awesome!!
I’ll say!
Beautiful effects! 
Holy crap thats beautiful
I showed your work to my brother. He has been very involved in Gathering For Gardner and is going to share what you’re doing. No promises, but hopefully opens up opportunities.
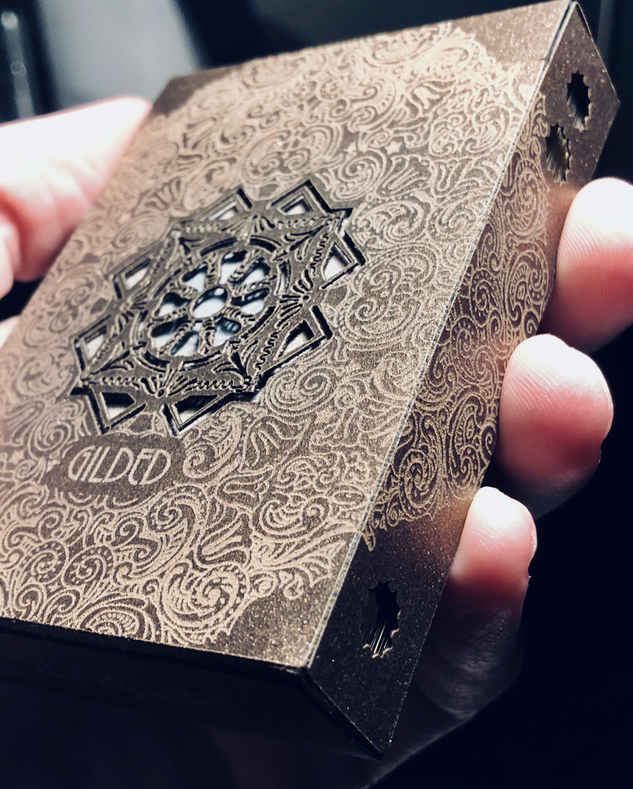
Getting closer to a final design here. I decided that the cut out part looked too awesome to leave just on the back, so I have it on both sides now and surrounded it with a detailed engrave. This is on a metallic bronze paper which I laminated with spray adhesive to a black card stock from Hobby Lobby.
The only real issue is that I do get some char on the paper after doing the main medallion cut. As an experiment I wiped the paper with a little isopropyl after the cut and it took off the char but ever-so-slightly dulled the engraving in certain light. I’d love to be able to cut/engrave without having to open the lid, apply masking and then cut again, so a few more experiments might be in order. (Unless any of you fine folks have ideas on how to reduce char when cutting paper, other than cutting on the backside which I can’t do in this case)
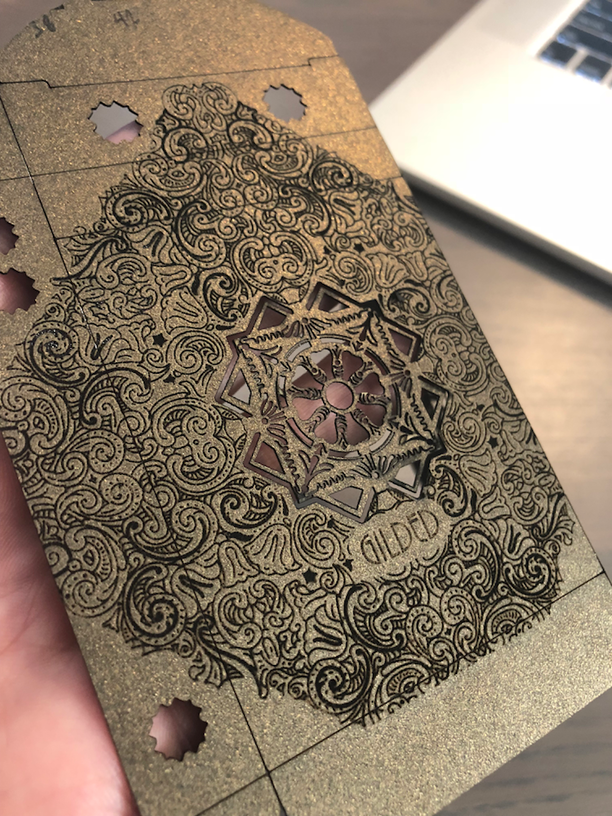
Still, I’m really liking where this is going! The plan is to make a super-limited release of 50 of these after the decks have been gilded.
@jbmanning5 has had good luck using salt!
That is gorgeous!
Fabulous suggestion. Thanks for sharing!
Absolutely a-maz-ing!! Thank you so much for sharing, including showing the test samples. The skyxxs the limit!
WOW
When you first introduced yourself here I knew this tool was made for your craft, and you would do marvelous things with it!
Beautiful work Sir!
Beautiful!
I made a laser cut box (the first ever in the industry) in 2012 and knew right then and there that it was a tool that needed to be leveraged on projects like this. I am so thankful and excited to have the Glowforge now, it just opens up so many possibilities.
That is such beautiful work!
Stunning…all of it!! You were definitely one on my list of makers I wanted to follow after getting the Glowforge. You did NOT disappoint.
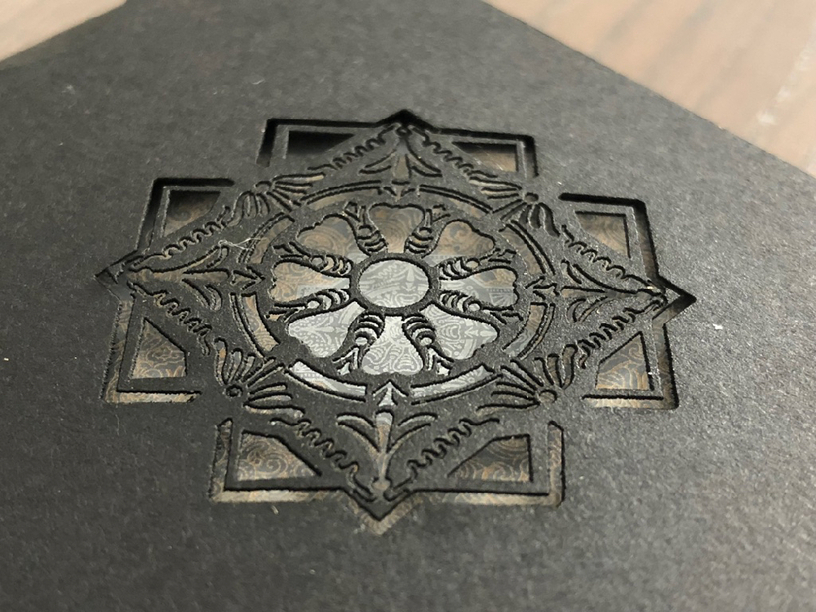
Now we are getting into the fine tune level. I decided to do a 2-step process on this so that I can do all the engrave and the first layer of cutouts, then apply a little masking tape, and then do the final two cuts. That works pretty great, though I will need to reduce the detail in the medallion cutout a little to make weeding easier.
I also experimenting with upping the power so that the large engrave starts to eat through the entire top paper, giving a pretty cool black contrast to areas. I have more tuning to do with this particular setup but all in all this is a pretty impressive amount of detail for paper, IMO anyways. ![]()