I’ve been having pretty decent luck with applying a varnish to keep away from smoke stains on unprotected cuts. I’m not sure if that’s a part of your workflow or not, but if you do varnish or use a UV protectant on the finished product, that might be a way to shorten the weeding workflow.
2 Likes
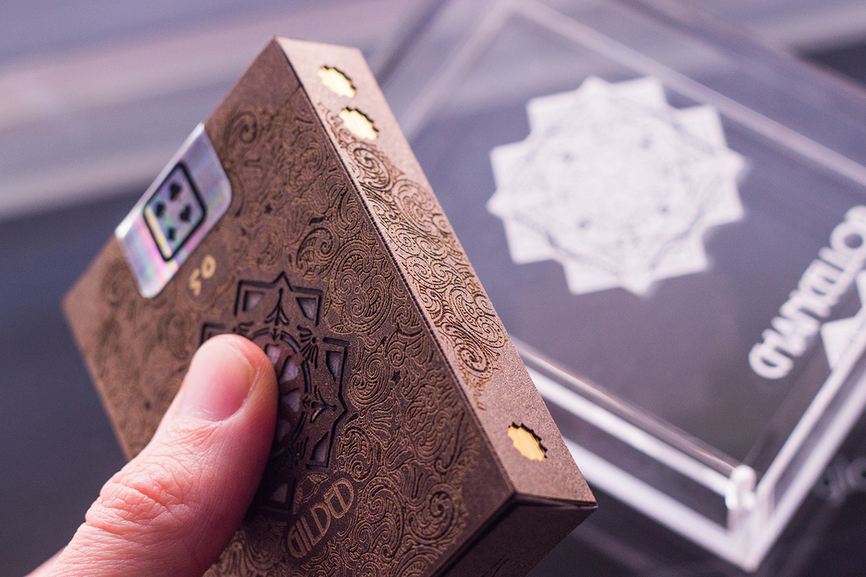
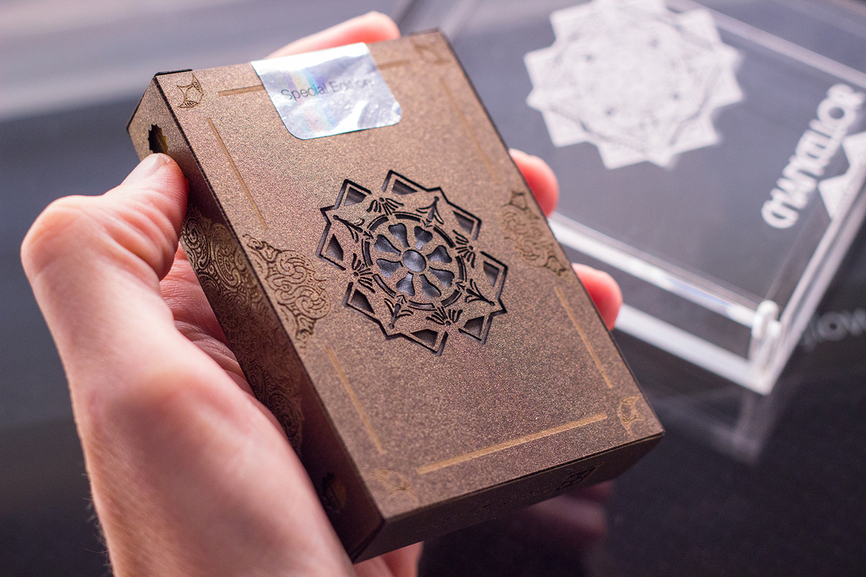
After many, many pieces of paper and laser time I have a near-final prototype of this box. Turned out pretty excellent, with great detail in the engraving and an absolutely perfect cut out.
The medallion in the middle was cut via the bitmap engrave method whereas the little side shapes and the outer cut line were done vector. I used some TransferRite medium tack tape for the masking of the center cuts. I’d classify it as low-tack, personally, but works great here because it comes right off the paper even in the tiny details.
This will be put into an engraved acrylic case and with just 50 made this should be a hit. Thanks Glowforge, finally after 2 years I can bring a vision to life.
44 Likes
That is stunning. Your customers I am sure will be in awe!
3 Likes
Yeah, awesome describes it perfectly! 
1 Like
These look fantastic.
i will probably be doing some vaguely similar things at some point (boxes with die cuts and engraving, but very different styles). can you tell me what weights and papers you’ve had some success with? I will need to do some sample ordering from paper mills. really curious to see how some of the funkier papers cut/engrave.
1 Like
Thanks! For the papers I actually used two sheets, one is a black standard cardstock and the top layer is a normal weight paper. I got both of them at Hobby Lobby and I used a spray adhesive to laminate them together. They measure out at .017" thick.
I found that with this setup you can tune the engrave to get through the top layer of paper and into the black in darker areas. For lighter areas it will skim some of the metallic paper off and give you a nice shimmer in the details.
Be prepared to do a lot of experiments. I burned through many sheets playing with the settings, as you need to balance the detail with lines per inch, but then need to compensate for the power and speed to avoid burn through.
2 Likes
yeah, i feel a lot of sheets of destroyed paper coming on.
i don’t know if you realize it, but there are already duplexed sheets of paper out there (although maybe not in the mix you want). in particular, neenah makes a bunch of them. linen, columns, and crest, in particular. generally a dark/light combo (like red/white, blue white, black/cream, charcoal/white or cream).
if you google neenah duplex papers you can see some options. i have a few 23 x 35 press sheets of black/cream and may have a few pieces of gray/black linen left to play with. need to raid the paper stock cabinet.
1 Like
Looks stunning.
I didn’t see this deck in the store on your website. When will it be available?
2 Likes
Simply beautiful. Thanks for sharing the final version!
This deck is not yet available and initially is going to be offered to my supporters on Patreon (which, of course, you are free to join). If they aren’t all snapped up by the patrons, I’ll have a preorder page for the public.
I just can’t say it enough, but it is extremely exciting to have this new tool in the arsenal. I’ve wanted to make a deck like this since 2012 and it would not have been reasonable to do until now, with the Glowforge. This one is just the start and I’ll start dreaming up new combinations of techniques (like engraving + cutting + foil + embossing for the holy quattro of awesomeness in package design)
12 Likes

That is an awesome set! So many little details. Well done!
So for the cuts you’re doing here, you are just upping engrave power to do that, rather than doing a vector cut?
I also do paper art and have only just started playing with my GF, and I’ve been somewhat disappointed in vector cutting performance for fine materials (e.g. paper). but your cuts here look pretty clean - well done! do you mind sharing some of the settings you used to get those nice cuts?
This project uses a combination of engrave and cuts, but for the super detailed parts the bitmap engrave works far better. I am using several steps here, both with a B&W bitmap PNG. I have the files laid out in Illustrator and there are actually 5 operations which I do in two main phases.
Step 1 is the engrave pass which lightly cuts in the fine details. For my particular papers and desired effect I ended up with 1000 speed, 25 power and 340lpi.
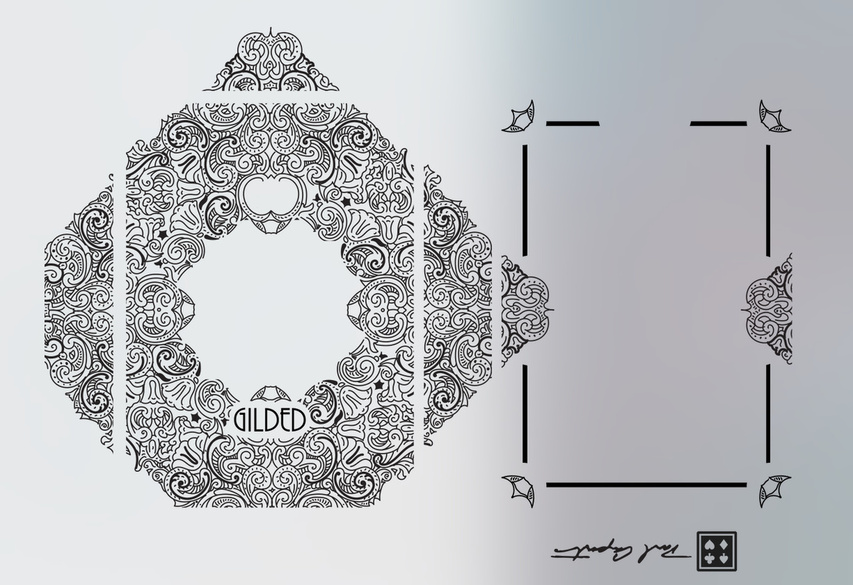
Step 2 is the “engrave cut” where I use a bitmap file but up the power to burn all the paper away. This works great and avoids the “hotspot” corners you can get with a vector cutout. This uses 500 speed, 60 power and 340lpi for two layers of paper and TransferRite masking tape. This has been able to get incredibly fine detail, some of my earlier tests had features less than 1mm wide that held up pretty well.

31 Likes
yeah, that makes a lot of sense - the servo slowdown/speedup in the corners seems to be the real problem in making even cuts in paper with vector cutting. While necessary for larger projects, what you are suggesting here is definitely a good workaround to avoid corner burn (for detailed projects it literally does set the paper on fire!)
Since you’re cutting small/intricate details with a raster engrave, do you see any “stepping” of the rasterized image on the diagonal/curved sections, or does it look smooth? Your photos look great, so it gives me a lot of hope for this process, just curious if that’s something you worked through to end up at those final settings.
1 Like
The engrave cut is visually very smooth. For reference, the main outline that runs around the outer edge in the design is 0.7mm wide and even massively zoomed in with the camera it is hard to note any unevenness. To the eye, it is almost perfectly smooth and straight.

12 Likes
that tiny line running around the inner ring… so thin! that’s just amazing.
looks to be very minimal char, did you do any cleanup on this post-cutting or is that literally the raw cut surface?
I’m itching to get home and re-try some things right now 
2 Likes
This paper will definitely char without masking. This was an early one and has some char on the left side though the photo hides most of it. I’ve since used TransferRite 582 (the “medium” tack which is actually super low tack) and it works perfectly on paper.
2 Likes
having trouble finding that particular TransferRite paper - but looking at the other ones, they are clear sheets of plastic… is the 382 similar? just wondering about the safety of that in the laser (as most sign shop stuff contains vinyl.)