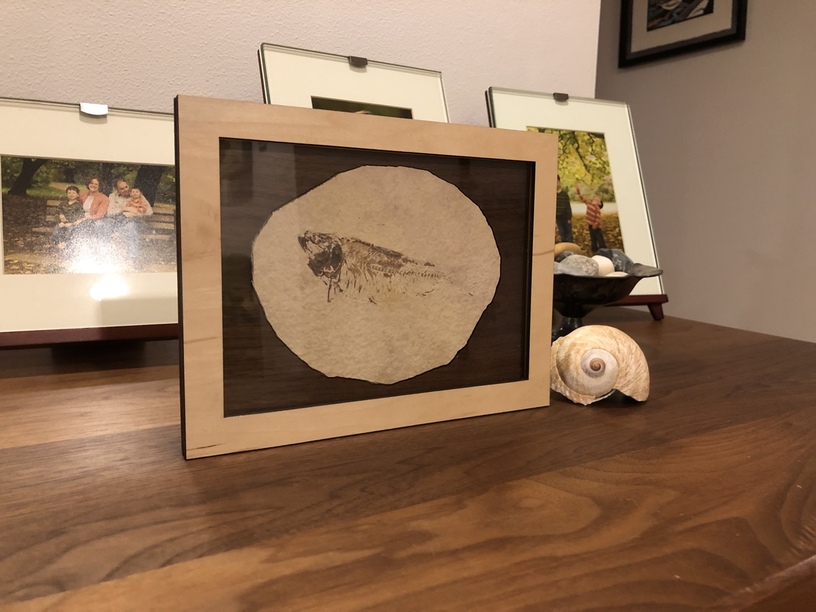
Two summers ago, my family visited the West Seattle summer festival. One of our favorite booths is a run by a couple who sell fossils, crystals, and minerals. I picked up a fossilized fish thinking that I could one day use my Glowforge to do something fun with this. Today is that day!
Here is the finished project. I used draft board for the back and 1/8” sheets of Baltic birch for the middle layers. The piece which holds the fossil is made from hardwood walnut and the front face is maple plywood.
I was inspired by Tom Stringham’s YouTube tutorial which shows how to use a lightbox and Inkscape to create perfectly sized cut-outs. https://youtu.be/HTB10v71hqU
One tip to share that may save you some time. Once I had my vector art for the fossil, I added additional rectangles for inner and outer boundary of each layer - using a different color for each. Doing so alllwed me to easily use the same SVG to cut each layer of the stacked frame. I also used these rectangles to create score marks that helped me line up the placement of the next layer.
One change that I may make the next time is the addition of a circular hole in each corner. Adding this would allow me to strengthen the connection between layers by using a dowel. I would likely use a walnut dowel to maintain the light/dark contrast.
Will definitely be doing more of this type of work in the future!

