Hi @m1979breanne. Thanks for getting back to us with the added screenshots to help address the Passthrough troubleshooting. @dklgood gave some great advice to try adjusting the file into separate pieces to help run the print, but if that does not help I have some further suggestions to help continue any troubleshooting.
First, I noticed that the design may encounter some trouble aligning between cuts due to the small amount of features in the original design. The Glowforge will try to locate markers of design between print slices. To aid with this process, you can try adding a few small shapes near the edges of your design in places where there are very few lines or features, and set them to be scored during the print. This will provide more areas for Pro Passthrough to use when aligning the print.
Next, if you are continuing to run into other Passthrough print attempts failing, it could help to get a good baseline performance of the printer by having you run the test print Jeremy mentioned earlier:
Here are the steps for the test:
Load a sheet of material into the Pro Passthrough slot and ensure that the portion sticking out of the printer is supported so the material lies flat on the crumb tray inside the printer.
Double-check that the material is completely flat against the crumb tray. A quick way to do this is to press gently on the material where it rests on the tray and feel if it moves. If not, you’re good.
It can help to use pins to hold the material flat against the tray. For example, a lot of customers use small pieces of scrap to print these pins available in the free laser design section.
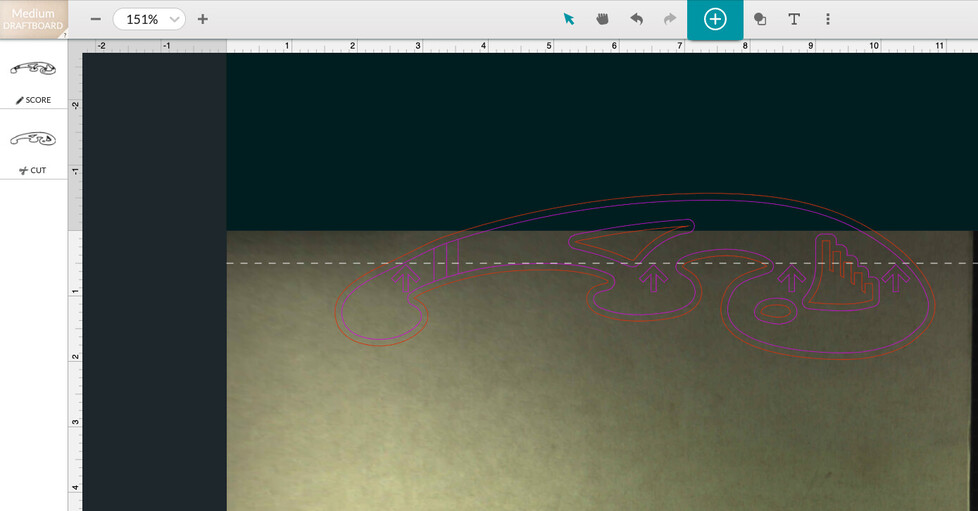
Open the Smooth Curves Stencil from your design library.
Turn on the Pro Passthrough feature in the menu bar.
Select the entire design, and arrange it so that the dotted line at the top of the work area is at the tips of the arrows in the design
Click Print and run the first section of the design.
After the first section completes, move your material through the Pro Passthrough slot so the printed area is more than 3 inches (7.62 cm) away from the front of the Glowforge.
Follow the prompts and run the 2nd portion of the test print.
After the test print completes, please send us the following:
Photos of the front and back of the finished print.
The date and time you ran the test along with your time zone.
A photo of the bottom of your print head showing the lens and both windows.
Let me know if that has any trouble printing, and I can review it in the log files for any next steps needed.
Kind regards,