This is a numbers project sheet I use to track my projects for repeatability (Not my creation). When possible I print, tape a sample, and I put them in a binder. I also file electronically.
CarterTG - Thank you, thank you, thank you! This is an indispensable tool for anyone using a Glowforge! The fact that I am already an Apple ecosystem user makes it a snap to use this tool. I started with the free version (very generous of you to offer), but quickly decided to purchase your Premium version for $3.00. Three dollars is a tremendous bargain for this tool. Well done, friend. Lastly, I love the humor injected in your disclaimer! My wife and I will protect ourselves while using this tool as we don’t need any more children!
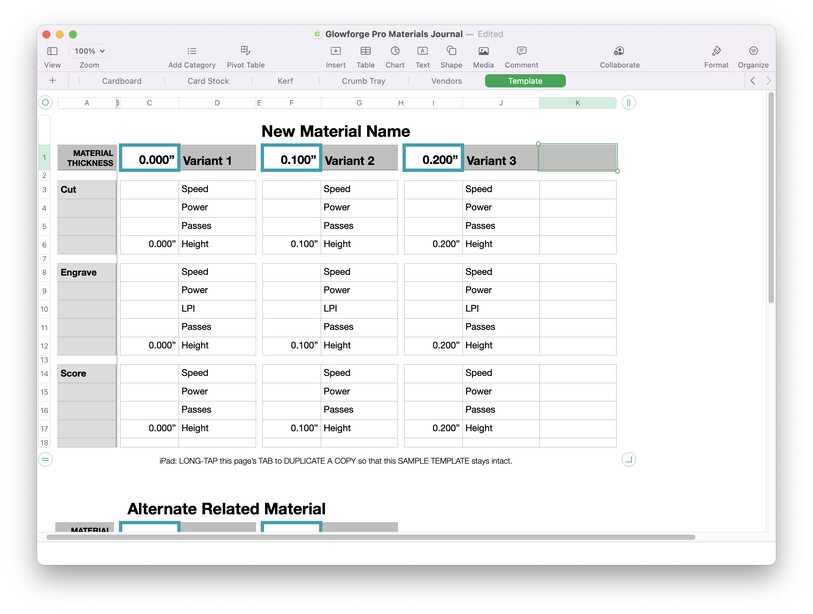
Demonstrated with the Journal loaded in Apple Numbers App on a MacBook Pro…
The process is similar on an iPad/iPhone with the understanding that touch gestures are used. ie, the Template tab needs a 2nd tap invoking a COPY | EDIT option to appear. COPY will create a duplicate tab. From there, add and alter your custom new material as desired.
TGCarter – I’ve been using your Deluxe Journal since last October and have found it to be indispensable. Question: is there a simple way to add a new variant to a specific material (something easier than adding three new columns to the right, adjusting column widths, and then copying and pasting the cell contents from the variant to the left)? Is there a shortcut I’m not aware of?
Hi CapnMike
I did some testing on the MacBook yesterday and verified that while Numbers can carry-over cell data and most formatting (cell border, font size), column width for whatever odd reason isn’t one of them.
Where you were indicating you’re creating three blank columns first and THEN pasting, just make one column initially and it’ll paste-dump however many columns you copied into the “clipboard” memory.
An example of my process starts by selecting all the desired target cells. Note here that I like including that little sliver of spacer (columns H, I, J). Copy into memory (Command-C). Find the circled pause icon at the top right
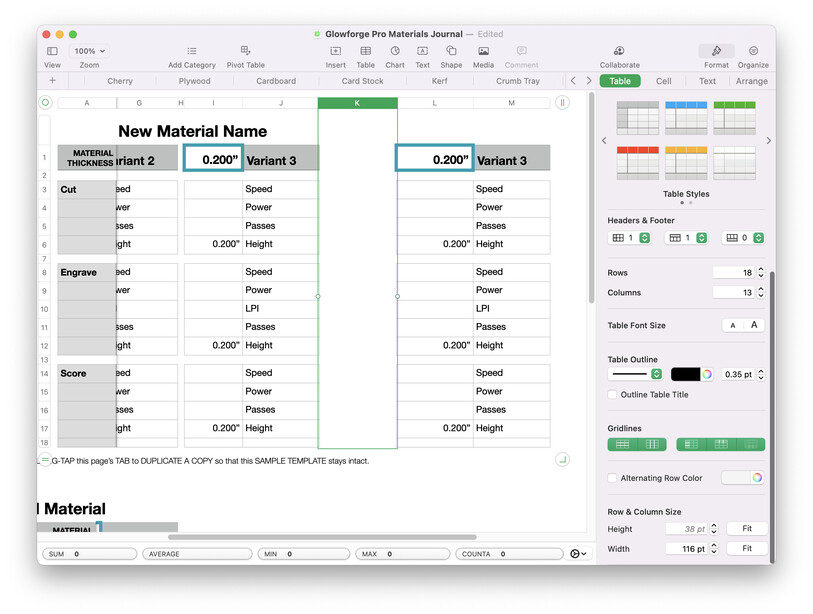
At this stage, instead of dancing the pointer between columns to drag a re-size, highlight the whole column (click the K header) and turn ON the Format pane (brush icon, very top right). In its “Table” tab, scroll down to find that you can punch-in a more precise Column Size. Set the spacer column (K) to 10 points. Data column (L) at 88 points, and description column (M) at 116 points.
If you find you tend to have a LOT more than the 3 variants I made per Material, definitely make this change to the Sample Template. Going forward, when you create a new personal material, it’s a lot faster to delete unneeded columns.
Aaahhhh – Thank you so much. I followed your well-written directions and successfully (and easily) added the new variant. And I made the changes to the Sample Template, too. Life just got simpler!
I’ve been putting off making something like this for so long. I just email myself notes and settings (as well as ideas and inspiration) but my email inbox has gotten to be too much. I need to work on this - for sure this year!
Narrator’s voice:
“But she did not work on it ‘for sure this year.’ In fact, she did not finish many of the things she was planning to do this year. Will she ever? That remains to be seen… But it’s all fine and the world goes on.”