My medical molding projects

So very excited that one of my projects FINALLY involves laser cutting. And typical of my stuff, I’m not starting small! This beast of a laser cutter is 55x48" and my first cut area is 41x35". I was making the last video in the series I have been working on, and needed to laser and CNC some stuff on film. Well kill 2 birds with one stone, and I am on my way over to NuVu studios near MIT to work with the faculty on the filming.

This design I will cut is the base plate for a 3D printed project, which is designed to suspend either a pig colon or stomach/small bowel for practice colonoscopy or endoscopy that we can’t do on my silicone molded version (because they involve actual electrocautery on tissue layers). However since the colon or stomach you get at the butcher (waste) is “dead” it doesn’t have blood in it, which is the substance that conducts electricity primarily in your body when we do electric procedures. So had to solve some electrical grounding problems on the organs. These parts are huge (a colon is about 60cm in length for instance). The parts are all printed in amphora and lock together via magnets embedded in the parts, and then lock onto the case (what will be laser printed) via pins that come up from the case floor. There were a million little engineering problems to solve here, including keeping this from becoming a giant petri dish (everything is copper or silver), dealing with the fact that electricity is running through a moist/acidic environment with multiple types of metals (battery) which will cause electrolysis (sacrificial zincs) and the fact that these very complex spline based objects are way, way bigger than any printer, so had to creatively section them, and embed magnets to lock them back into one piece.

I used MakerCase for the case base design, then edited it in adobe illustrator (how painful after using a parametric CAD to do high-precision CAD work).

20 Likes

By far one of the most-interesting use cases I’ve seen!

1 Like

I will add this was my first use of 2KG printing spools (custom ordered from ColorFabb) of nGen. This finish is before I add a gloss coat of clear coat epoxy for bacterial control!

4 Likes

You can say that again!

So some major updates this week, as my “real job” of software development had a slight lull, so did a huge amount of molding this week. This post will be an update on the artery molding project.

So first off if you recall we have blood vessels 3D reconstructed from CT scans (angiograms) which I print in PVA (E3D Scaffold) to form the lumen (inside) of the arteries and veins. Our intention was to be able to ultrasound and use fluoroscopy on these blood vessels inside various body parts to perform procedures in training situations. So this week we decided to make it happen; we failed by learned a lot, and have a new offshoot that works even better:


Mold outer box in PLA (just a test block) and the distal iliac and femoral arteries in PVA


We coated the vessels in platinum cured mold making silicon from Reynolds. Took multiple dripped on coats over multiple days. It’s blue at baseline, so we couldn’t color it…


Then we hot-glued the coated artery in the mold box so it was sealed against the edges. And then poured in our standard 50-weight silicone with skin color dye.


We picked the ends off the PVA so that the water could attack the PVA core (very optimistic of us). So over 36 hours we hit it with our high-pressure hot water hose, which certainly blew a lot of PVA gunk out, but it never really got totally clear.


Then my colleague Jeff from interventional radiology tried ultra sounding it with, which never quite worked, as the 50 silicone just is too dense, so we are trying other silicone for the body tissue. But he was able to successfully insert a needle under guidance into the lumen but it was a battle.


We were able to snake a bronchoscope up there (it’s like a $20000 bore scope) and there is our needle (and lots of little bits of PVA on the walls)

Luckily Jeff said, hey let’s try it under fluoroscopy (x-ray camera) and see if we can use it to practice a totally different procedure which is a blind inserted billiary drain. It’s clearly the wrong shape (it’s a large artery, but could we see and inject dye in a realistic manner).


So with a surgery resident in tow who wanted to play with the fluoroscopy (and it’s perfect since he’s a noob at fluoroscopy guided procedures since that is not his specialty), we ran upstairs and threw it on the table.


You can see the needle coming in on the left into the branch of the artery (which is showing up clearly as it is full of air right now) and injecting dye (black). You can also tell that the artery is clogged with PVA since it is a narrow little section. But we did do a pretend billiary drain insertion which worked out great. So while we research silicones (it’s quite complicated as they also have to be chemically compatible with our other components) we are making the easy part (haha) which is a practice billiary drain kit. And that was just one of the projects mostly done today!

33 Likes

Believe it or not, we did a second molding project at the same time as the above (pretty sure I am going to die of some exotic cancer due to all the silicone that got splashed on my skin despite gloves, etc)… So if you recall way back, we were also working on a molded colon. Well that got a lot of attention this week. First off I tromped off the OR with my colleague Tom (one of our colorectal surgeons) to look at the much more closely than in prior cases at a colon.

since the case was not a cancer case, I could actually examine and cut into the specimen after removal (still can’t “lose” any part, but can at least examine it). And after measuring the thickness, color and consistency of each layer (super important to the structure), off to CAD/printing and the sim center for some molding.

First step was to see if we could make the colon suturable, and in the colon only the submucosa can hold a stitch. So it is important as a training aid, that any other layer tear, and that the submucosa be absolutely correct. So in case you are wondering what simulates tough connective tissue? It is power mesh. That is the fabric used in the crotch of women’s bathing suits. Totally amazing stuff, which is almost untearable, incredibly fine weave mesh, super thin, flexible beyond belief and has other interesting mechanical properties. And it bonds great to 50 weight silicone.

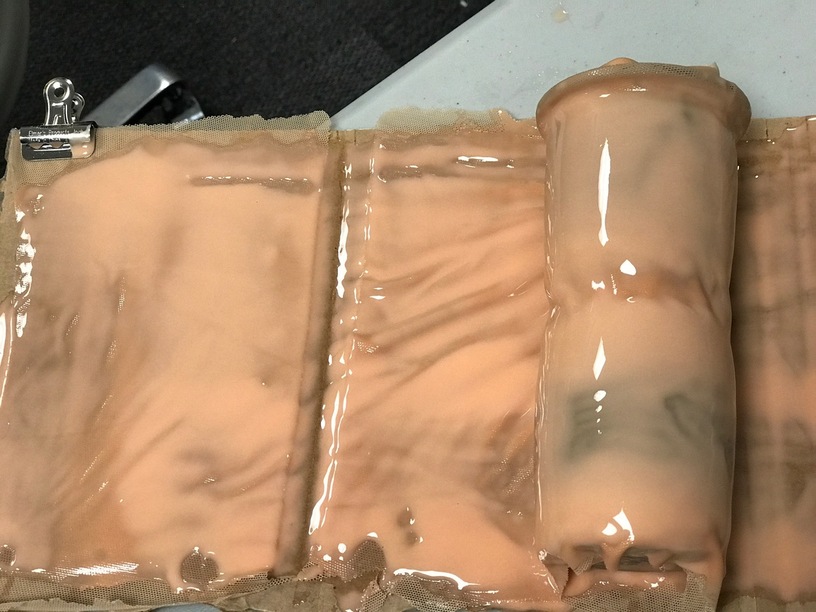
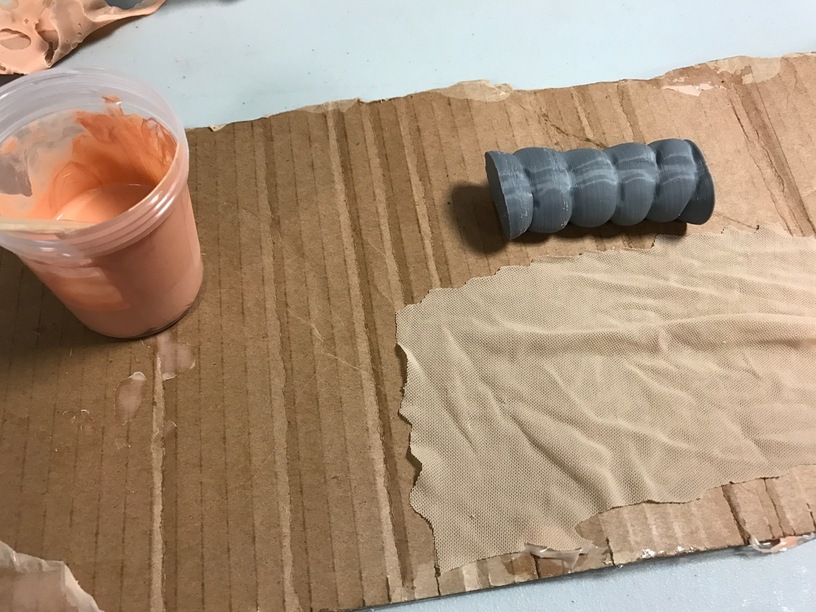
So first we made a big colon (like horse sized) to see how it would work (same mold as before):


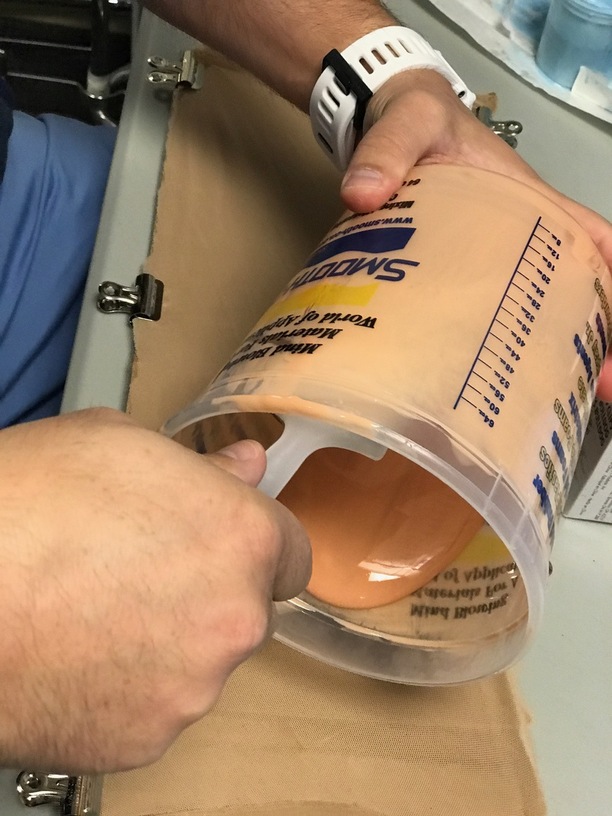
So we laid out the power mesh first, and pour out some silicone


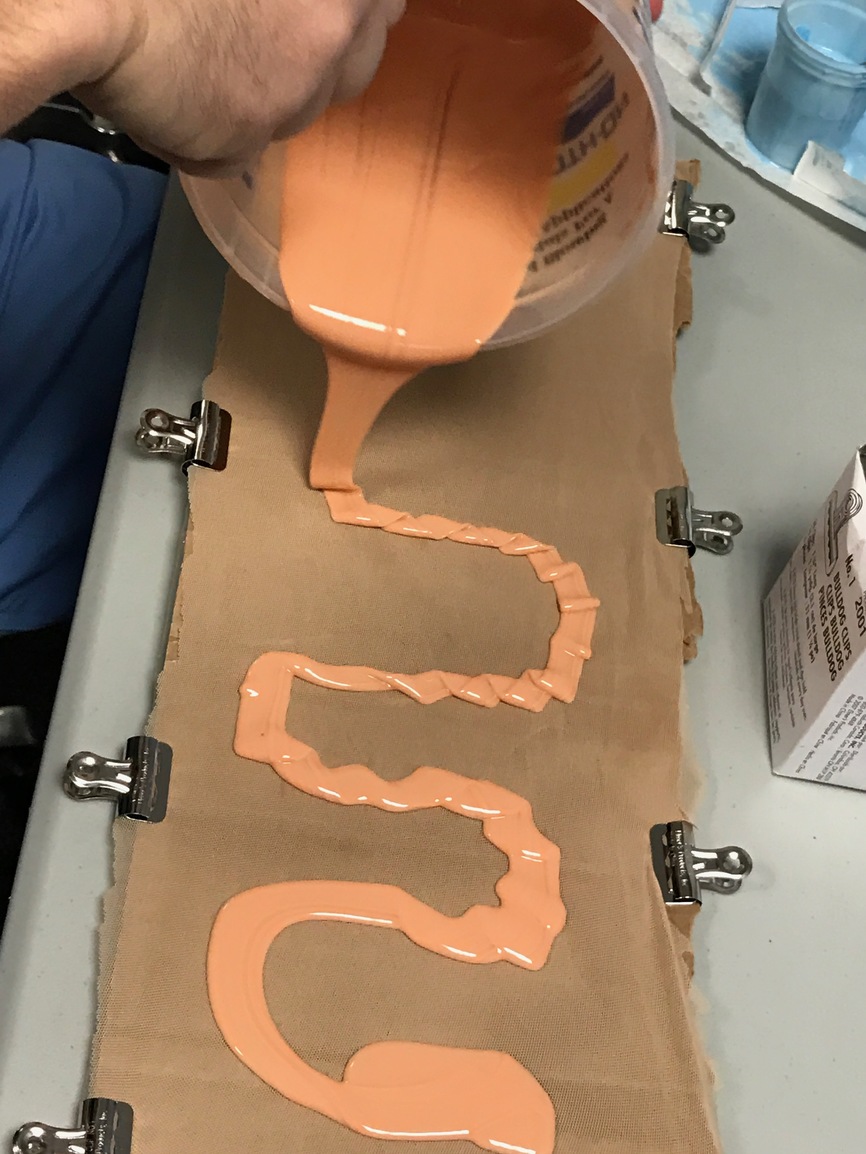
This actually turned out to be too much, but this was a quick test


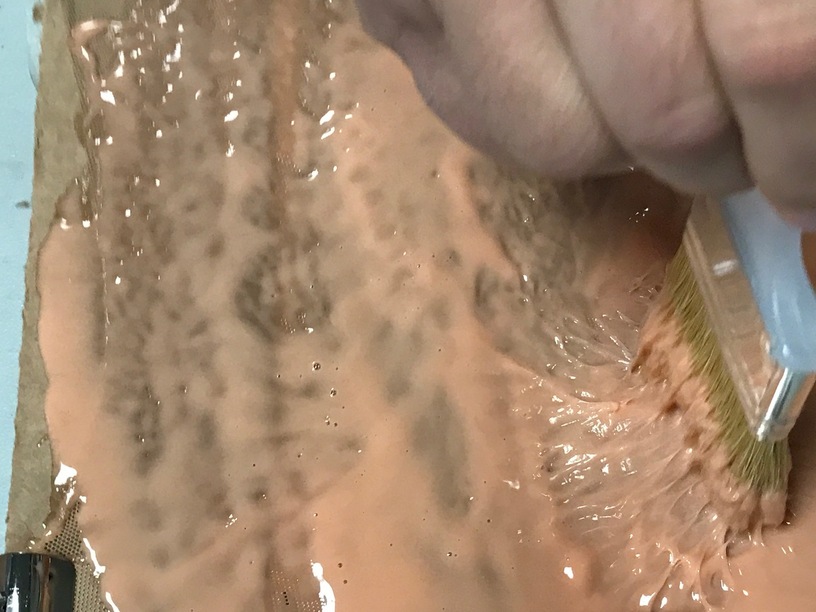
It needs to be stippled in to make best contact


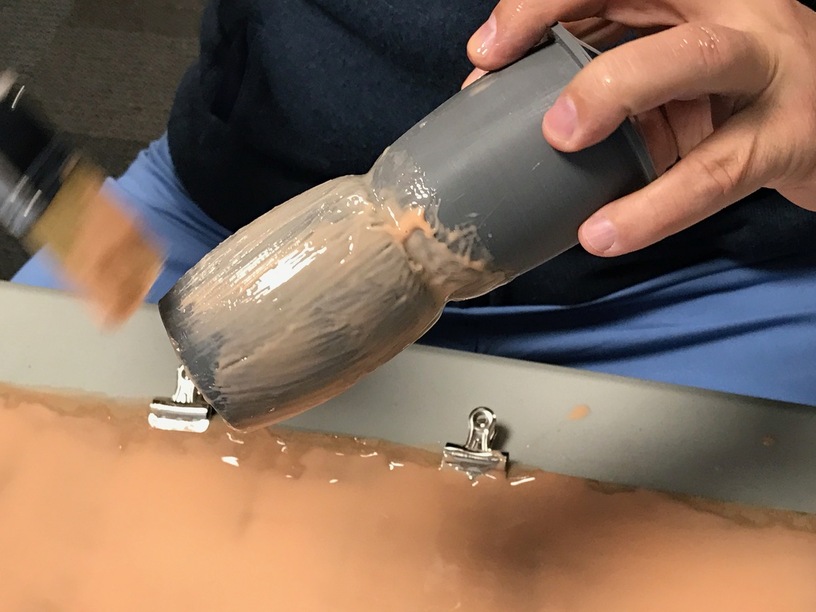
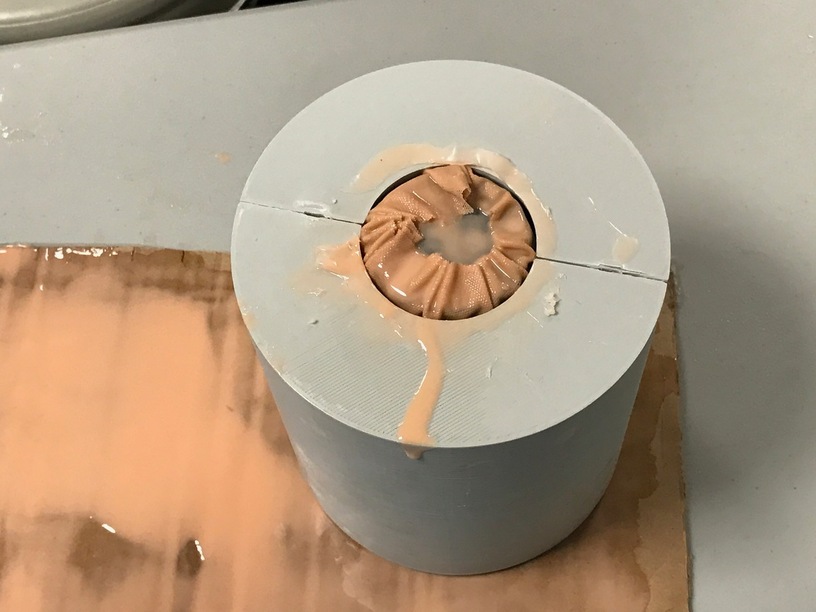
Skim coat on the mold core


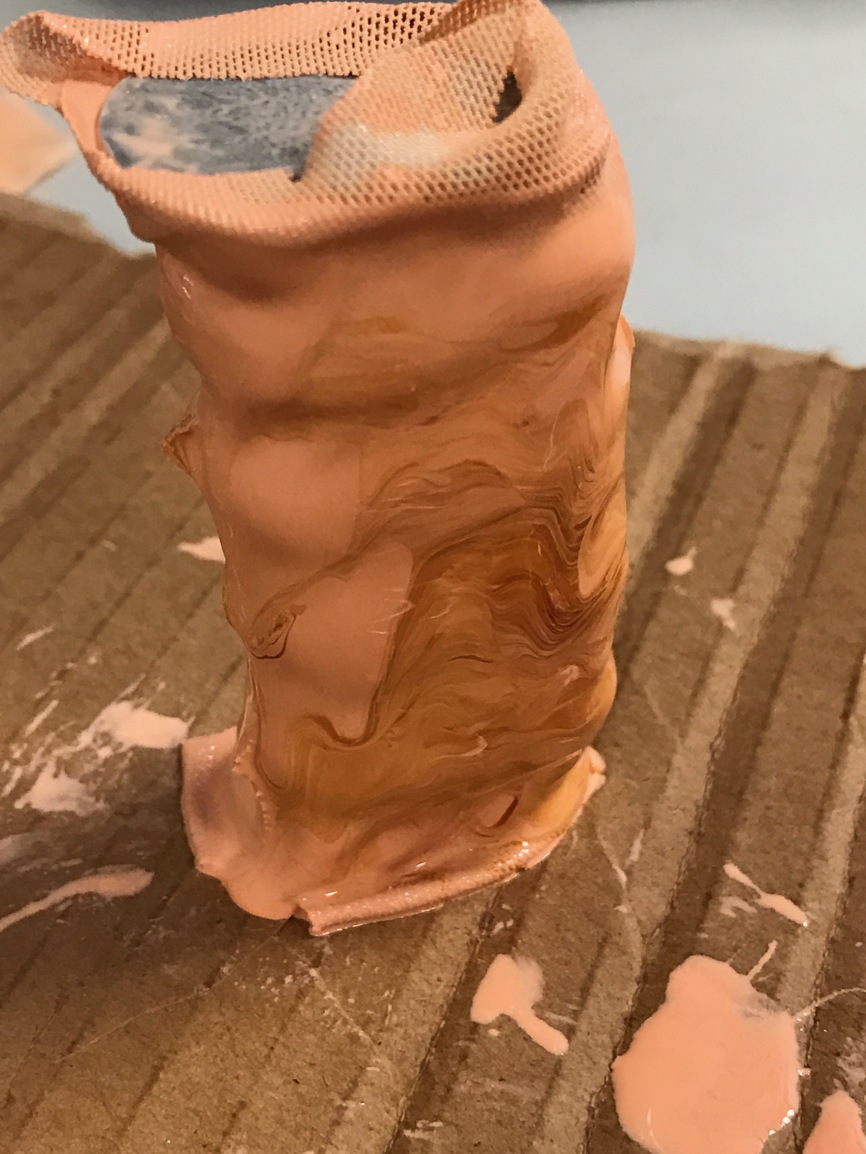
Powermesh rolled over the mold core


Now your colon has a connective tissue stripe called the Tinea Coli which is way, way less stretchy, so we rolled the power mesh around an endotracheal tube stylet and then flattened that out. Worked amazingly well


Into the mold for another 40 minutes


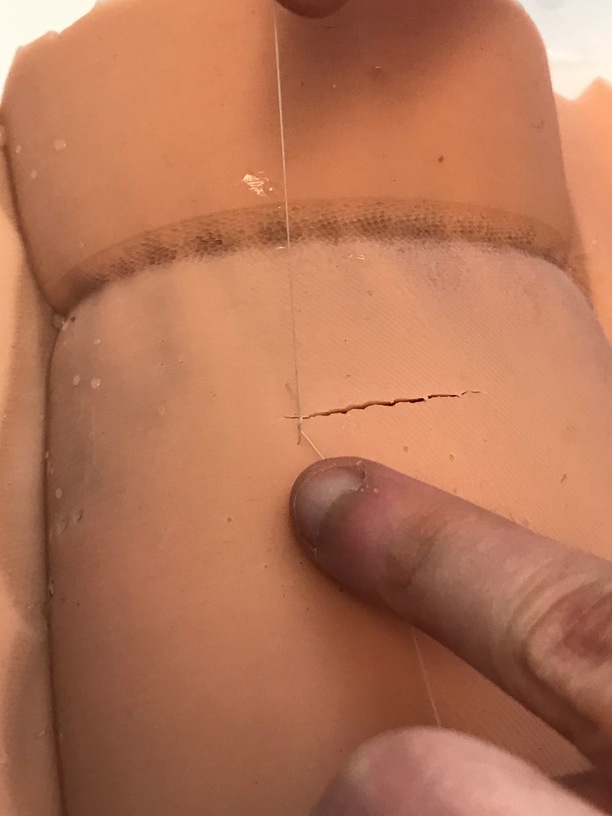
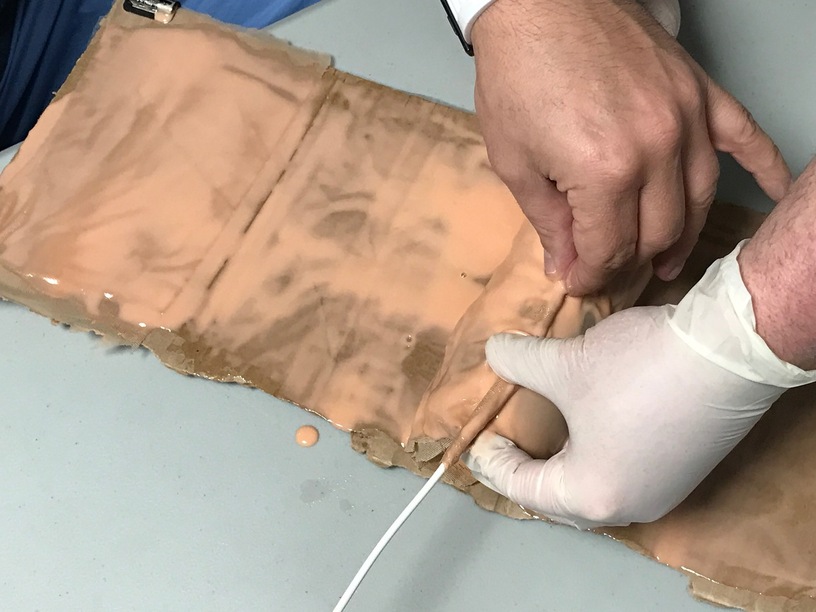
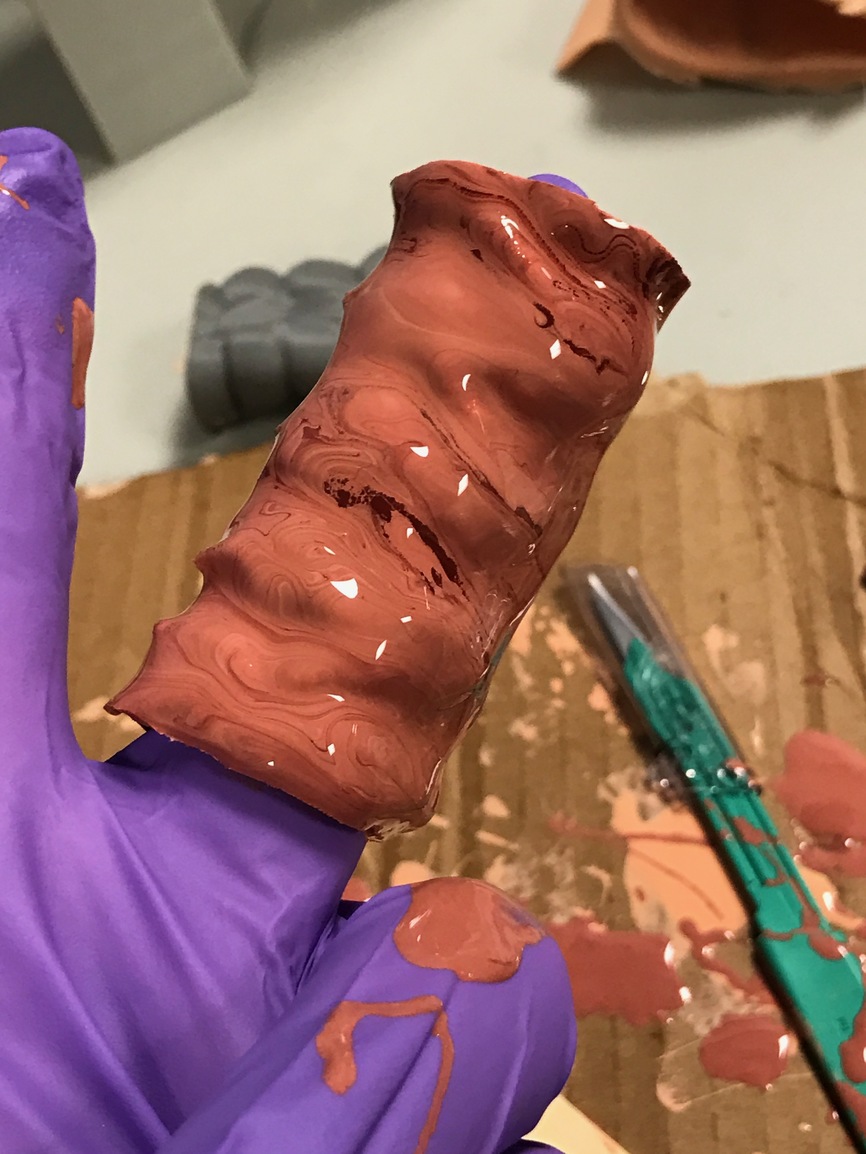
Sutures hold perfectly, and you can do full and half-thickness sutures, but super shallow tear out (as they should). Everyone commented how realistic the suturing experience was (other than this being huge)

So now to produce a small segment of proper size colon, we used a real anatomic model of the colon to scale, with the core printed in PVA again.


Mold core and power mesh


Waiting for final coat


Final coat

Soon to make a better outer mold (meshmixer keeps crashing on this model), and onto the full size colon. But in the mean time. this is super quick to make and the residents can practice anastomosis (attaching the ends together). This also holds staples, so they can use an endo-stapler, but those are insanely expensive compared to expired suture material. We hope to get these down to around $1 per practice.

30 Likes

This is fascinating to read about–I’m so glad you are posting all this. I don’t understand all the technical terms but I get the general gist, and I think everybody will benefit from this work. It can only be a great advantage to have a medical professional be as well trained as possible before they need to do these procedures on real people!

5 Likes

This is insanely fascinating. You ought to be on some kind of discovery channel program or biotech podcast. Or Tech. Or med.
It’s incredible.
I’m out of likes, too.
Thanks for sharing your projects here, since you aren’t on Discovery just yet.

6 Likes

I really feel privileged that you would take so much time to share all this with us. It’s so amazing what you are doing. Ditto with the TV show.

3 Likes

Really cool stuff! Kinda wild that the same materials I am using for making candy molds and car parts, you are using for lifelike human tissue simulations!!

Have you tried using fingers, or an EVA foam squeegee (sliced up foam flooring tile) to work the silicone into the power mesh? Just a hint from composites experience, when you stipple a liquid resin into fabric, it tends to drive air into the material as well. Brushing on a coat then gliding a finger or flexible soft squeegee over it will drive the liquid into the material.

Reynolds also has materials for thinning silicone, although it softens the durometer which may not work for your needs.

5 Likes

LOL, earlier this evening I checked in and saw the artery post. I was telling my husband all about it, and how fascinating it is to be able to learn about such things. He agreed that it was very interesting, so when I checked back and saw this post I thought he’d enjoy another update.

Me: “Oh wow! Now he’s making colons!”

Hubs: “Ecch, sounds like he’s going downhill.”

(ok, maybe you had to be there)

8 Likes

Utterly amazing.

6 Likes

No, but we will this morning! thanks for the tip. We like simple, and stippling is slow and painful, finger/squeegee sounds much faster!

Yeah, we have the thinners, but since there are a bazillion compounds they sell (love the wall-o-disks) we figured we’d try the disks to see if any work better before going crazy. We know there are silicones that work, since we have some commercial models ($$$$) that have ultrasound capability.

Tell him it is uphill (by about 6" from the iliac artery…)

And @Dan if you get me the GF quickly, I would have been able to make a way better curing rack. The challenge is that as the colon cures (this is fast-set - but still has about 30-40mins until it is solid) the stuff wants to flow to the dependent point. So I had to pathetically set up this made of a stylette and 2 mixing cups, as opposed to a rotisserie made of acrylic which I could have whipped out in a few mins on a GF powered by an arduino + gear motor I have for the artery project to drive the pump! This was painful to rotate…

16 Likes

@henryhbk would be a really good candidate for a pre-release unit.

3 Likes

Have you looked into using a Phantom Gel instead of silicone? The acoustic properties of the gel are very similar to human tissue. It should be easier to image through than silicone.

1 Like

So the issue with ballistics gel (i.e. medical grade knox blox) is that they don’t last very long. With silicone we expect 1000 punctures with a needle prior to needing to be replaced. There are some articles on using a cross linked hydrogel, which we are looking into.

2 Likes

So another day, another organ (or a few). Today I brought the colon to the OR so my colleague Tom from CRS could try sewing on the colon from yesterday. Gets a B+ as it is a little firm, so we will try a softer silicone (Dragon Skin 10) on monday.

So first new organ today was we made a suturable artery. Now this is very different than the other artery, in that, that one was designed for radiology procedures, but this one is used to teach residents to suture (sew) arteries together (either a tear or attach either one end to another or in a T-shape as an implant).

So for this we used Dragon Skin 10 Very Fast silicone (and no joke, it is very fast curing). So the setup is somewhat crazy, and we used a steel shaft in a drill and you coat it with a skim coat as it turns, then wrap the power mesh around it. You are slowly spinning the drill, apply more silicone while it is turning.

Then you add 3 drops of hardener (that I think was a mistake) to the mix (changes from pudding to peanut butter hardness in about 3 seconds) and apply the final coat. Then you apply the silicone solvent to your glove and smooth the whole thing. After about another minute you let it just sit for another 20 minutes and it is fully cured. There is a serious sense of urgency for this as it cures so fast, so definitely mis-en-place on this one!


drill setup


nice and shiny after the solvent


Powermesh in the vessel wall to grab the suture material. Now the teaching point here is if they don’t go perpendicular with the needle they will skeeve off the shallow material and the suture will tear out, just like a real artery (and that worked perfectly).


Soft but springy


Senior surgery resident giving it a spin. A bit thicker than we wanted, so monday will attempt it without the thickener agent.


A side incision all sewed up…

16 Likes

And second organ of the day, as I was showing off my artery in the lobby to a colleague, another came by who is one of our podiatry surgeons, and said “ya know what would be awesome? An achilles tendon!

Never one to refuse a throw down, asked a few questions about what the achilles is like in real life, and ran off to the sim center. I had the idea of taking Dragon Skin 10 and just coating power mesh with it and very tightly rolling it. We tried two different thickness silicones, with and without the hardening agent.

30 minutes later in the podiatry clinic, showing it off. With hardener was like a brick, but without was super useful. $0.15 worth of material, and I can teach the podiatry chief residents to make it themselves for their interns next year…


The bottom one was the winner (might want to roll it a tad looser) so we will make little boards (hello GF!) to attach it too, with spring clips to sew the halves together (to simulate the ruptured tendon).

16 Likes

interesting suture technique, the beginning and end. I presume that is to distribute/offset the strain?

1 Like

I don’t know why, but this phrase just tickles me…

7 Likes