Fan *~@"ing-tatic!!!
I know a lot of advancements are happening in 3D printing and it seems to me like you are on the cutting edge!!!
Fan *~@"ing-tatic!!!
I know a lot of advancements are happening in 3D printing and it seems to me like you are on the cutting edge!!!
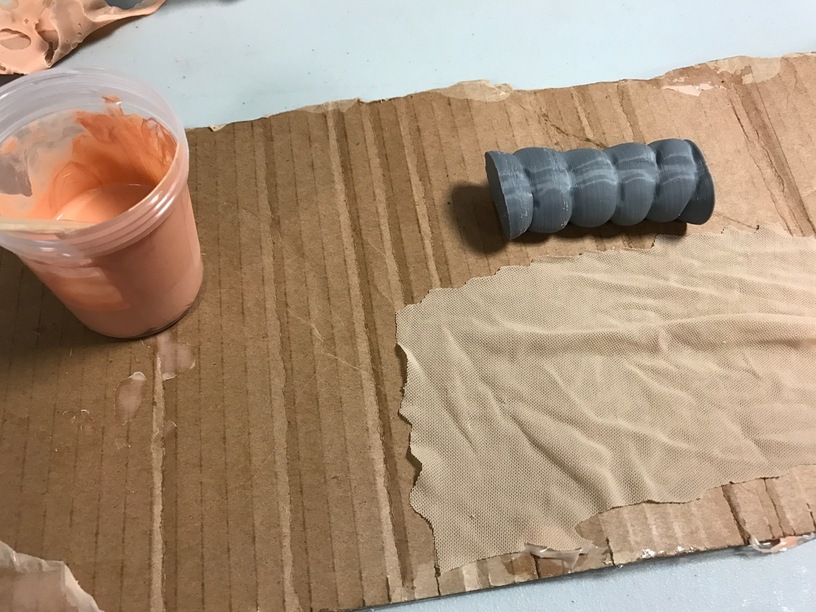
Well the mold is reporting 1.5kg of plastic and 59 hours (actually less than I thought)… Here are the components so far (I spread the molds halves - I am printing these separately since a failure would be bad and kill both halves):
What kind of build volume do you have on that printer? (And what printer are you using? )
I have 2 printers going on this project. My E3D BigBox dual hybrid at home and my Taz6 in the lab. The Taz is 280 mm x 280 mm x 250 mm (11 in x 11 in x 9.8 in). The BigBox is 300mm x 200mm x ~280mm (12" x 8" x ~12").
All of the molds are printed in MeltInk3D Silver PLA/PHA (yes, the color matters, the silver produces the highest quality prints)
Taz made the short list when I was buying, but i ultimately decided I don’t need to print that large. You’re getting some really nice prints out of those. 
I’m not sure I’d purchase the Taz again, if you want smaller I’d go with the real Prusa i3mk2, and larger the Gmax 1.5 or something. My BigBox when it’s not being temperamental produces amazing prints, but it’s more of a hackable platform than a off-the-shelf product. The taz is a bit of a pain since they sort of expect you to send it back or something whenever something goes wrong (like a serious clog, you aren’t “allowed” to unscrew the nozzle) which of course happens all the time with 3D printers… My motherboard blew due to power spikes, but it’s just a Rambo 1.3 board, so that’s not their fault.
Yeah…that ain’t gonna happen (Sending it in for maintenance).
I eventually decided on the MakerGear M2, and upgraded to a dual, and it’s a sweet setup. (A dual with different filaments in each of the nozzles would work really well for your support removal issues, if you get to doing the small stuff again, but the print time just about quadruples with a dual, so that might be kind of tough on those 60 hour jobs.) We’ve had guys run jobs that take 10-12 days though…you just have to pause the print and feed a new filament end in when you get close to the end of the spool.
Yes, my BigBox is a dual as well. It started out (V1-KS) as a dual-direct extruders, and then I transitioned it to the V1.1 Hybrid (main extruder direct, support extruder bowden) which greatly lowered the mass of the x-carriage when the Titan extruder came out. I am deciding whether to go to the dual direct carriage that someone invented from the community vs. waiting for the V2 BigBox which is dual independent heads. The challenge for dual printing with PVA support material is that it really doesn’t like to bake, so on top of the purge tower (and the BigBox does ram-purging which cuts down on the waste) you have to cool the head with each tool change and then heat it back up… I like the Prusa system for multi-material printing which uses an internal purge/fill with one nozzle:
You’re printing PVA in order to ultimately dissolve it right? Since you’ve got a dual setup, you might want to try PVA for your main print, with PETG in the other nozzle for support. I discovered that the PETG and PLA /PVA just don’t stick to each other - support snaps off clean without damaging anything, and you can reduce your vertical separation to zero, getting really good support and clean bottoms on the main print.
For something as thin as your artery print, you would want to use a high infill for strength, but other than that it should (theoretically, because I’ve never tried to print something quite that tall and skinny) work pretty well.
(I hated printing with PVA…had a lot of sticking trouble with it, so I eventually switched to PLA and PETG, but I didn’t have to dissolve it out, so you’re stuck with it, I guess.)
Anyway…it’s an idea that might work if you run into any more tight support situations in the things you need to print. I’m sure these won’t be your last.
Wow!
Thought of @henryhbk when I saw this:
So I am actually using Scaffold from E3D, which is a slightly modified PVA, so sticks quite well. For the larger arteries it’s pretty easy to print with supports as is, the small one turned out to be so fragile as to be unworkable (it cracked just holding it), but interestingly the radial artery turns out to be 2.5-3.5mm in I.D. so that made it pretty easy, instead for that specific model we are simply bending 2.85mm filament using a heat-gun to the shape using a PLA one as a guide.
PVA can cause violent allergic reaction in the eyes, Be careful.
Hopefully that won’t be a problem (barring some horrible sink related accident)
So very excited that one of my projects FINALLY involves laser cutting. And typical of my stuff, I’m not starting small! This beast of a laser cutter is 55x48" and my first cut area is 41x35". I was making the last video in the series I have been working on, and needed to laser and CNC some stuff on film. Well kill 2 birds with one stone, and I am on my way over to NuVu studios near MIT to work with the faculty on the filming.
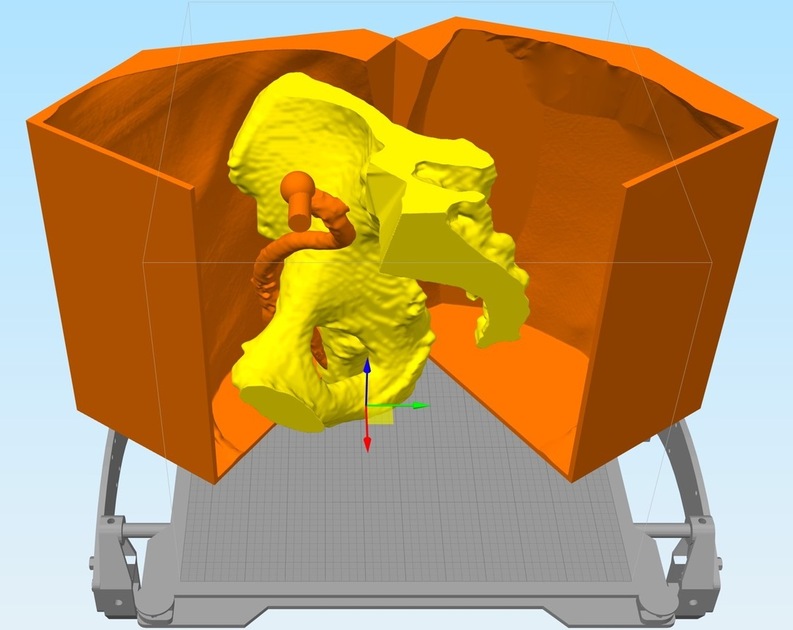
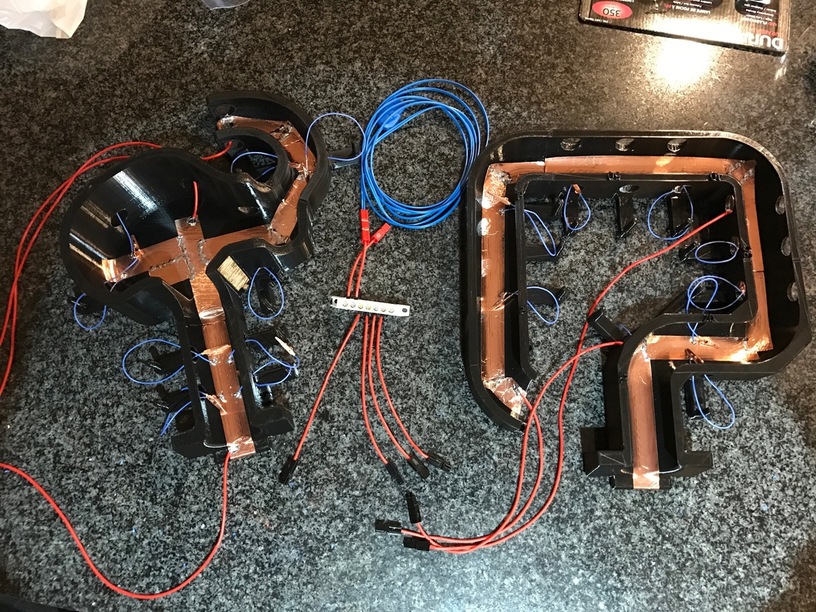
This design I will cut is the base plate for a 3D printed project, which is designed to suspend either a pig colon or stomach/small bowel for practice colonoscopy or endoscopy that we can’t do on my silicone molded version (because they involve actual electrocautery on tissue layers). However since the colon or stomach you get at the butcher (waste) is “dead” it doesn’t have blood in it, which is the substance that conducts electricity primarily in your body when we do electric procedures. So had to solve some electrical grounding problems on the organs. These parts are huge (a colon is about 60cm in length for instance). The parts are all printed in amphora and lock together via magnets embedded in the parts, and then lock onto the case (what will be laser printed) via pins that come up from the case floor. There were a million little engineering problems to solve here, including keeping this from becoming a giant petri dish (everything is copper or silver), dealing with the fact that electricity is running through a moist/acidic environment with multiple types of metals (battery) which will cause electrolysis (sacrificial zincs) and the fact that these very complex spline based objects are way, way bigger than any printer, so had to creatively section them, and embed magnets to lock them back into one piece.
I used MakerCase for the case base design, then edited it in adobe illustrator (how painful after using a parametric CAD to do high-precision CAD work).
By far one of the most-interesting use cases I’ve seen!
I will add this was my first use of 2KG printing spools (custom ordered from ColorFabb) of nGen. This finish is before I add a gloss coat of clear coat epoxy for bacterial control!
You can say that again!
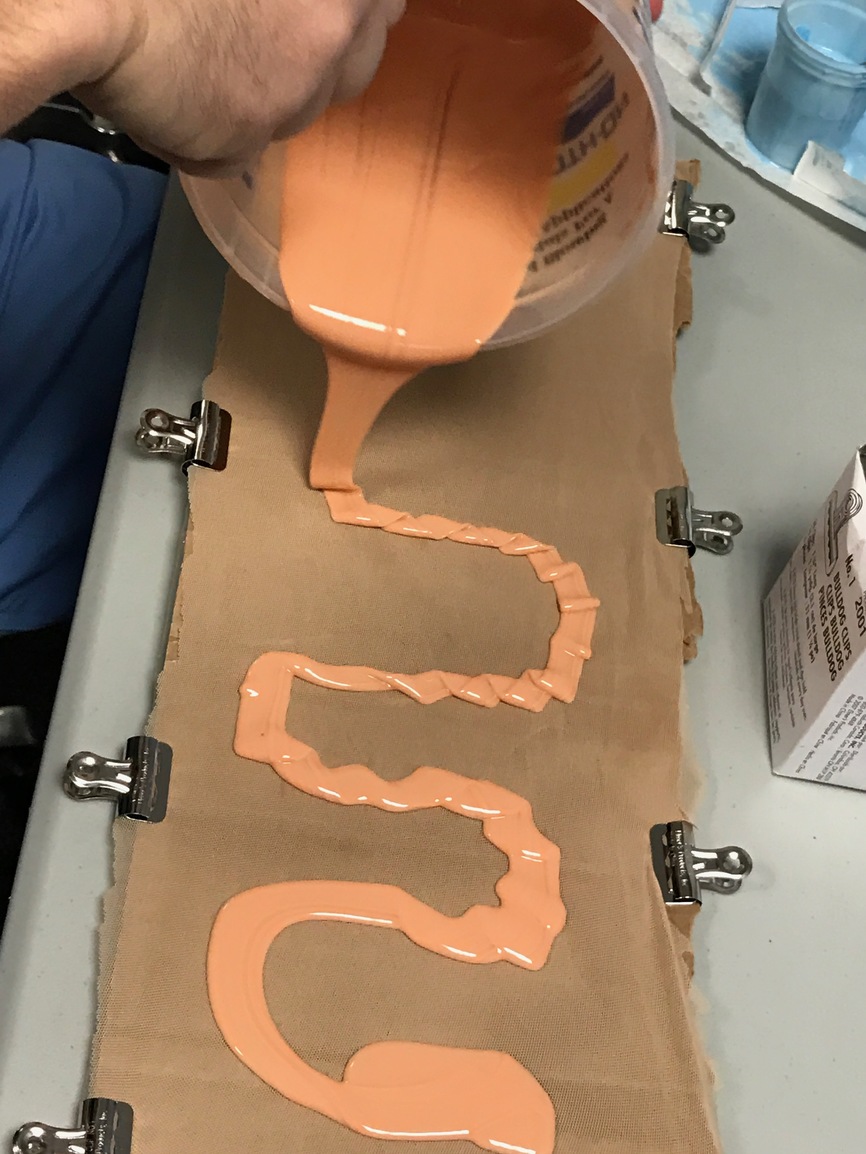
So some major updates this week, as my “real job” of software development had a slight lull, so did a huge amount of molding this week. This post will be an update on the artery molding project.
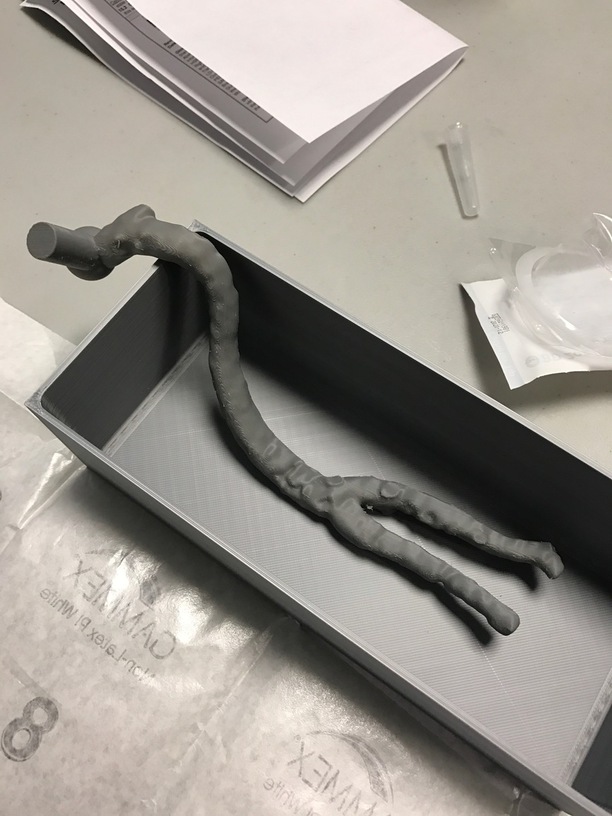
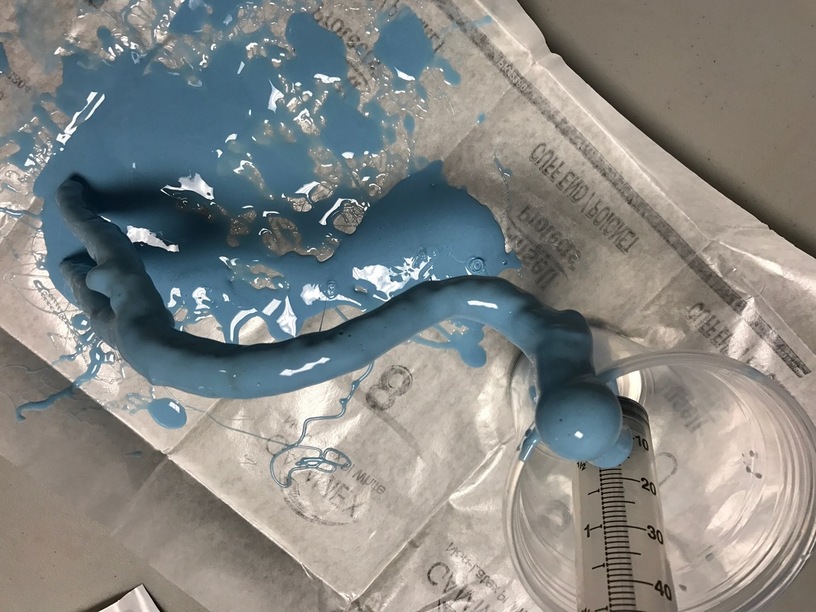
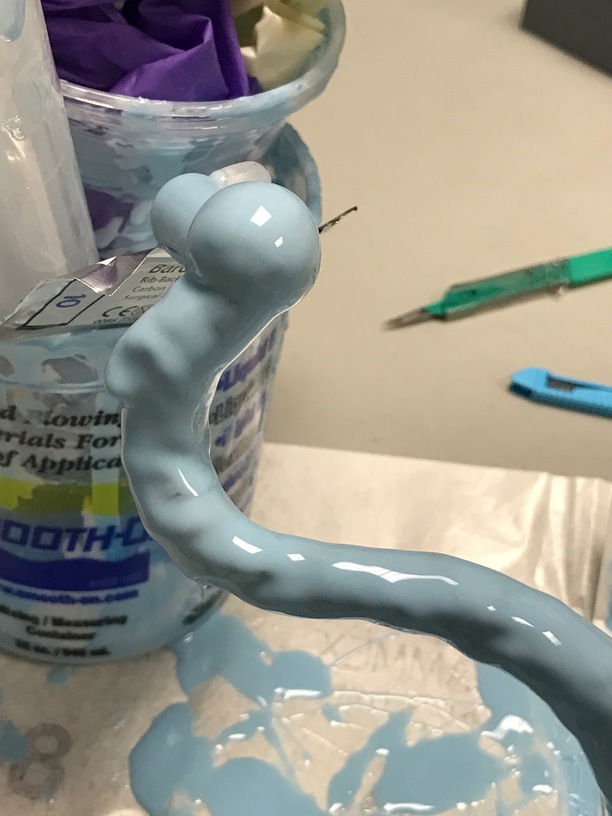
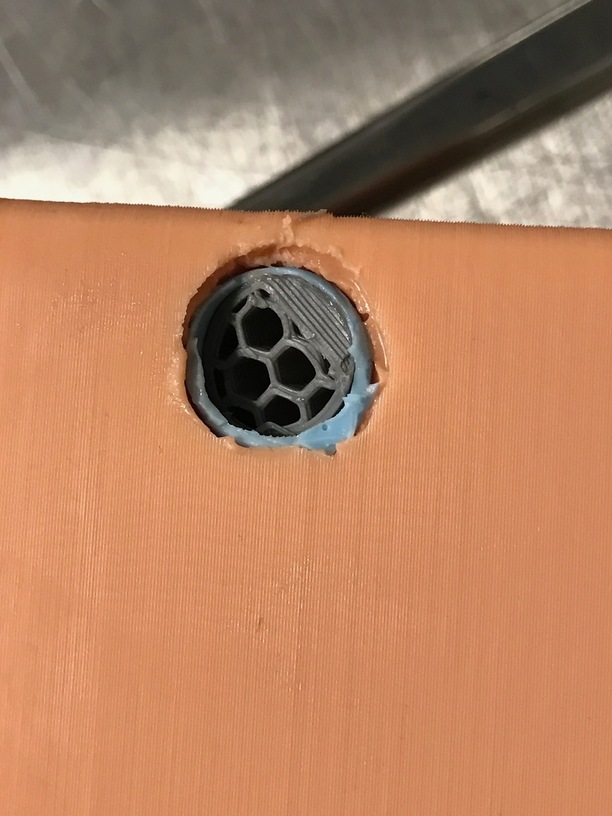
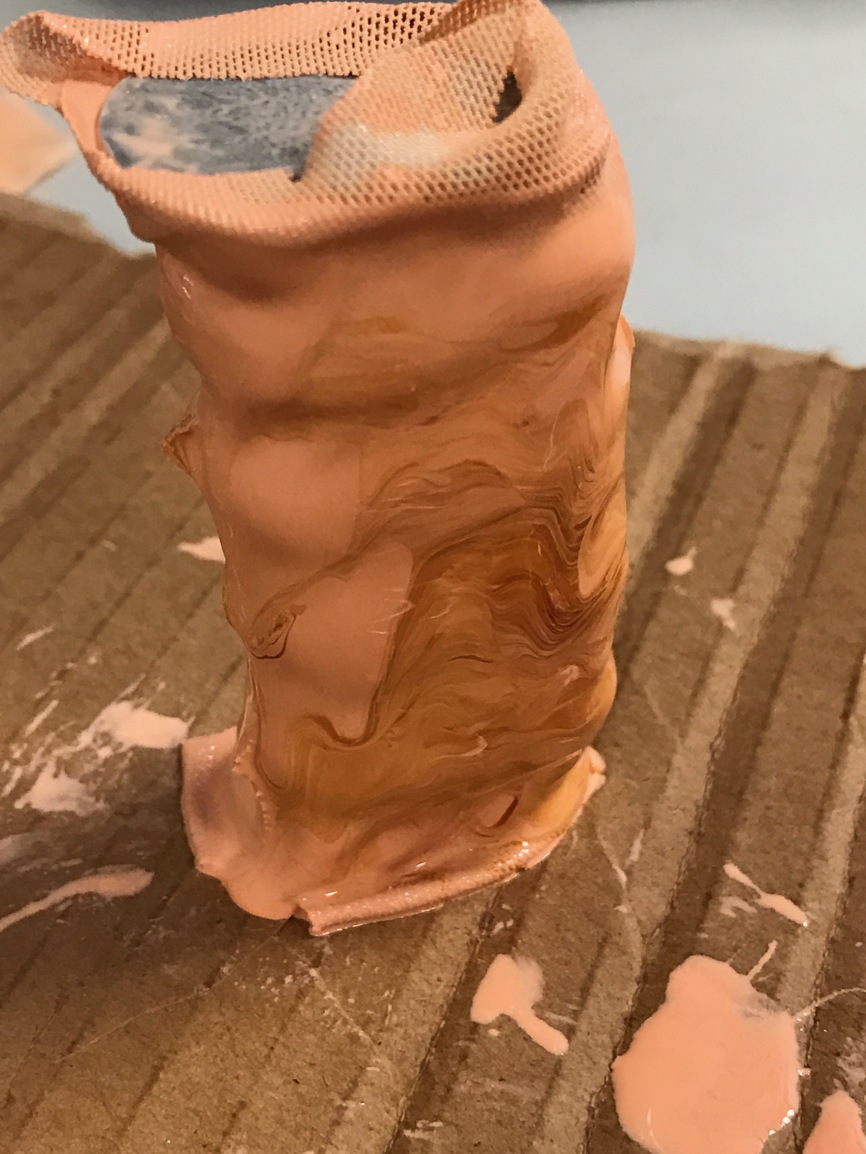
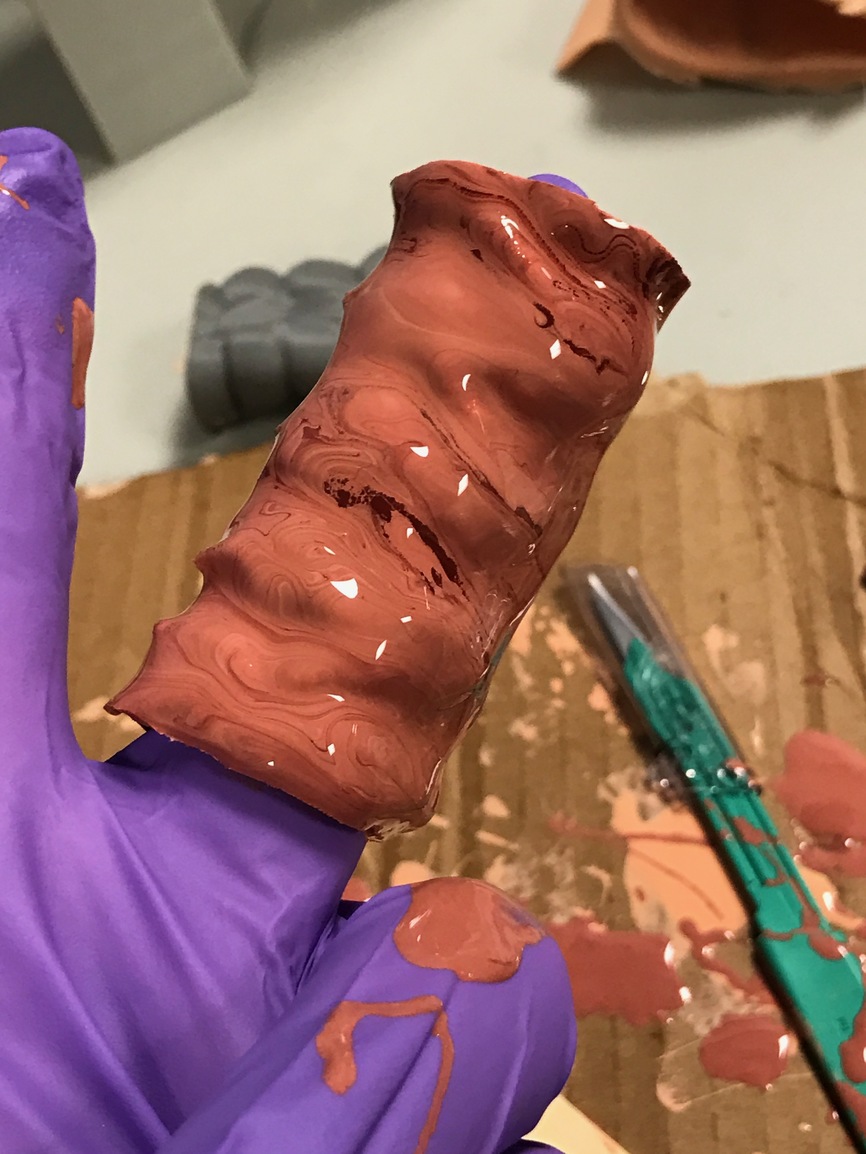
So first off if you recall we have blood vessels 3D reconstructed from CT scans (angiograms) which I print in PVA (E3D Scaffold) to form the lumen (inside) of the arteries and veins. Our intention was to be able to ultrasound and use fluoroscopy on these blood vessels inside various body parts to perform procedures in training situations. So this week we decided to make it happen; we failed by learned a lot, and have a new offshoot that works even better:
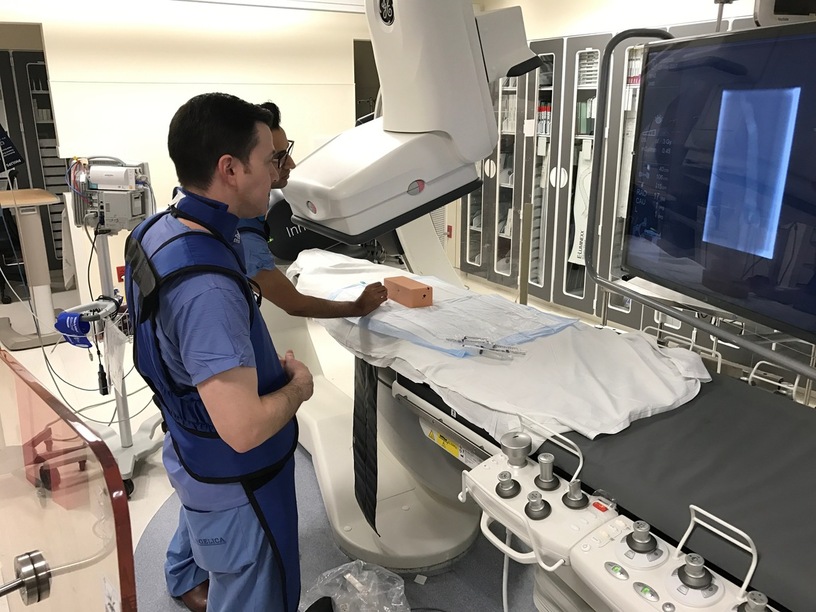
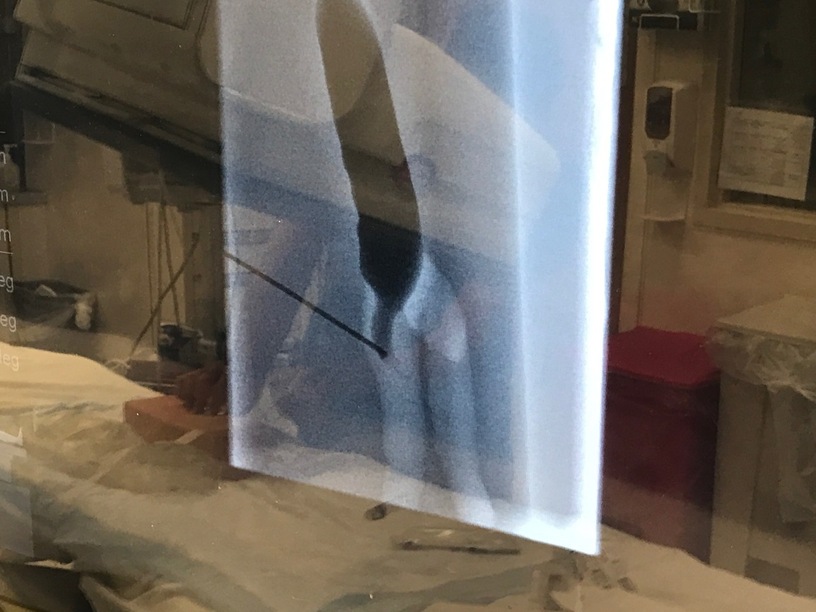
Luckily Jeff said, hey let’s try it under fluoroscopy (x-ray camera) and see if we can use it to practice a totally different procedure which is a blind inserted billiary drain. It’s clearly the wrong shape (it’s a large artery, but could we see and inject dye in a realistic manner).
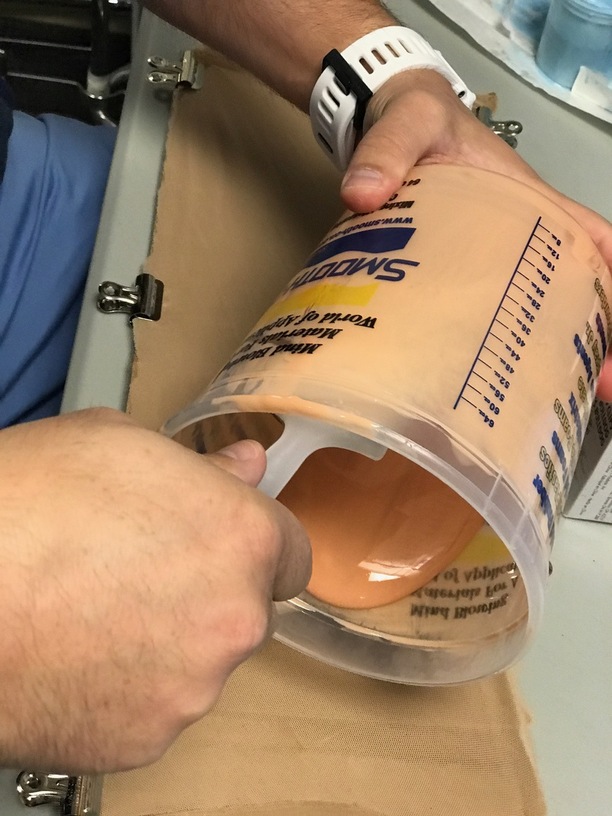
Believe it or not, we did a second molding project at the same time as the above (pretty sure I am going to die of some exotic cancer due to all the silicone that got splashed on my skin despite gloves, etc)… So if you recall way back, we were also working on a molded colon. Well that got a lot of attention this week. First off I tromped off the OR with my colleague Tom (one of our colorectal surgeons) to look at the much more closely than in prior cases at a colon.
since the case was not a cancer case, I could actually examine and cut into the specimen after removal (still can’t “lose” any part, but can at least examine it). And after measuring the thickness, color and consistency of each layer (super important to the structure), off to CAD/printing and the sim center for some molding.
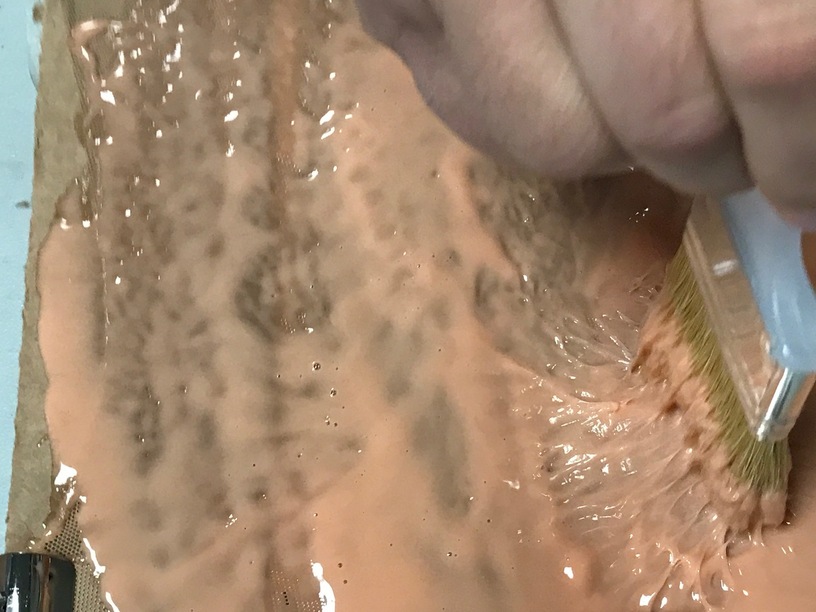
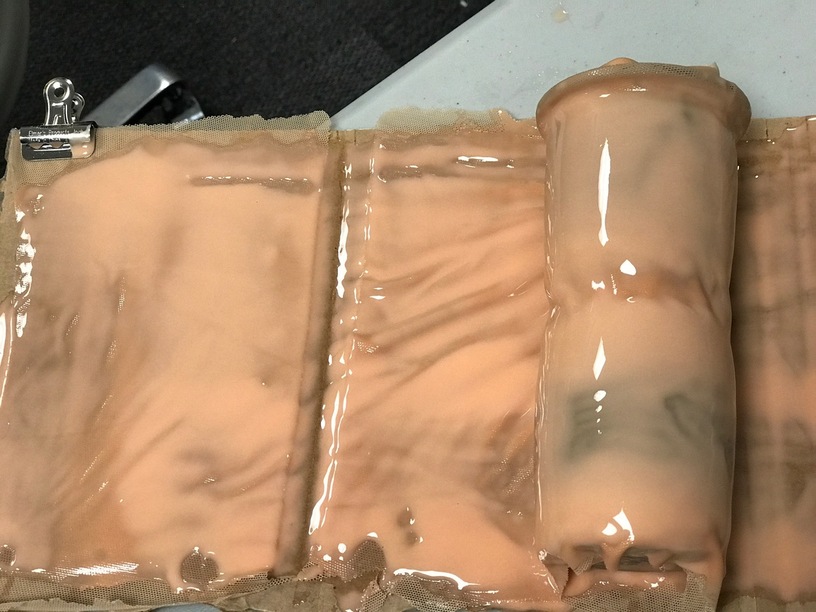
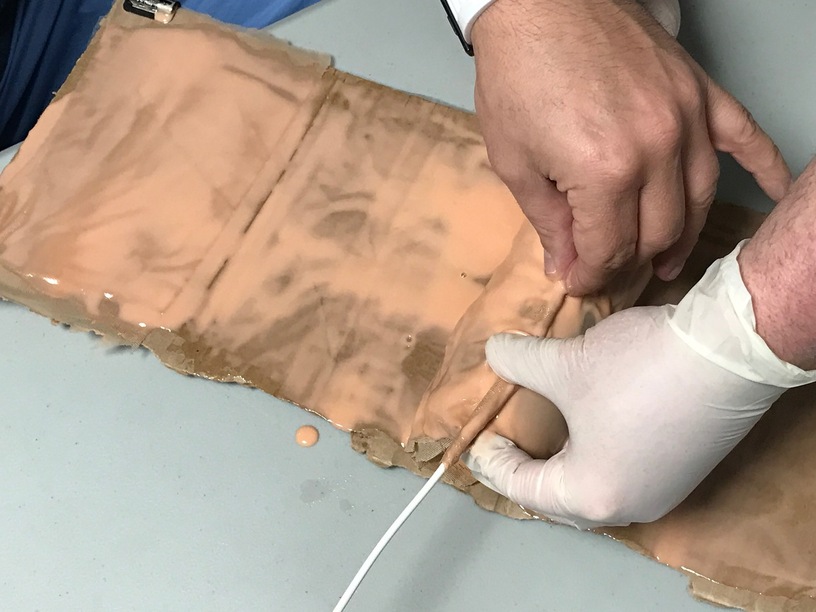
First step was to see if we could make the colon suturable, and in the colon only the submucosa can hold a stitch. So it is important as a training aid, that any other layer tear, and that the submucosa be absolutely correct. So in case you are wondering what simulates tough connective tissue? It is power mesh. That is the fabric used in the crotch of women’s bathing suits. Totally amazing stuff, which is almost untearable, incredibly fine weave mesh, super thin, flexible beyond belief and has other interesting mechanical properties. And it bonds great to 50 weight silicone.
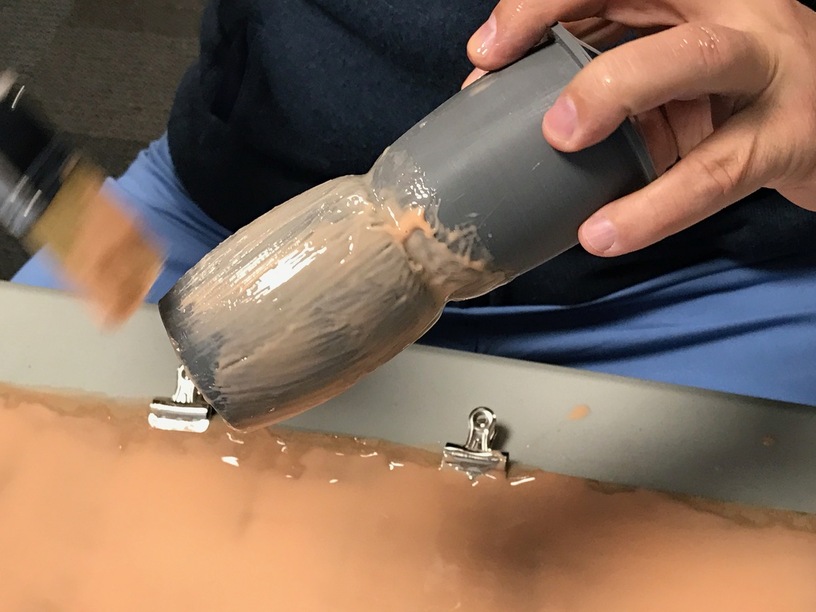
So first we made a big colon (like horse sized) to see how it would work (same mold as before):
This actually turned out to be too much, but this was a quick test
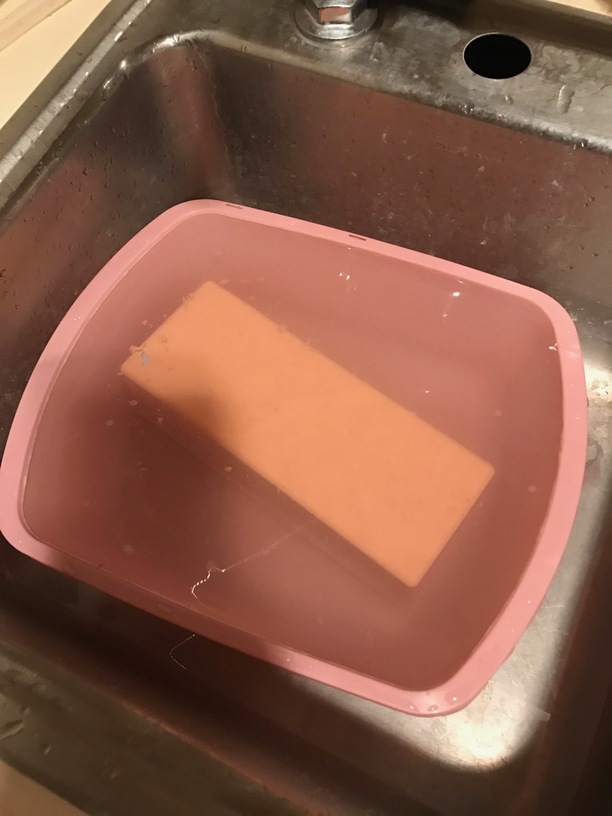
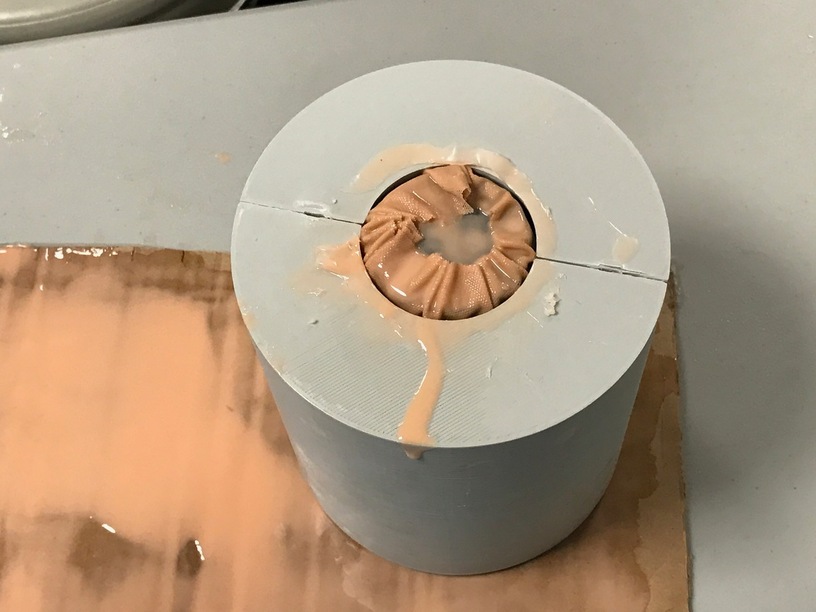
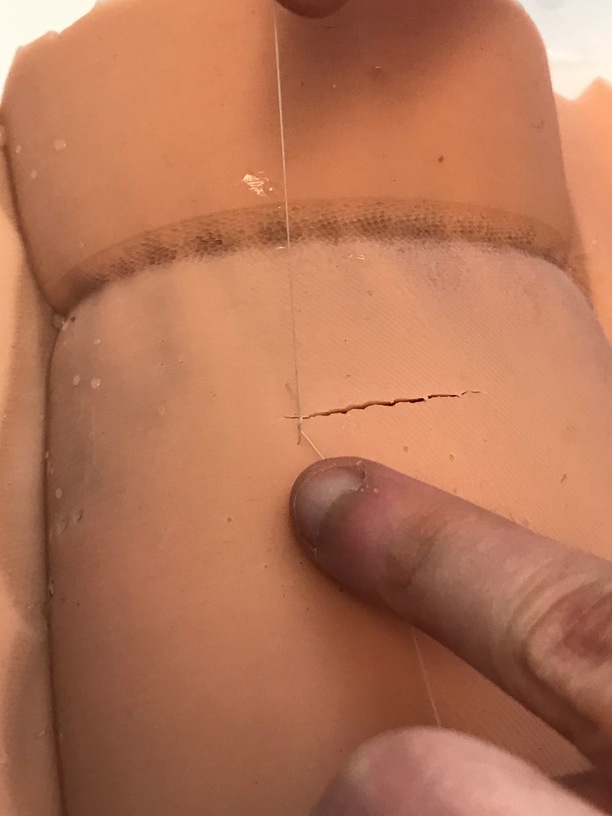
So now to produce a small segment of proper size colon, we used a real anatomic model of the colon to scale, with the core printed in PVA again.
Waiting for final coat
Final coat
Soon to make a better outer mold (meshmixer keeps crashing on this model), and onto the full size colon. But in the mean time. this is super quick to make and the residents can practice anastomosis (attaching the ends together). This also holds staples, so they can use an endo-stapler, but those are insanely expensive compared to expired suture material. We hope to get these down to around $1 per practice.